User Account Control
DISCLAIMER: We make no claims or guarantees regarding the security of this approach. If you have any doubts, please consult an expert and conduct thorough audits.
Making a viewer and its medical imaging data accessible on the open web can provide a lot of benefits, but requires additional security to make sure sensitive information can only be viewed by authorized individuals. Most image archives are equipped with basic security measures, but they are not robust/secure enough for the open web.
This guide covers one of many potential production setups that secure our sensitive data.
Overview
This guide builds on top of our
Nginx + Image Archive guide,
wherein we used a reverse proxy
to retrieve resources from our image archive (Orthanc).
To add support for "User Account Control" we introduce
Keycloak. Keycloak is an open source
Identity and Access Management solution that makes it easy to secure
applications and services with little to no code. We improve upon our
reverse proxy setup by integrating Keycloak and Nginx to create an
authenticating reverse proxy.
An authenticating reverse proxy is a reverse proxy that only retrieves the resources on behalf of a client if the client has been authenticated. If a client is not authenticated they can be redirected to a login page.
This setup allows us to create a setup similar to the one pictured below:
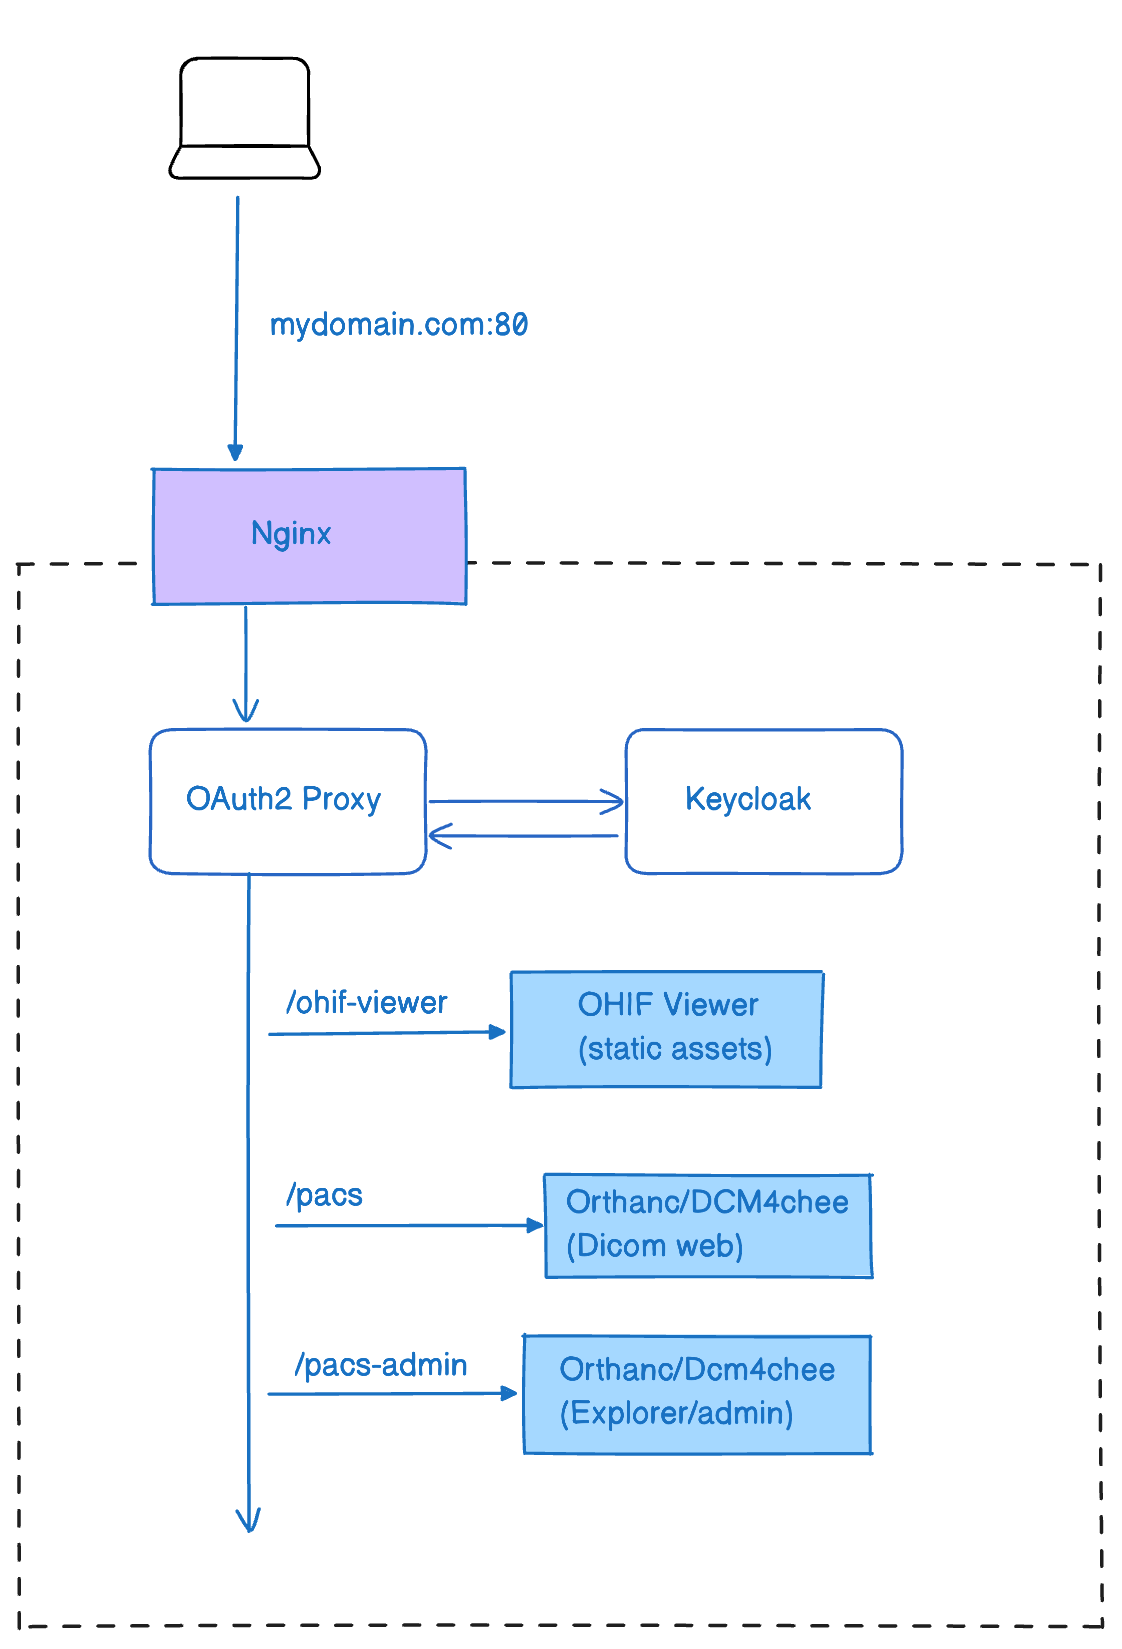
Nginx:
- Acts as a reverse proxy server that handles incoming requests to the domain (mydomain.com:80) and forwards them to the appropriate backend services.
- It also ensures that all requests go through the OAuth2 Proxy for authentication.
OAuth2 Proxy:
- Serves as an intermediary that authenticates users via OAuth2.
- Works in conjunction with Keycloak to manage user sessions and authentication tokens.
- Once the user is authenticated, it allows access to specific routes (/ohif-viewer, /pacs, /pacs-admin).
Keycloak:
- An open-source identity and access management solution.
- Manages user identities, including authentication and authorization.
- Communicates with the OAuth2 Proxy to validate user credentials and provide tokens for authenticated sessions.
OHIF Viewer:
- Hosted under the route /ohif-viewer, which serves the static assets of the OHIF Viewer.
Orthanc/DCM4chee:
- PACS (Picture Archiving and Communication System) for managing medical imaging data. Exposes two routes:
- /pacs: Accesses the DICOM web services.
- /pacs-admin: Provides administrative and explorer interfaces.
Getting Started - Orthanc
Requirements
Not sure if you have docker installed already? Try running docker --version
in command prompt or terminal
Setup 1 - Trying Locally
Navigate to the Orthanc Keycloak configuration directory:
cd platform\app\.recipes\Nginx-Orthanc-Keycloak
Due to the increased complexity of this setup, we've introduced a magic word YOUR_DOMAIN. Replace this word with your project IP address to follow along more easily.
Since we are running this locally, we will use 127.0.0.1 as our IP address.
In the docker-compose.yml file, replace YOUR_DOMAIN with 127.0.0.1.
In the Keycloak service:
Before:
KC_HOSTNAME_ADMIN_URL: http://YOUR_DOMAIN/keycloak/
KC_HOSTNAME_URL: http://YOUR_DOMAIN/keycloak/
After
KC_HOSTNAME_ADMIN_URL: http://127.0.0.1/keycloak/
KC_HOSTNAME_URL: http://127.0.0.1/keycloak/
In the Keycloak healthcheck, replace YOUR_DOMAIN with localhost.
In the Nginx config, change:
server_name YOUR_DOMAIN;
to:
server_name 127.0.0.1;
Since we're not using SSL, remove the following lines from the Nginx config file and create one server instead of two:
Before (two servers one for http and one for https):
server {
    listen 80;
    server_name YOUR_DOMAIN;

    location /.well-known/acme-challenge/ {
        root /var/www/certbot;
    }

    location / {
        return 301 https://$host$request_uri;
    }
}

server {
    listen 443 ssl;
    server_name YOUR_DOMAIN;

    ssl_certificate /etc/letsencrypt/live/ohifviewer.duckdns.org/fullchain.pem;
    ssl_certificate_key /etc/letsencrypt/live/ohifviewer.duckdns.org/privkey.pem;

    root /var/www/html;
After (merging both servers into one only http server):
server {
  listen 80;
  server_name 127.0.0.1;

  location /.well-known/acme-challenge/ {
      root /var/www/certbot;
  }

  root /var/www/html;
In OAuth2-proxy configuration at oauth2-proxy.cfg
Before:
redirect_url="http://YOUR_DOMAIN/oauth2/callback"
oidc_issuer_url="http://YOUR_DOMAIN/keycloak/realms/ohif"
After:
redirect_url="http://127.0.0.1/oauth2/callback"
oidc_issuer_url="http://127.0.0.1/keycloak/realms/ohif"
Finally, in the docker-nginx-orthanc-keycloak config file that lives in platform/app/public/config/docker-nginx-orthanc-keycloak.js, replace YOUR_DOMAIN with
Before:
wadoUriRoot: 'http://YOUR_DOMAIN/pacs',
qidoRoot: 'http://YOUR_DOMAIN/pacs',
wadoRoot: 'http://YOUR_DOMAIN/pacs',
After:
wadoUriRoot: 'http://127.0.0.1/pacs',
qidoRoot: 'http://127.0.0.1/pacs',
wadoRoot: 'http://127.0.0.1/pacs',
This is the config that is used inside the dockerfile to build the viewer, look at dockerfile
ENV APP_CONFIG=config/docker-nginx-orthanc-keycloak.js
Run the following command to start the services:
docker-compose up --build
You can watch the following video, which will guide you through the process of setting up Orthanc with keycloak and OHIF locally.
We have set up two predefined users in Keycloak:
user: admin password: admin- Has access to keycloak portal for managing users and clientsuser: viewer password: viewer- Has access to the OHIF Viewer but not the pacs-adminuser: pacsadmin password: pacsadmin- Has access to both the pacs-admin for uploading and the OHIF Viewer
You can navigate to:
http://127.0.0.1- This will redirect you tohttp://127.0.0.1/ohif-viewer, prompting you to log in with Keycloak using either userhttp://127.0.0.1/pacs-admin- Only thepacsadminuser can access this route, while thevieweruser cannot
Step 2 - Trying via a Server
Now that you have successfully set up Orthanc with Keycloak and OHIF locally, you can deploy it to a server. While you can rent a server from any provider, this tutorial will demonstrate the process using Linode as an example.
You can watch the following video, which will guide you through the process.
Some notes:
- Since this is a remote machine we need to clone the repo
- Typically a Linux machine, you need to download and install Docker on it
- Use the Visual Studio Code Remote SSH extension to connect to the server
- Use docker extension in Visual Studio Code to manage the containers
- The public IP address of the server now becomes the YOUR_DOMAIN and is used in the configuration files.
Still we have not set up SSL, so we will use HTTP instead of HTTPS.
We should use the same one server configuration as we did locally for Nginx (but with the new server IP address)
Don't forget to change the docker-ngix-orthanc-keycloak.js file to use the new server IP address.
After you run docker compose up --build you can navigate to the server IP address and see the viewer will not work...
We have encountered some strange issues with the Keycloak service not allowing non-HTTPS connections (around 10:00). To resolve this, we need to modify the Keycloak configuration to permit HTTPS. This requires accessing the container and making the necessary changes.
After accessing the container shell
cd /opt/keycloak/bin

./kcadm.sh config credentials --server http://localhost:8080 --realm master --user admin
./kcadm.sh update realms/master -s sslRequired=NONE
After we need to change some configurations in the Keycloak UI to enable the connection in the server
Navigate to
http://IP_ADDRESS/keycloak
which will redirect you to the Keycloak login page
- login with the admin user
adminand passwordadmin - From the top left drop down menu, select
ohifrealm - Go to
Clientsand selectohif_viewer - In the
Access Settingschange all instances ofhttp://127.0.0.1tohttp://IP_ADDRESS- Root URL:
http://IP_ADDRESS - Home URL:
http://IP_ADDRESS - Valid Redirect URIs:
http://IP_ADDRESS/oauth2/callback - Valid post logout URIs:
* - Web Origins:
http://IP_ADDRESS - Admin URL:
http://IP_ADDRESS
- Root URL:
Now if you navigate to the IP address it should work !!
Step 3 - Adding SSL and Deploying to Production
Now we'll add an SSL certificate to our server to enable HTTPS. We'll use Let's Encrypt to generate the SSL certificate.
Let's Encrypt requires a domain name, so we'll use a free domain name service like DuckDNS (duckdns.org). Follow these steps:
- Visit https://www.duckdns.org/ and create an account.
- Create a free domain name and point it to your server's IP address.
You can watch a video guide for this process if needed.
Replace YOUR_DOMAIN with your new domain name in the docker-compose.yml file and all other config files, as we did previously.
Next, we'll add HTTPS support. Add the following lines to the Nginx config file:
(Note: We'll have both HTTP and HTTPS servers, and the server IP will use HTTPS)
server {
    listen 80;
    server_name https://IP_ADDRESS;

    location /.well-known/acme-challenge/ {
        root /var/www/certbot;
    }

    location / {
        return 301 https://$host$request_uri;
    }
}

server {
    listen 443 ssl;
    server_name https://IP_ADDRESS;

    ssl_certificate /etc/letsencrypt/live/ohifviewer.duckdns.org/fullchain.pem;
    ssl_certificate_key /etc/letsencrypt/live/ohifviewer.duckdns.org/privkey.pem;

    root /var/www/html;
Don't forget to replace YOUR_DOMAIN with the new domain name in the docker-nginx-orthanc-keycloak.js file.
Remember to include https:// when adding the domain name to the configurations.
Now, we need to add a certificate. Let's assume we have the domain name hospital.duckdns.org and the email we registered with DuckDNS is your_email@example.com.
 docker run -it --rm --name certbot \
  -v ./config/letsencrypt:/etc/letsencrypt \
  -v ./config/certbot:/var/www/certbot \
  -p 80:80 \
  certbot/certbot certonly \
  --standalone \
  --preferred-challenges http \
  --email your_email@example.com \
  --agree-tos \
  --no-eff-email \
  -d hospital.duckdns.org
Replace "hospital.duckdns.org" with your domain name and update the email address accordingly.
DuckDNS is suitable for testing and demonstration purposes only. For production environments, use a proper domain name and SSL certificate to ensure security.
If you follow these steps, you'll encounter the error invalid parameter: redirect_uri when attempting to log in to Keycloak. This occurs because the redirect URL isn't set up correctly in the Keycloak client configuration. To resolve this, we need to log in and adjust these settings.
Navigate to:
http://IP_ADDRESS/keycloak
Log in using the admin credentials:
- Username:
admin - Password:
admin
Replace all IP addresses with the new domain name, using HTTPS.
Getting Started - DCM4CHEE
You can follow the same steps as above to set up DCM4CHEE. The only difference is that you need to navigate to the correct directory. platform\app\.recipes\Nginx-Dcm4chee-Keycloak
You can watch the following video, which will guide you through the process of setting up DCM4CHEE.
Troubleshooting
invalid parameter: redirect_uri
This means the redirect URL isn't set up correctly in the Keycloak client configuration. To resolve this, log in to Keycloak and adjust the settings in the correct client (ohif_viewer) and correct realm (ohif).
Exit code 137
This means Docker ran out of memory. Open Docker Desktop, go to the advanced
tab, and increase the amount of Memory available.
Cannot create container for service X
Use this one with caution: docker system prune
X is already running
Stop running all containers:
- Win:
docker ps -a -q | ForEach { docker stop $_ } - Linux:
docker stop $(docker ps -a -q)
OHIF Viewer
The OHIF Viewer's configuration is imported from a static .js file. The
configuration we use is set to a specific file when we build the viewer, and
determined by the env variable: APP_CONFIG. You can see where we set its value
in the dockerfile for this solution:
ENV APP_CONFIG=config/docker-nginx-orthanc-keycloak.js
You can find the configuration we're using here:
/public/config/docker-nginx-orthanc-keycloak.js
To rebuild the webapp image created by our dockerfile after updating the
Viewer's configuration, you can run:
docker-compose buildORdocker-compose up --build
Next Steps
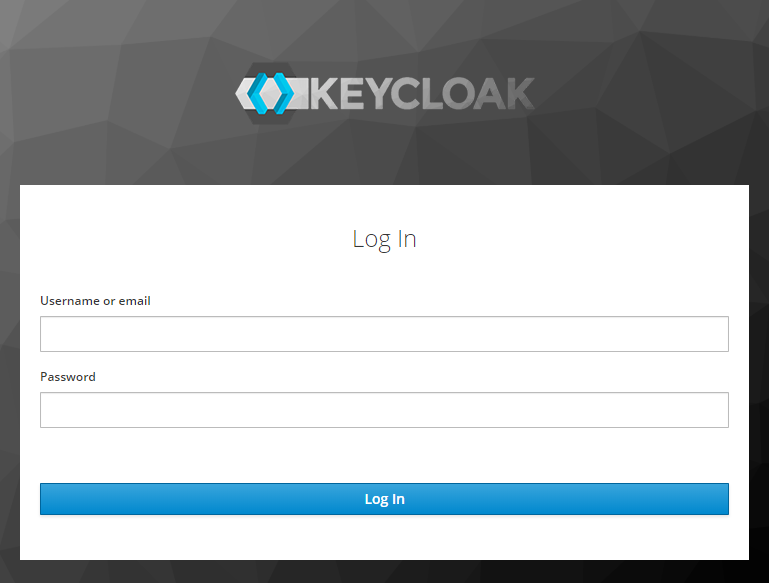
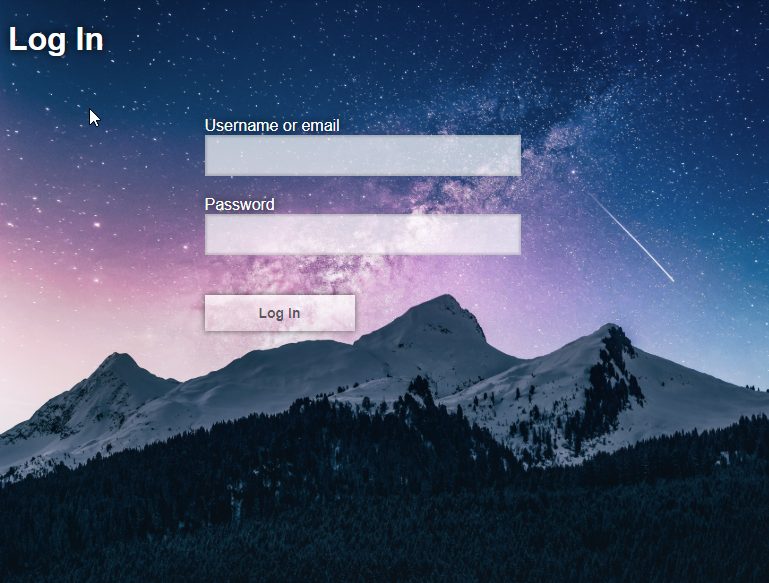
Keycloak Theming
The Login screen for the ohif-viewer client is using a Custom Keycloak
theme. You can find the source files for it in
platform/app/.recipes/deprecated-recipes/OpenResty-Orthanc-Keycloak/volumes/keycloak-themes. You can see how
we add it to Keycloak in the docker-compose file, and you can read up on how
to leverage custom themes in
Keycloak's own docs.
| Default Theme | OHIF Theme |
|---|---|
 |  |
Resources
Referenced Articles
The inspiration for our setup was driven largely by these articles:
- Securing Nginx with Keycloak
- Authenticating Reverse Proxy with Keycloak
- Securing APIs with Kong and Keycloak
For more documentation on the software we've chosen to use, you may find the following resources helpful:
We chose to use a generic OpenID Connect library on the client, but it's worth noting that Keycloak comes packaged with its own:
If you're not already drowning in links, here are some good security resources for OAuth:
For a different take on this setup, check out the repositories our community members put together: