# OHIF Documentation > OHIF (Open Health Imaging Foundation) Viewer is an open-source, web-based, zero-footprint DICOM viewer platform designed for medical imaging. It provides a highly configurable and extensible framework for building diagnostic quality medical imaging applications. OHIF Viewer supports various imaging formats (primarily DICOM), offers advanced visualization tools, customizable workflows, and integration capabilities with different data sources. This file contains the complete documentation for OHIF Viewer, concatenated for easy reference and searching. Each section is clearly marked with its source URL. # Root Documentation ## Where to next? Source: https://docs.ohif.org/llm/README The [Open Health Imaging Foundation][ohif-org] (OHIF) Viewer is an open source, web-based, medical imaging platform. It aims to provide a core framework for building complex imaging applications. Key features: - Designed to load large radiology studies as quickly as possible. Retrieves metadata ahead of time and streams in imaging pixel data as needed. - Leverages [Cornerstone3D](https://github.com/cornerstonejs/cornerstone3D-beta) for decoding, rendering, and annotating medical images. - Works out-of-the-box with Image Archives that support [DICOMWeb][dicom-web]. Offers a Data Source API for communicating with archives over proprietary API formats. - Provides a plugin framework for creating task-based workflow modes which can reuse core functionality. - Beautiful user interface (UI) designed with extensibility in mind. UI components available in a reusable component library built with React.js and Tailwind CSS
Subscribe to our newsletter Release Notes


| | | | | :-: | :--- | :--- | | Measurement tracking | Measurement Tracking | [Demo](https://viewer.ohif.org/viewer?StudyInstanceUIDs=1.3.6.1.4.1.25403.345050719074.3824.20170125095438.5) | | Segmentations | Labelmap Segmentations | [Demo](https://viewer.ohif.org/viewer?StudyInstanceUIDs=1.3.12.2.1107.5.2.32.35162.30000015050317233592200000046) | | Hanging Protocols | Fusion and Custom Hanging protocols | [Demo](https://viewer.ohif.org/tmtv?StudyInstanceUIDs=1.3.6.1.4.1.14519.5.2.1.7009.2403.334240657131972136850343327463) | | Volume Rendering | Volume Rendering | [Demo](https://viewer.ohif.org/viewer?StudyInstanceUIDs=1.3.6.1.4.1.25403.345050719074.3824.20170125095438.5&hangingprotocolId=mprAnd3DVolumeViewport) | | PDF | 
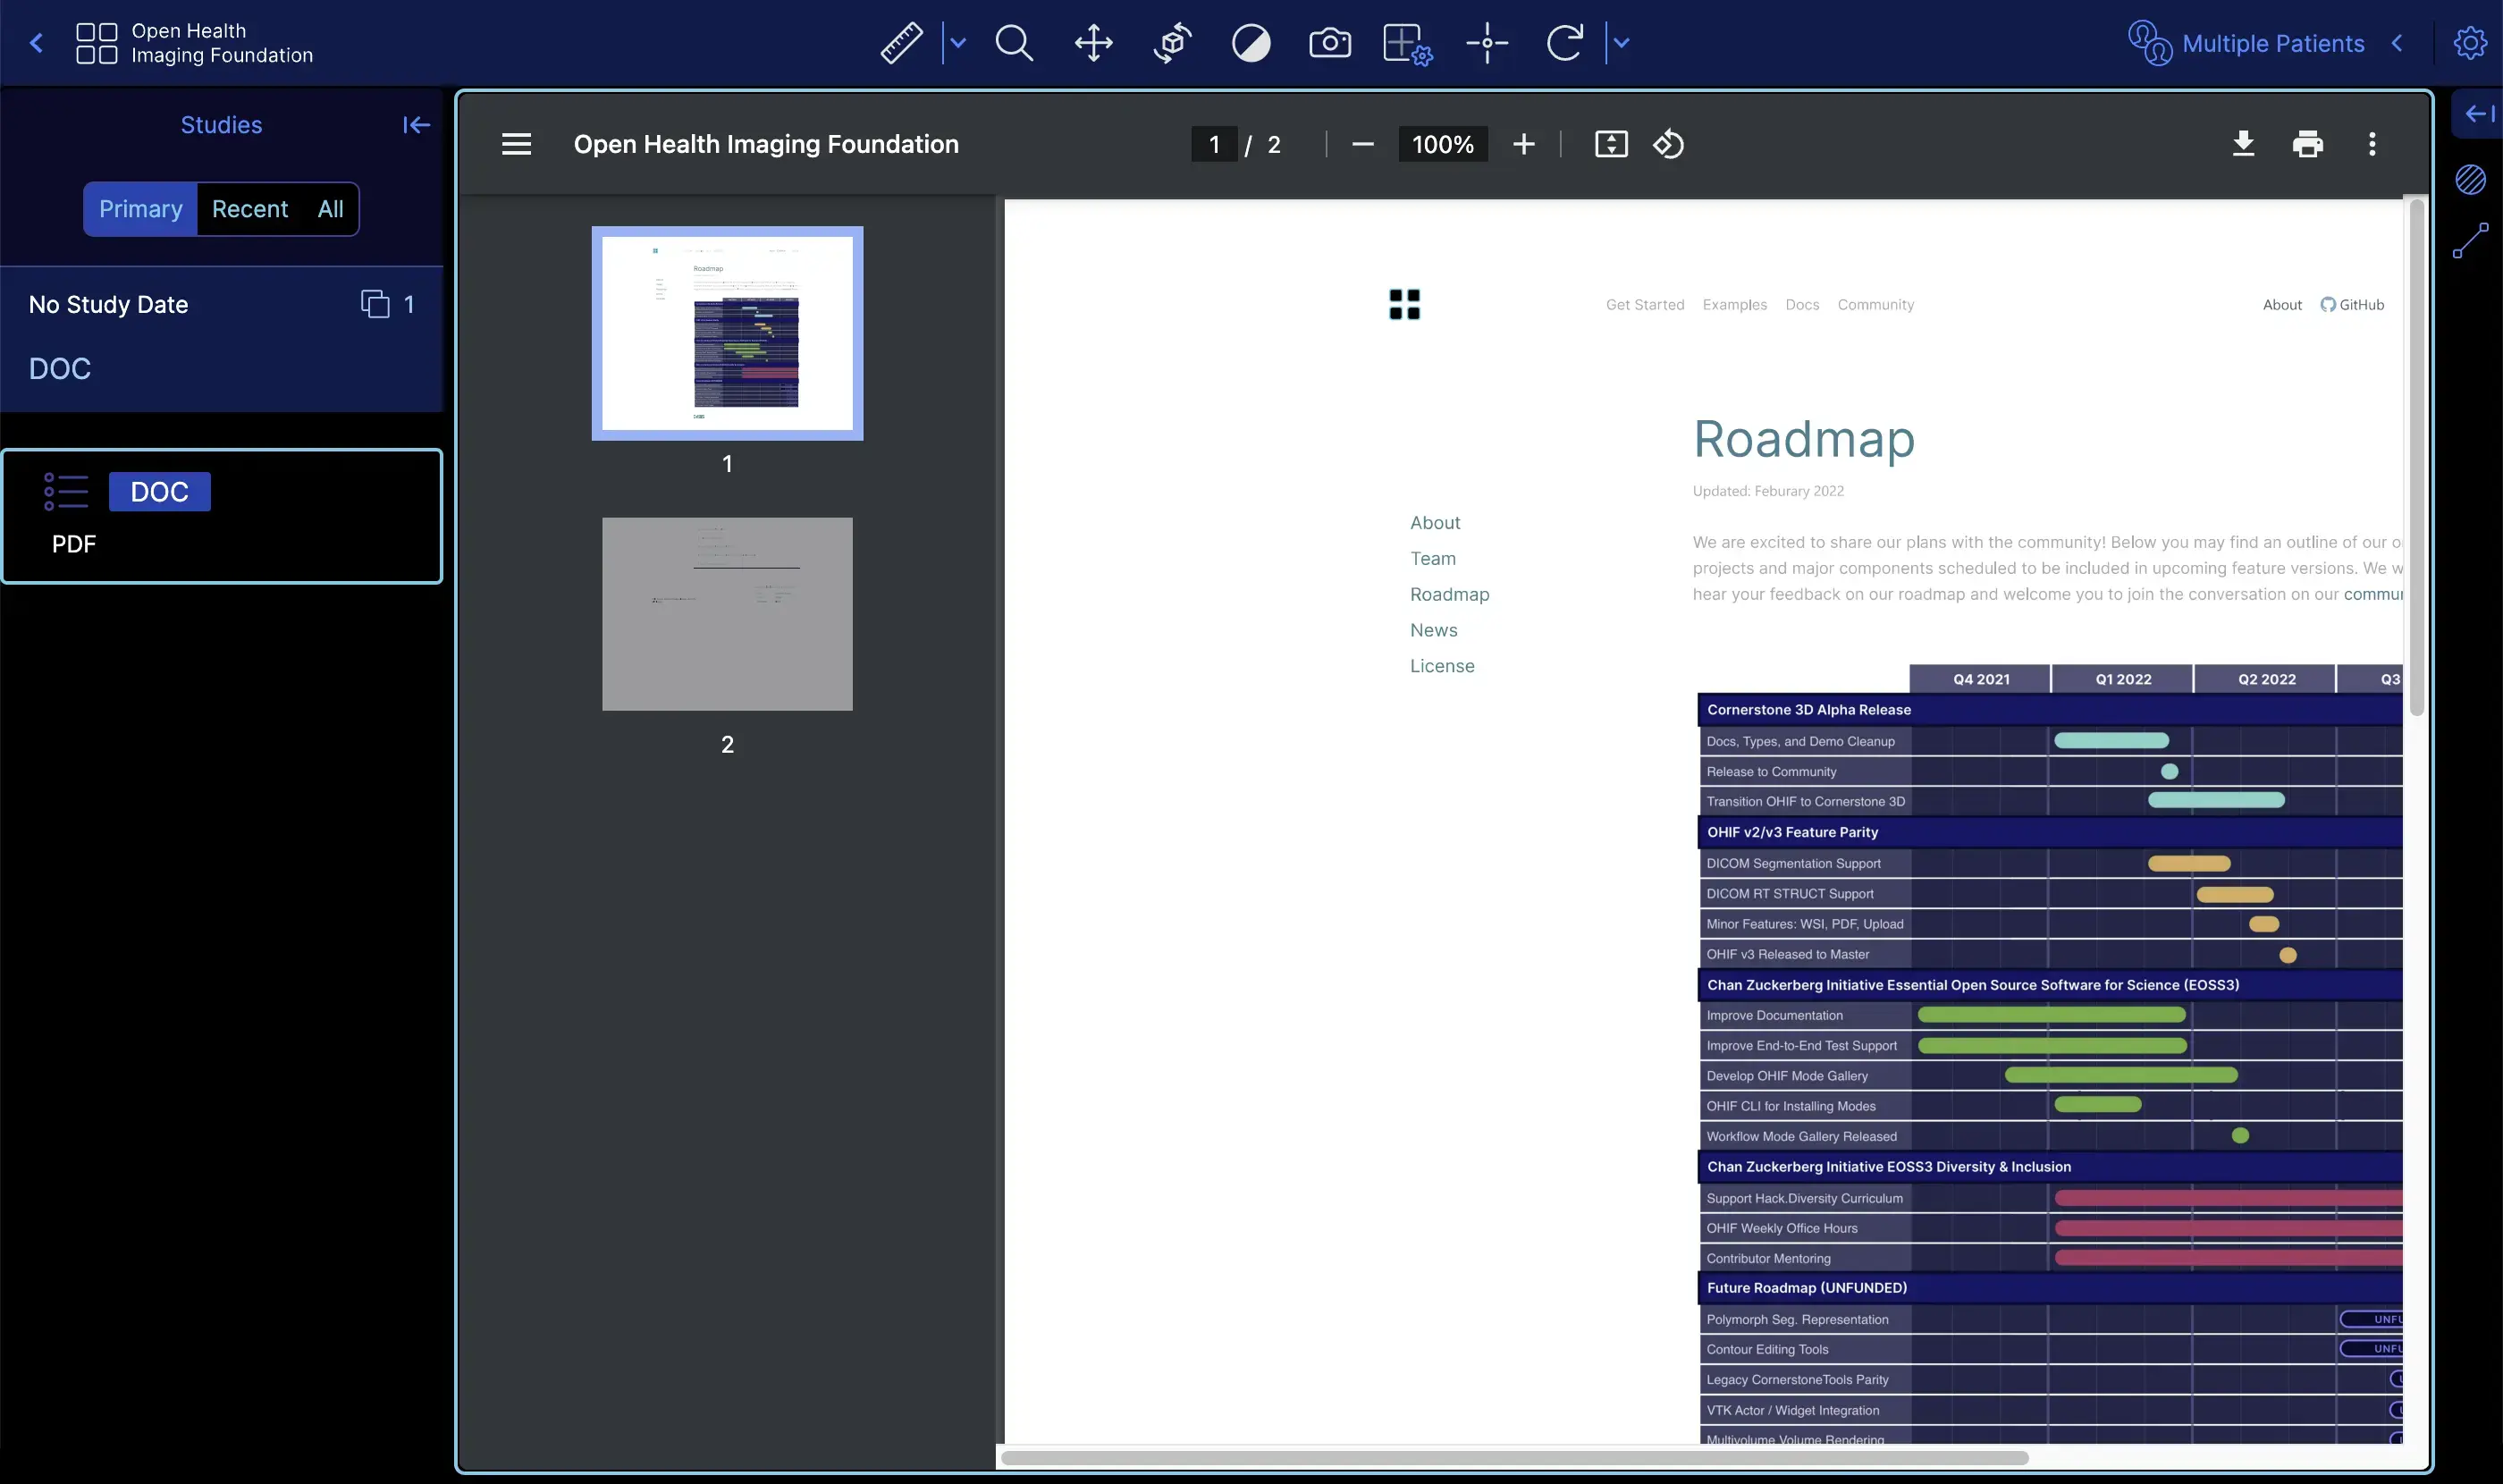
PDF | [Demo](https://viewer.ohif.org/viewer?StudyInstanceUIDs=2.25.317377619501274872606137091638706705333) | | RTSTRUCT | 
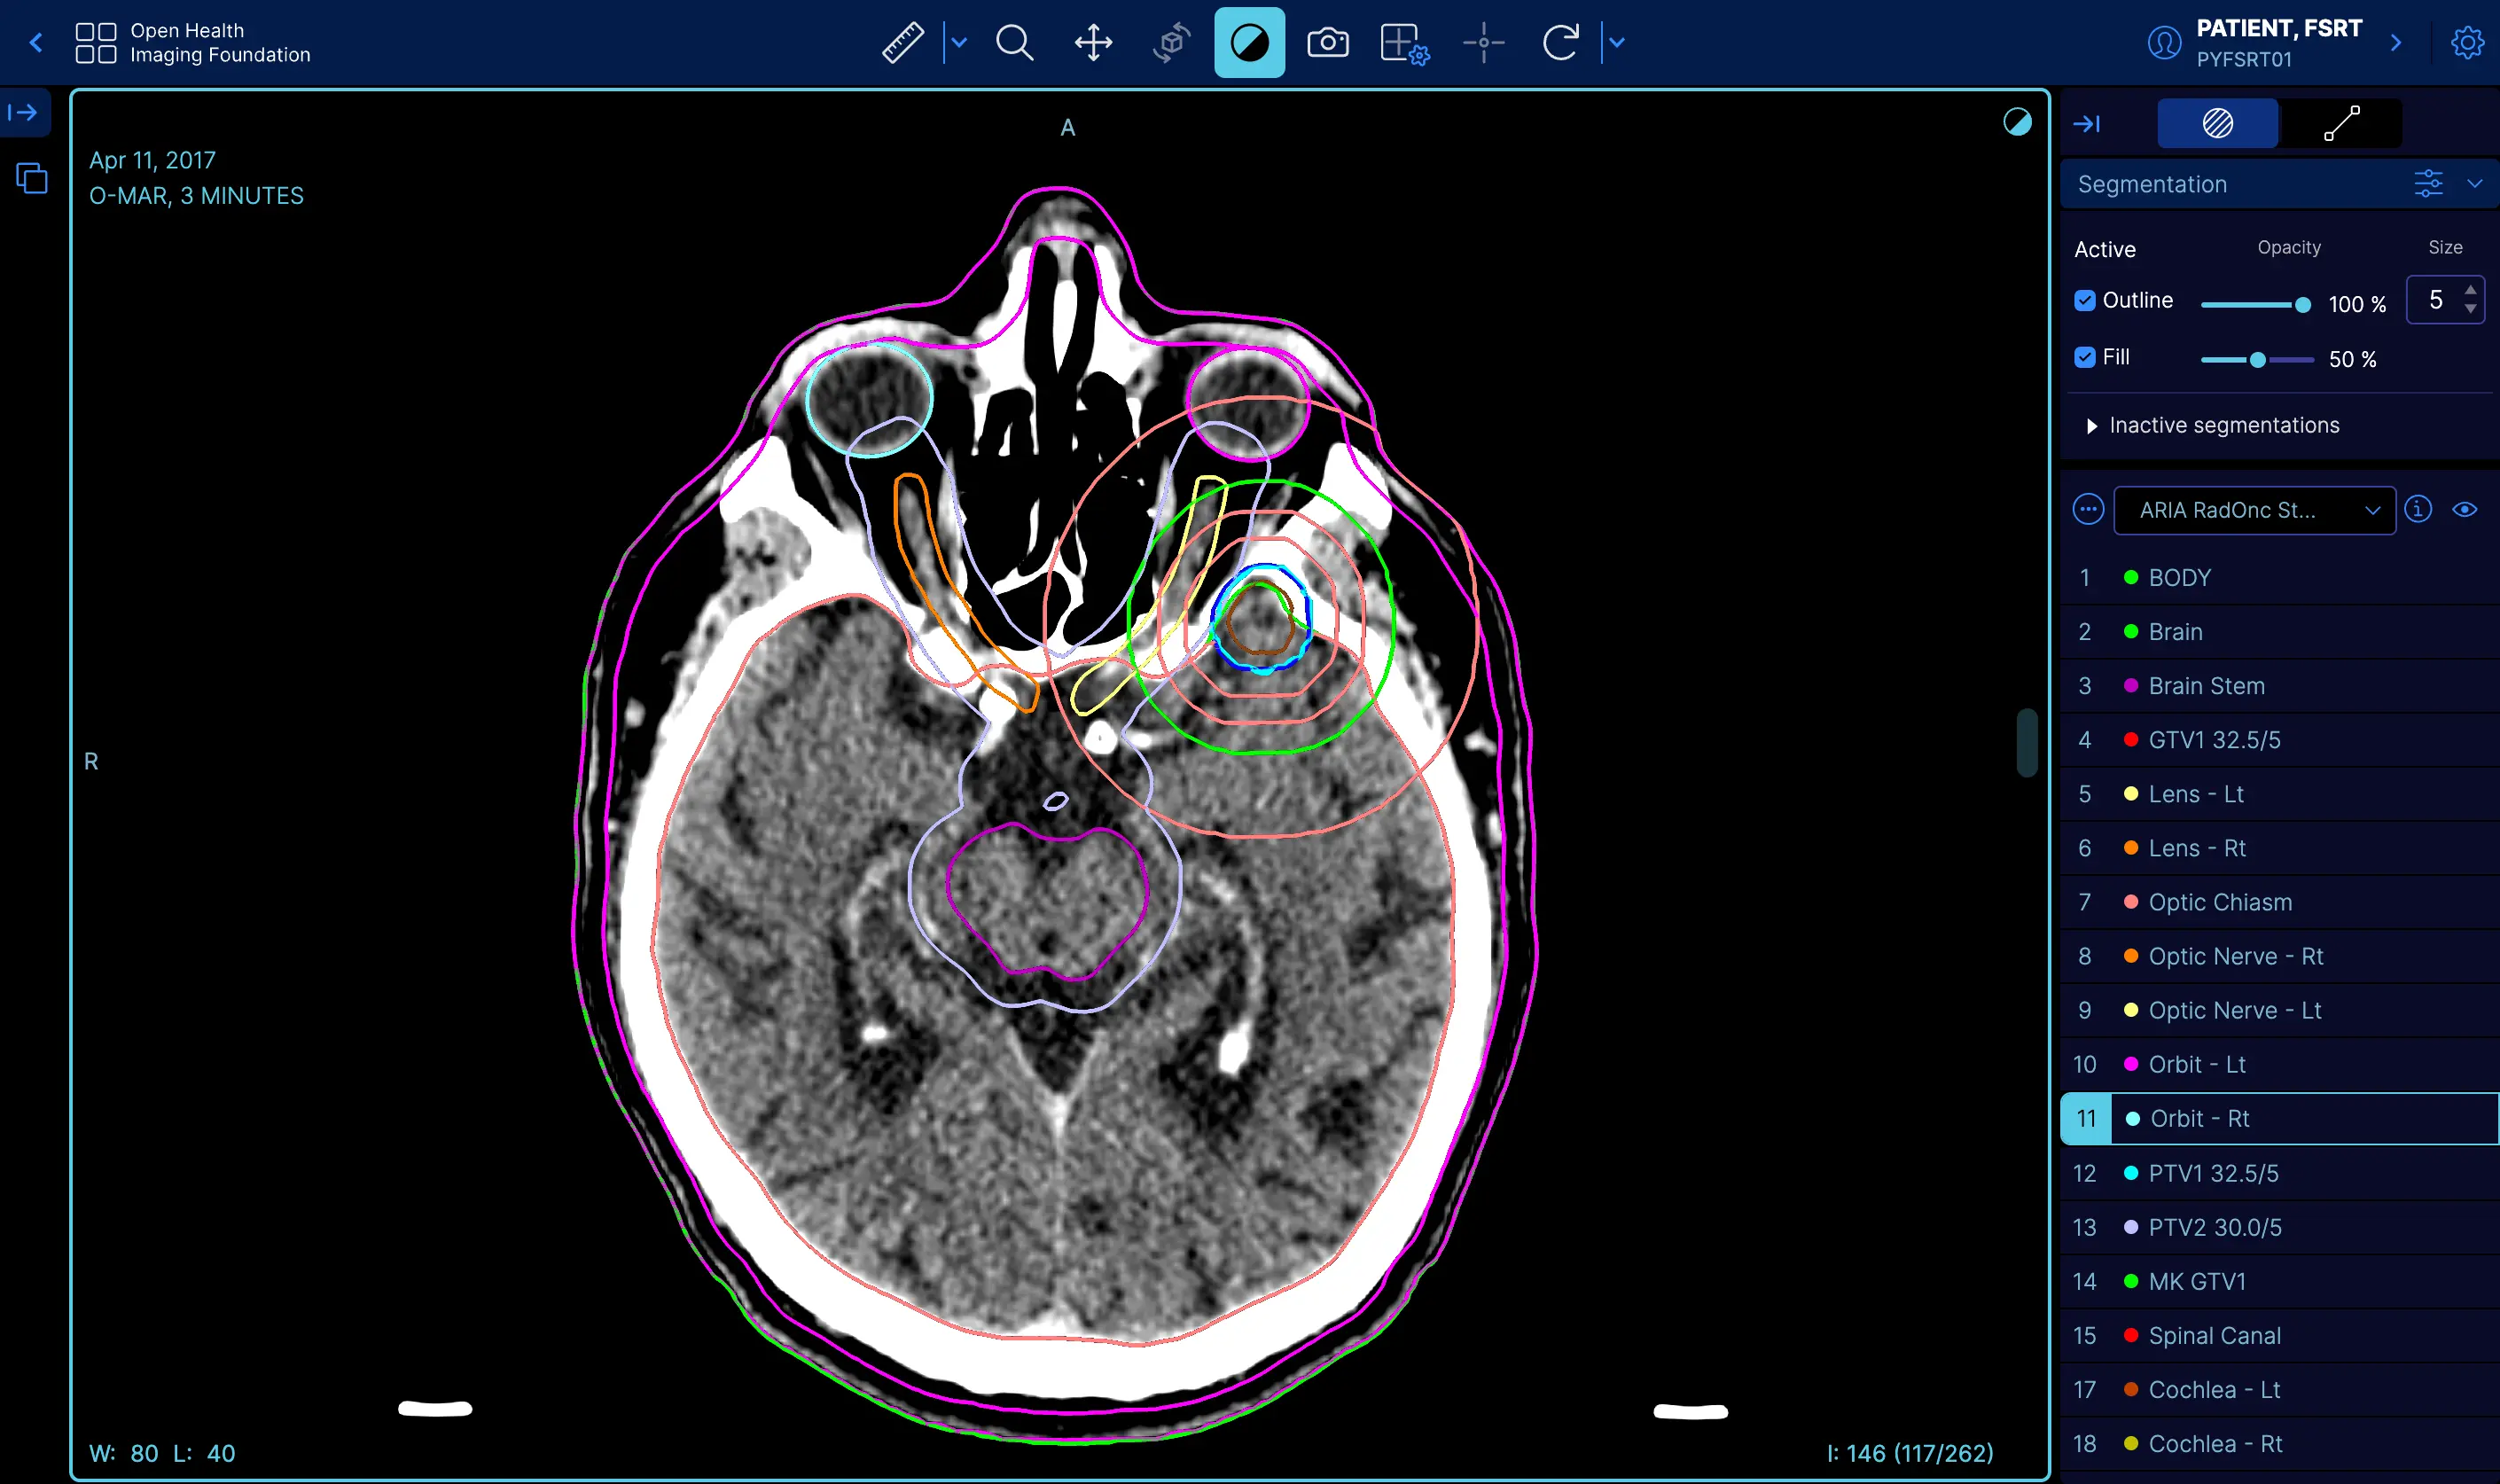
RT STRUCT | [Demo](https://viewer.ohif.org/viewer?StudyInstanceUIDs=1.3.6.1.4.1.5962.99.1.2968617883.1314880426.1493322302363.3.0) | | 4D | 
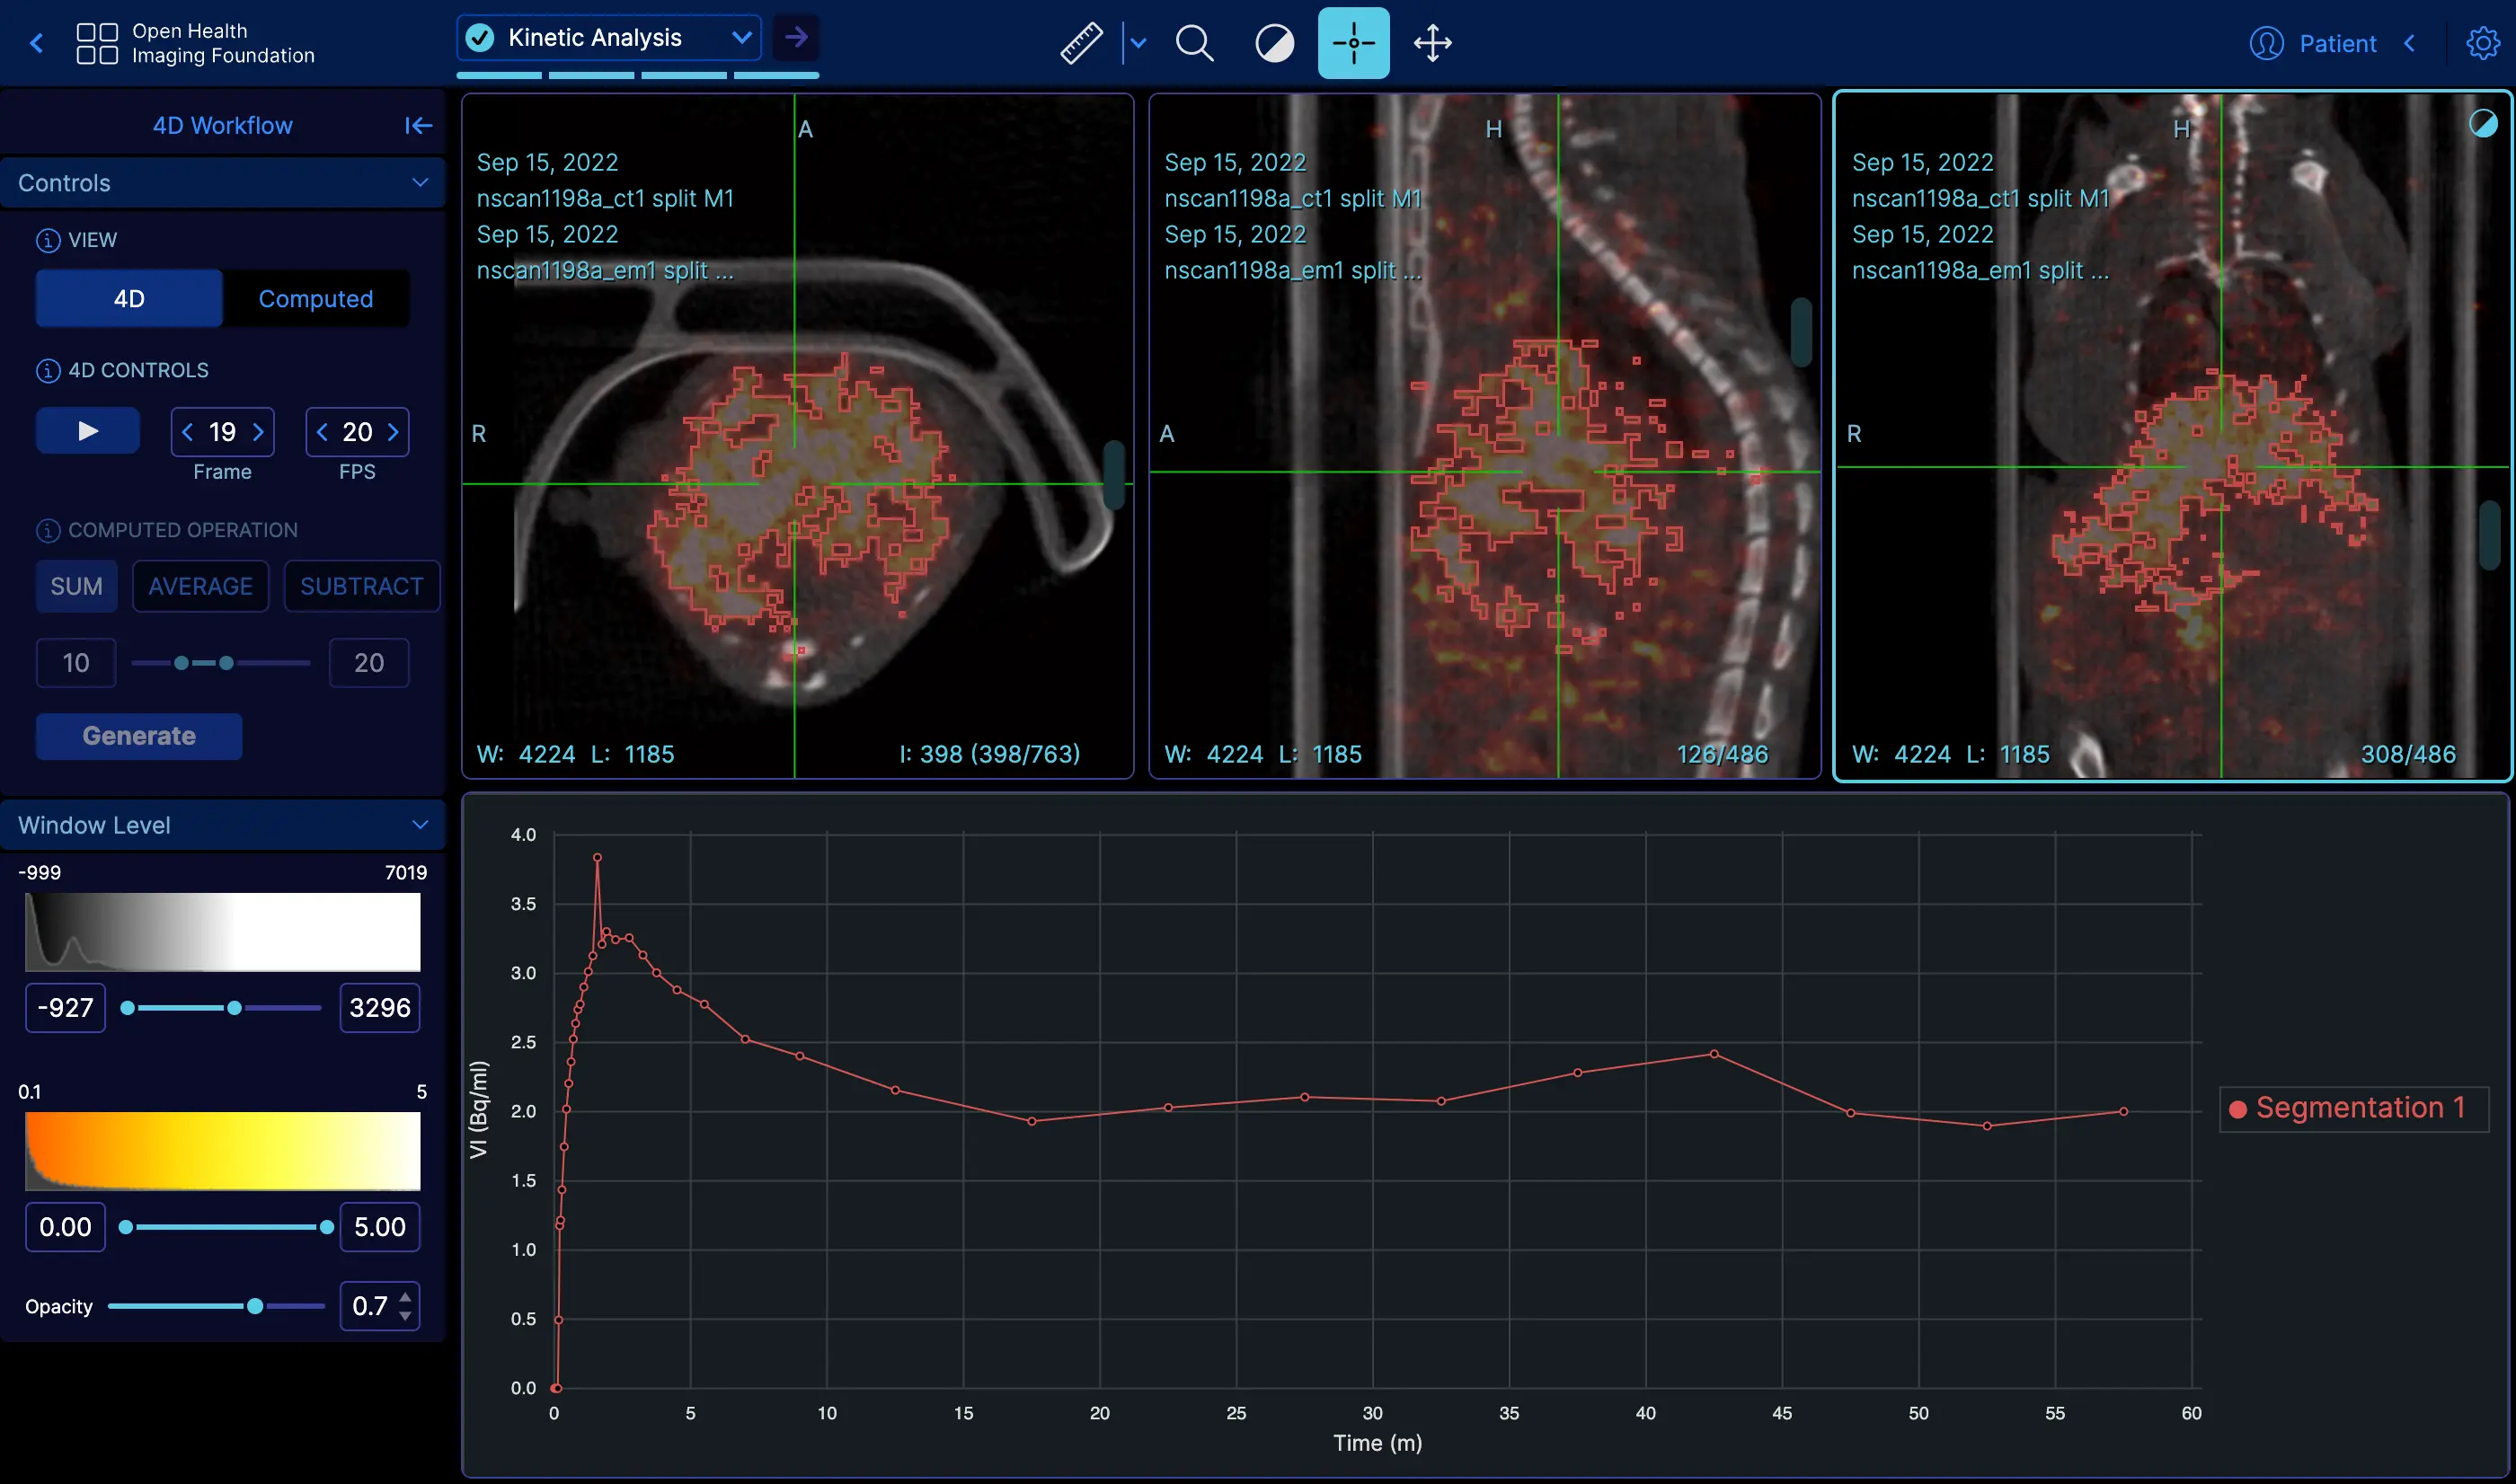
4D | [Demo](https://viewer.ohif.org/dynamic-volume?StudyInstanceUIDs=2.25.232704420736447710317909004159492840763) | | VIDEO | Video | [Demo](https://viewer.ohif.org/viewer?StudyInstanceUIDs=2.25.96975534054447904995905761963464388233) | | microscopy | Slide Microscopy | [Demo](https://viewer.ohif.org/microscopy?StudyInstanceUIDs=2.25.141277760791347900862109212450152067508) | #### Where to next? The Open Health Imaging Foundation intends to provide an imaging viewer framework which can be easily extended for specific uses. If you find yourself unable to extend the viewer for your purposes, please reach out via our [GitHub issues][gh-issues]. We are actively seeking feedback on ways to improve our integration and extension points. Check out these helpful links: - Ready to dive into some code? Check out our [Getting Started Guide](./development/getting-started.md). - We're an active, vibrant community. [Learn how you can be more involved.](./development/contributing.md) - Feeling lost? Read our [help page](/help). #### Citing OHIF To cite the OHIF Viewer in an academic publication, please cite > _Open Health Imaging Foundation Viewer: An Extensible Open-Source Framework > for Building Web-Based Imaging Applications to Support Cancer Research_ > > Erik Ziegler, Trinity Urban, Danny Brown, James Petts, Steve D. Pieper, Rob > Lewis, Chris Hafey, and Gordon J. Harris _JCO Clinical Cancer Informatics_, no. 4 (2020), 336-345, DOI: > [10.1200/CCI.19.00131](https://www.doi.org/10.1200/CCI.19.00131) This article is freely available on Pubmed Central: https://www.ncbi.nlm.nih.gov/pmc/articles/PMC7259879/ or, for Lesion Tracker of OHIF v1, please cite: > _LesionTracker: Extensible Open-Source Zero-Footprint Web Viewer for Cancer > Imaging Research and Clinical Trials_ > > Trinity Urban, Erik Ziegler, Rob Lewis, Chris Hafey, Cheryl Sadow, Annick D. > Van den Abbeele and Gordon J. Harris _Cancer Research_, November 1 2017 (77) (21) e119-e122 DOI: > [10.1158/0008-5472.CAN-17-0334](https://www.doi.org/10.1158/0008-5472.CAN-17-0334) This article is freely available on Pubmed Central. https://pubmed.ncbi.nlm.nih.gov/29092955/ **Note:** If you use or find this repository helpful, please take the time to star this repository on Github. This is an easy way for us to assess adoption, and it can help us obtain future funding for the project. #### License MIT © [OHIF](https://github.com/OHIF)   [ohif-org]: https://www.ohif.org [ohif-demo]: http://viewer.ohif.org/ [dicom-web]: https://en.wikipedia.org/wiki/DICOMweb [gh-issues]: https://github.com/OHIF/Viewers/issues --- ## DICOM Conformance Statement Source: https://docs.ohif.org/llm/conformance You can find a version that has been open sourced by Radical Imaging [in this link](https://docs.google.com/document/d/1hbDlUApX4svX33gAUGxGfD7fXXZNaBsX0hSePbc-hNA/edit?usp=sharing) --- ## OHIF Viewer Release Notes Source: https://docs.ohif.org/llm/release-notes #### Release Notes You can find the detailed release notes on the OHIF website. Please visit [https://ohif.org/release-notes](https://ohif.org/release-notes) --- ## OHIF Viewer Educational Resources Source: https://docs.ohif.org/llm/resources #### Resources Throughout the development of the OHIF Viewer, we have participated in various conferences and "hackathons". In this page, we will provide the presentations and other resources that we have provided to the community in the past: #### 2025 #### Machine Learning in Medical Imaging Consortium (MaLMIC) | January 2025 We presented two talks at the Machine Learning in Medical Imaging Consortium (MaLMIC) 2025 conference. - Advanced Medical Imaging Visualization [Slides](https://docs.google.com/presentation/d/1HZDL-72nNe4BPawDxR3XnSFLB3oLo72RjExc-KHDZfo/edit?usp=sharing) - Introducing Advanced Segmentation Tools in the OHIF Viewer and Cornerstone3D [Slides](https://docs.google.com/presentation/d/146oJ24PPsFZaDPHeFudRF1dmbL42K9yHzQdXXAXdWxk/edit?usp=sharing) #### 2024 #### ITCR Sustainment Session 2024 Dr. Gordon Harris presented at ITCR sustainment session about the future of OHIF. - OHIF Sustainability [Slides](https://docs.google.com/presentation/d/15380mjCzBKBj9PuysCW1Q9ODnyoypJrCDpj3atTtK6I/edit?usp=sharing) #### ITCR Sustainment Panel 2024 - Advanced Medical Imaging Visualization [Slides](https://docs.google.com/presentation/d/1alUp9uJpoJs3aAUE0KqrufGo6e6HHvXYmOAdJp-Rlkc/edit?usp=sharing) #### IMNO 2024 - March 19-20, 2024 We participated in the Imaging Network Ontario (ImNO) 2024 symposium, presenting three posters. One of our presentations received the best talk award during the session. - Advancing Medical Imaging on the Web: Implementation of Hanging Protocols for Automated Image Display Configuration in OHIF V3 [Poster](https://www.dropbox.com/scl/fi/z4h86bmsxi0c62e1n6h9l/P7-9-Alireza-Sedghi-Final.pdf?rlkey=v5pm0p5ygkbq41x9bz3hr5yi8&dl=0) - Advancing Medical Imaging on the Web: Optimizing the Dicomweb Server Architecture with Static Dicomweb [Poster](https://www.dropbox.com/scl/fi/ep0lxjp90kbxhjoffe4kh/P7-10-Bill-Wallace-Final.pdf?rlkey=xl2u6tdnh9j9hgvkajxv3b02o&dl=0) - (**🏆🏆 BEST PRESENTATION AWARD in the Session 7 Pitches: Devices, HW, SW Development 🏆🏆**) Advancing Medical Imaging on the Web: Integrating High Throughput JPEG 2000 (HTJ2K) in Cornerstone3D for Streamlined Progressive Loading and Visualization [Poster](https://www.dropbox.com/scl/fi/srs2rxgtv2r69ver9ub1j/P7-8-Bill-Wallace-Final.pdf?rlkey=k9mmraw76r9q2s3b9w9s0793w&dl=0) #### 2023 #### ITCR 2023 Conference | September 11-13, 2023 Dr. Gordon Harris presented an update on OHIF in [NCI Informatics Technology for Cancer Research Annual Meeting](https://www.itcr2023.org/). You can find the slides and poster here: [[Slides]](https://docs.google.com/presentation/d/1R38s95db_yZj0WoYdlUbaWGZsWVb3H-3u_hXBZXiTaE/edit?usp=sharing)[[Poster]](https://ohif-assets.s3.us-east-2.amazonaws.com/presentations/OHIF-ITCR-2023-FINAL-PRINT.pdf) #### SIIM 2023 Tech Tools Webinar | April 12th, 2023 Free, Open Source Tools for Research: MONAI and OHIF Viewer [[Slides](https://docs.google.com/presentation/d/1afJ5Y9Tzukgn7eAbaO1oiCtN7XvIimFdmZP-HcOUofA/edit?usp=sharing)][[Video](https://www.youtube.com/watch?v=lo8J5w5jUJI)] #### NA-MIC Project Week 38th 2023 - Remote We participated in the 38th Project Week with three projects around OHIF. [[Website](https://projectweek.na-mic.org/PW38_2023_GranCanaria/)] - PolySeg representations for OHIF Viewer ([link](https://projectweek.na-mic.org/PW38_2023_GranCanaria/Projects/OHIF_PolySeg/)) - Cross study synchronizer for OHIF Crosshair ([link](https://projectweek.na-mic.org/PW38_2023_GranCanaria/Projects/OHIF_SyncCrosshair/)) - DATSCAN Viewer implementation in OHIF ([link](https://projectweek.na-mic.org/PW38_2023_GranCanaria/Projects/OHIF_DATSCAN/)) #### 2022 #### OHIF Demo to Interns [[Slides]](https://docs.google.com/presentation/d/1a2PkUnqkVMaXaBsuFn7-PPlBJULU3dBwzI_44gKFeYI/edit?usp=sharing) #### SIIM 2022 - Updates from the Imaging Informatics Community We participated in the SIIM 2022 conference to give update for the imaging informatics community. [[Slides]](https://docs.google.com/presentation/d/1EUGaUzQtGhZbZWpGLe6ONqChpVMw9Qr9l3KHODevMow/edit?usp=sharing) [[Video]](https://vimeo.com/734463662/dbd5a88371) #### The Imaging Network Ontario - Remote The Imaging Network Ontario (ImNO) is an annual symposium that brings together medical imaging researchers and scientists from across Canada to share knowledge, ideas, and experiences. [[Slides]](https://docs.google.com/presentation/d/18XZDon4-Sitc2a70V5sFyhyUVZI_mIgfXHGtdxhZMjE/edit?usp=sharing) [[Video]](https://vimeo.com/843234581/ad7d308a44) #### [NA-MIC Project Week 36th 2022 - Remote](https://github.com/NA-MIC/ProjectWeek/blob/master/PW36_2022_Virtual/README.md) The Project Week is a week-long hackathon of hands-on activity in which medical image computing researchers. OHIF team participated and gave a talk on OHIF and Cornerstone in the 36th Project Week: [[Slides]](https://docs.google.com/presentation/d/1-GtOKmr2cQi-r3OFyseSmgLeurtB3KXUkGMx2pVLh1I/edit?usp=sharing) [[Video]](https://vimeo.com/668339696/63a2c48de8) #### 2021 #### [NA-MIC Project Week 35th 2021 - Remote](https://github.com/NA-MIC/ProjectWeek/tree/master/PW35_2021_Virtual) The Project Week is a week-long hackathon of hands-on activity in which medical image computing researchers. OHIF team participated in the 35th Project Week in 2021. [[Slides]](https://docs.google.com/presentation/d/1KYNjuiI8lT1foQ4P9TGNV0lBhM6H-5KBs0wkYj4JJbk/edit?usp=sharing) #### Chan Zuckerberg Initiative (CZI) Project presentations and demonstrations of Essential Open Source Software for Science (EOSS) grantees [[Slides]](https://docs.google.com/presentation/d/1_CLtG2hsL3ZxOtV2olVnzBOzq-TMLrHLomOy3FiU4NE/edit?usp=sharing) [[Video]](https://youtu.be/0FjKkTJO0Rc?t=3737) #### Google Cloud Tech Healthcare Imaging with Cloud Healthcare API [[Video]](https://www.youtube.com/watch?v=2MiX9ScHFhY) #### 2020 #### OHIF ITCR Pitch OHIF pitch for Informatics Technology for Cancer Research (ITCR) [[Slides]](https://docs.google.com/presentation/d/1MZXnZrVAnjmhVIWqC-aRSvJOoMMRLhLddACdCa1TybM/edit?usp=sharing) [[Video]](https://vimeo.com/843234613/625bdb8793) #### 2019 #### OHIF and VTK.js Training Course OHIF and Kitware collaboration to create a training course for OHIF and VTK.js developers. Funding for this work was provided by Kitware (NIH NINDS R44NS081792, NIH NINDS R42NS086295, NIH NIBIB and NIGMS R01EB021396, NIH NIBIB R01EB014955), Isomics (NIH P41 EB015902), and Massachusetts General Hospital (NIH U24 CA199460). 1. Introduction to VTK.js and OHIF [[Slides]](https://docs.google.com/presentation/d/1NCJxpfx_qUGJI_2DhbECzaOg0k-Z6b65QlUptCofN-A/edit#slide=id.p) [[Video]](https://vimeo.com/375520781) 2. Developing with VTK.js [[Slides]](https://docs.google.com/presentation/d/17TCS6EhFi6SWFIrcAJ-DFdFzFFL-WD9BBTv-owmMdDU/edit#slide=id.p) [[Video]](https://vimeo.com/375521036) 3. VTK.js Architecture and Tooling [[Slides]](https://docs.google.com/presentation/d/1Sr1OGxMSw0oCt46koKQbmwSIE11Kqq8MGtyW3W0ASpk/edit?usp=gmail_thread) [[Video]](https://vimeo.com/375521810) 4. OHIF + VTK.js Integration [[Slides]](https://docs.google.com/presentation/d/1Iwg-u01HGVf1CgC6NbcBD3gm3uHN9WhjU59FSz55TN8/edit?ts=5d9c9ce4#slide=id.g59aa99cda4_0_131) [[Video]](https://vimeo.com/375521206) #### 2017 #### Lesion Tracker LesionTracker: Extensible Open-Source Zero-Footprint Web Viewer for Cancer Imaging Research and Clinical Trials. This project was supported in part by grant U24 CA199460 from the National Cancer Institute (NCI) Informatics Technology for Cancer Research (ITCR) Program. [[Video]](https://www.youtube.com/watch?v=gUIPtoSBL-Q) #### OHIF Community Meeting - June [[Slides]](https://docs.google.com/presentation/d/1K9Y6eP5DYTXoDlfwCZE6GkCUp83AK4_40YQS0dlzVBo/edit?usp=sharing) #### 2016 #### Imaging Community Call Open Source Oncology Web Viewer; Presentation by Gordon J. Harris [[Slides]](https://www.slideshare.net/imgcommcall/lesiontracker) #### OHIF Community Meeting - June [[Slides]](https://docs.google.com/presentation/d/1Ai25mBG0ZWUPhaadp3VnbCVmkYs9K51sQ8osMixrvJ0/edit?usp=sharing) #### OHIF Community Meeting - September [[Slides]](https://docs.google.com/presentation/d/1iYZoU7v7KHSLHiKwH1_9_wweAkG7RGnyxrWeeHva4zQ/edit?usp=sharing) --- ## OHIF Viewer Test Coverage Source: https://docs.ohif.org/llm/test-coverage #### Test Coverage #### Playwright Here's the test coverage report for our Playwright tests. Keep in mind that this doesn't include our Cypress tests, so our actual test coverage is likely higher than what's shown. We're focusing on Playwright for future OHIF testing, and we're really pushing to improve that coverage number. You can view our latest test coverage report here: - [OHIF Playwright Test Coverage Report](https://docs.ohif.org/coverage) --- # Configuration ## Configuration Files Source: https://docs.ohif.org/llm/configuration/configurationFiles.md #### Config files After following the steps outlined in [Getting Started](./../development/getting-started.md), you'll notice that the OHIF Viewer has data for several studies and their images. You didn't add this data, so where is it coming from? By default, the viewer is configured to connect to a Amazon S3 bucket that is hosting a Static WADO server (see [Static WADO DICOMWeb](https://github.com/RadicalImaging/static-dicomweb)). By default we use `default.js` for the configuration file. You can change this by setting the `APP_CONFIG` environment variable and select other options such as `config/local_orthanc.js` or `config/google.js`. #### Configuration Files The configuration for our viewer is in the `platform/app/public/config` directory. Our build process knows which configuration file to use based on the `APP_CONFIG` environment variable. By default, its value is [`config/default.js`][default-config]. The majority of the viewer's features, and registered extension's features, are configured using this file. The simplest way is to update the existing default config: ```js title="platform/app/public/config/default.js" window.config = { routerBasename: null, extensions: [], modes: [], showStudyList: true, dataSources: [ { namespace: '@ohif/extension-default.dataSourcesModule.dicomweb', sourceName: 'dicomweb', configuration: { friendlyName: 'dcmjs DICOMWeb Server', name: 'DCM4CHEE', wadoUriRoot: 'https://server.dcmjs.org/dcm4chee-arc/aets/DCM4CHEE/wado', qidoRoot: 'https://server.dcmjs.org/dcm4chee-arc/aets/DCM4CHEE/rs', wadoRoot: 'https://server.dcmjs.org/dcm4chee-arc/aets/DCM4CHEE/rs', qidoSupportsIncludeField: true, supportsReject: true, imageRendering: 'wadors', thumbnailRendering: 'wadors', enableStudyLazyLoad: true, supportsFuzzyMatching: true, supportsWildcard: true, omitQuotationForMultipartRequest: true, }, }, ], defaultDataSourceName: 'dicomweb', }; ``` > As you can see a new change in `OHIF-v3` is the addition of `dataSources`. You > can build your own datasource and map it to the internal data structure of > OHIF’s > metadata and enjoy using other peoples developed mode on your own > data! > > You can read more about data sources at > [Data Source section in Modes](../platform/modes/index.md) The configuration can also be written as a JS Function in case you need to inject dependencies like external services: ```js window.config = ({ servicesManager } = {}) => { const { UIDialogService } = servicesManager.services; return { cornerstoneExtensionConfig: { tools: { ArrowAnnotate: { configuration: { getTextCallback: (callback, eventDetails) => UIDialogService.create({... } } }, }, routerBasename: null, dataSources: [ { namespace: '@ohif/extension-default.dataSourcesModule.dicomweb', sourceName: 'dicomweb', configuration: { friendlyName: 'dcmjs DICOMWeb Server', name: 'DCM4CHEE', wadoUriRoot: 'https://server.dcmjs.org/dcm4chee-arc/aets/DCM4CHEE/wado', qidoRoot: 'https://server.dcmjs.org/dcm4chee-arc/aets/DCM4CHEE/rs', wadoRoot: 'https://server.dcmjs.org/dcm4chee-arc/aets/DCM4CHEE/rs', qidoSupportsIncludeField: true, supportsReject: true, imageRendering: 'wadors', thumbnailRendering: 'wadors', enableStudyLazyLoad: true, supportsFuzzyMatching: true, supportsWildcard: true, omitQuotationForMultipartRequest: true, }, }, ], defaultDataSourceName: 'dicomweb', }; }; ``` #### Configuration Options Here are a list of some options available: - `disableEditing`: If true, it disables editing in OHIF, hiding edit buttons in segmentation panel and locking already stored measurements. - `maxNumberOfWebWorkers`: The maximum number of web workers to use for decoding. Defaults to minimum of `navigator.hardwareConcurrency` and what is specified by `maxNumberOfWebWorkers`. Some windows machines require smaller values. - `acceptHeader` : accept header to request specific dicom transfer syntax ex : [ 'multipart/related; type=image/jls; q=1', 'multipart/related; type=application/octet-stream; q=0.1' ] - `investigationalUseDialog`: This should contain an object with `option` value, it can be either `always` which always shows the dialog once per session, `never` which never shows the dialog, or `configure` which shows the dialog once and won't show it again until a set number of days defined by the user, if it's set to configure, you are required to add an additional property `days` which is the number of days to wait before showing the dialog again. - `groupEnabledModesFirst`: boolean, if set to true, all valid modes for the study get grouped together first, then the rest of the modes. If false, all modes are shown in the order they are defined in the configuration. - `experimentalStudyBrowserSort`: boolean, if set to true, you will get the experimental StudyBrowserSort component in the UI, which displays a list of sort functions that the displaySets can be sorted by, the sort reflects in all part of the app including the thumbnail/study panel. These sort functions are defined in the customizationModule and can be expanded by users. - `disableConfirmationPrompts`: boolean, if set to true, it skips confirmation prompts for segmentation related prompts. - `showPatientInfo`: string, if set to 'visible', the patient info header will be shown and its initial state is expanded. If set to 'visibleCollapsed', the patient info header will be shown but it's initial state is collapsed. If set to 'disabled', the patient info header will never be shown, and if set to 'visibleReadOnly', the patient info header will be shown and always expanded. - `requestTransferSyntaxUID` : Request a specific Transfer syntax from dicom web server ex: 1.2.840.10008.1.2.4.80 (applied only if acceptHeader is not set) - `omitQuotationForMultipartRequest`: Some servers (e.g., .NET) require the `multipart/related` request to be sent without quotation marks. Defaults to `false`. If your server doesn't require this, then setting this flag to `true` might improve performance (by removing the need for preflight requests). Also note that if auth headers are used, a preflight request is required. - `maxNumRequests`: The maximum number of requests to allow in parallel. It is an object with keys of `interaction`, `thumbnail`, and `prefetch`. You can specify a specific number for each type. - `modesConfiguration`: Allows overriding modes configuration. - Example config: ```js modesConfiguration: { '@ohif/mode-longitudinal': { displayName: 'Custom Name', routeName: 'customRouteName', routes: [ { path: 'customPath', layoutTemplate: () => { /** Custom Layout */ return { id: ohif.layout, props: { leftPanels: [tracked.thumbnailList], rightPanels: [dicomSeg.panel, tracked.measurements], rightPanelClosed: true, viewports: [ { namespace: tracked.viewport, displaySetsToDisplay: [ohif.sopClassHandler], }, ], }, }; }, }, ], } }, ``` Note: Although the mode configuration is passed to the mode factory function, it is up to the particular mode itself if its going to use it to allow overwriting its original configuration e.g. ```js function modeFactory({ modeConfiguration }) { return { id, routeName: 'viewer', displayName: 'Basic Viewer', ... onModeEnter: ({ servicesManager, extensionManager, commandsManager }) => { ... }, /** * This mode allows its configuration to be overwritten by * destructuring the modeConfiguration value from the mode fatory function * at the end of the mode configuration definition. */ ...modeConfiguration, }; } ``` - `showLoadingIndicator`: (default to true), if set to false, the loading indicator will not be shown when navigating between studies. - `useNorm16Texture`: (default to false), if set to true, it will use 16 bit data type for the image data wherever possible which has significant impact on reducing the memory usage. However, the 16Bit textures require EXT_texture_norm16 extension in webGL 2.0 (you can check if you have it here https://webglreport.com/?v=2). In addition to the extension, there are reported problems for Intel Macs that might cause the viewer to crash. In summary, it is great a configuration if you have support for it. - `useSharedArrayBuffer` (default to 'TRUE', options: 'AUTO', 'FALSE', 'TRUE', note that these are strings), for volume loading we use sharedArrayBuffer to be able to load the volume progressively as the data arrives (each webworker has the shared buffer and can write to it). However, there might be certain environments that do not support sharedArrayBuffer. In that case, you can set this flag to false and the viewer will use the regular arrayBuffer which might be slower for large volume loading. - `supportsWildcard`: (default to false), if set to true, the datasource will support wildcard matching for patient name and patient id. - `allowMultiSelectExport`: (default to false), if set to true, the user will be able to select the datasource to export the report to. - `activateViewportBeforeInteraction`: (default to true), if set to false, tools can be used directly without the need to click and activate the viewport. - `autoPlayCine`: (default to false), if set to true, data sets with the DICOM frame time tag (i.e. (0018,1063)) will auto play when displayed - `addWindowLevelActionMenu`: (default to true), if set to false, the window level action menu item is NOT added to the viewport action corners - `dangerouslyUseDynamicConfig`: Dynamic config allows user to pass `configUrl` query string. This allows to load config without recompiling application. If the `configUrl` query string is passed, the worklist and modes will load from the referenced json rather than the default .env config. If there is no `configUrl` path provided, the default behaviour is used and there should not be any deviation from current user experience.
Points to consider while using `dangerouslyUseDynamicConfig`:
- User have to enable this feature by setting `dangerouslyUseDynamicConfig.enabled:true`. By default it is `false`. - Regex helps to avoid easy exploit. Default is `/.*/`. Setup your own regex to choose a specific source of configuration only. - System administrators can return `cross-origin: same-origin` with OHIF files to disallow any loading from other origin. It will block read access to resources loaded from a different origin to avoid potential attack vector. - Example config: ```js dangerouslyUseDynamicConfig: { enabled: false, regex: /.*/ } ``` > Example 1, to allow numbers and letters in an absolute or sub-path only.
`regex: /(0-9A-Za-z.]+)(\/[0-9A-Za-z.]+)*/`
Example 2, to restricts to either hosptial.com or othersite.com.
`regex: /(https:\/\/hospital.com(\/[0-9A-Za-z.]+)*)|(https:\/\/othersite.com(\/[0-9A-Za-z.]+)*)/`
Example usage:
`http://localhost:3000/?configUrl=http://localhost:3000/config/example.json`
- `onConfiguration`: Currently only available for DicomWebDataSource, this option allows the interception of the data source configuration for dynamic values e.g. values coming from url params or query params. Here is an example of building the dicomweb datasource configuration object with values that are based on the route url params: ``` { namespace: '@ohif/extension-default.dataSourcesModule.dicomweb', sourceName: 'gcpdicomweb', configuration: { friendlyName: 'GCP DICOMWeb Server', name: 'gcpdicomweb', qidoSupportsIncludeField: false, imageRendering: 'wadors', thumbnailRendering: 'wadors', enableStudyLazyLoad: true, supportsFuzzyMatching: false, supportsWildcard: false, singlepart: 'bulkdata,video,pdf', onConfiguration: (dicomWebConfig, options) => { const { params } = options; const { project, location, dataset, dicomStore } = params; const pathUrl = `https://healthcare.googleapis.com/v1/projects/${project}/locations/${location}/datasets/${dataset}/dicomStores/${dicomStore}/dicomWeb`; return { ...dicomWebConfig, wadoRoot: pathUrl, qidoRoot: pathUrl, wadoUri: pathUrl, wadoUriRoot: pathUrl, }; }, }, }, ``` This configuration would allow the user to build a dicomweb configuration from a GCP healthcare api path e.g. http://localhost:3000/projects/your-gcp-project/locations/us-central1/datasets/your-dataset/dicomStores/your-dicom-store/study/1.3.6.1.4.1.1234.5.2.1.1234.1234.123123123123123123123123123123 :::note You can stack multiple panel components on top of each other by providing an array of panel components in the `rightPanels` or `leftPanels` properties. For instance we can use ``` rightPanels: [[dicomSeg.panel, tracked.measurements], [dicomSeg.panel, tracked.measurements]] ``` This will result in two panels, one with `dicomSeg.panel` and `tracked.measurements` and the other with `dicomSeg.panel` and `tracked.measurements` stacked on top of each other. ::: #### Study Prefetcher You can enable the study prefetcher so that OHIF loads the next/previous series/display sets based on the proximity to the current series/display set. This can be useful to improve the user experience ```js studyPrefetcher: { /* Enable/disable study prefetching service (default: false) */ enabled: true, /* Number of displaysets to be prefetched (default: 2)*/ displaySetsCount: 2, /** * Max number of concurrent prefetch requests (default: 10) * High numbers may impact on the time to load a new dropped series because * the browser will be busy with all prefetching requests. As soon as the * prefetch requests get fulfilled the new ones from the new dropped series * are sent to the server. * * TODO: abort all prefetch requests when a new series is loaded on a viewport. * (need to add support for `AbortController` on Cornerstone) * */ maxNumPrefetchRequests: 10, /* Display sets loading order (closest (deafult), downward or upward) */ order: 'closest', }, ``` #### More on Accept Header Configuration In the previous section we showed that you can modify the `acceptHeader` configuration to request specific dicom transfer syntax. By default we use `acceptHeader: ['multipart/related; type=application/octet-stream; transfer-syntax=*']` for the following reasons: - **Ensures Optimal Transfer Syntax**: By allowing the server to select the transfer syntax, the client is more likely to receive the image in a syntax that's well-suited for fast transmission and rendering. This might be the original syntax the image was stored in or another syntax that the server deems efficient. - **Avoids Transcoding**: Transcoding (converting from one transfer syntax to another) can be a resource-intensive process. Since the OHIF Viewer supports all transfer syntaxes, it is fine to accept any transfer syntax (transfer-syntax=*). This allows the server to send the images in their stored syntax, avoiding the need for costly on-the-fly conversions. This approach not only saves server resources but also reduces response times by leveraging the viewer's capability to handle various syntaxes directly. - **Faster Data Transfer**: Compressed transfer syntaxes generally result in smaller file sizes compared to uncompressed ones. Smaller files transmit faster over the network, leading to quicker load times for the end-user. By accepting any syntax, the client can take advantage of compression when available. However, if you would like to get compressed data in a specific transfer syntax, you can modify the `acceptHeader` configuration or `requestTransferSyntaxUID` configuration. #### Environment Variables We use environment variables at build and dev time to change the Viewer's behavior. We can update the `HTML_TEMPLATE` to easily change which extensions are registered, and specify a different `APP_CONFIG` to connect to an alternative data source (or even specify different default hotkeys). | Environment Variable | Description | Default | | -------------------- | -------------------------------------------------------------------------------------------------- | ------------------- | | `HTML_TEMPLATE` | Which [HTML template][html-templates] to use as our web app's entry point. Specific to PWA builds. | `index.html` | | `PUBLIC_URL` | The route relative to the host that the app will be served from. Specific to PWA builds. | `/` | | `APP_CONFIG` | Which [configuration file][config-file] to copy to output as `app-config.js` | `config/default.js` | | `PROXY_TARGET` | When developing, proxy requests that match this pattern to `PROXY_DOMAIN` | `undefined` | | `PROXY_DOMAIN` | When developing, proxy requests from `PROXY_TARGET` to `PROXY_DOMAIN` | `undefined` | | `OHIF_PORT` | The port to run the webpack server on for PWA builds. | `3000` | You can also create a new config file and specify its path relative to the build output's root by setting the `APP_CONFIG` environment variable. You can set the value of this environment variable a few different ways: - ~[Add a temporary environment variable in your shell](https://facebook.github.io/create-react-app/docs/adding-custom-environment-variables#adding-temporary-environment-variables-in-your-shell)~ - Previous `react-scripts` functionality that we need to duplicate with `dotenv-webpack` - ~[Add environment specific variables in `.env` file(s)](https://facebook.github.io/create-react-app/docs/adding-custom-environment-variables#adding-development-environment-variables-in-env)~ - Previous `react-scripts` functionality that we need to duplicate with `dotenv-webpack` - Using the `cross-env` package in a npm script: - `"build": "cross-env APP_CONFIG=config/my-config.js react-scripts build"` After updating the configuration, `yarn run build` to generate updated build output. [dcmjs-org]: https://server.dcmjs.org/dcm4chee-arc/aets/DCM4CHEE/wado [dicom-web]: https://en.wikipedia.org/wiki/DICOMweb [storescu]: https://support.dcmtk.org/docs/storescu.html [webpack-proxy]: https://webpack.js.org/configuration/dev-server/#devserverproxy [orthanc-docker-compose]: https://github.com/OHIF/Viewers/tree/master/platform/app/.recipes/Nginx-Orthanc [dcm4chee]: https://github.com/dcm4che/dcm4chee-arc-light [dcm4chee-docker]: https://github.com/dcm4che/dcm4chee-arc-light/wiki/Running-on-Docker [orthanc]: https://www.orthanc-server.com/ [orthanc-docker]: https://book.orthanc-server.com/users/docker.html [dicomcloud]: https://github.com/DICOMcloud/DICOMcloud [dicomcloud-install]: https://github.com/DICOMcloud/DICOMcloud#running-the-code [osirix]: https://www.osirix-viewer.com/ [horos]: https://www.horosproject.org/ [default-config]: https://github.com/OHIF/Viewers/blob/master/platform/app/public/config/default.js [html-templates]: https://github.com/OHIF/Viewers/tree/master/platform/app/public/html-templates [config-files]: https://github.com/OHIF/Viewers/tree/master/platform/app/public/config --- ## Configuring Tours in OHIF Source: https://docs.ohif.org/llm/configuration/tours.md #### Configuring Tours in OHIF with Shepherd.js In OHIF, you can configure guided tours for users by leveraging [Shepherd.js](https://shepherdjs.dev/), a JavaScript library for building feature tours. This page explains how you can define and customize these tours within your app configuration file. #### Overview Tours allow you to provide step-by-step guidance to users, explaining different features of your mode/extension or the viewer. Each tour is associated with a route and consists of several steps, each guiding the user through specific interactions in the viewer. #### Adding a Tour to your Configuration Here's how you can add a tour to your configuration file: ```javascript window.config = { customizationService: { 'ohif.tours': { $set: [ { id: 'basicViewerTour', route: '/viewer', steps: [ { id: 'zoom', title: 'Zooming In and Out', text: 'You can zoom the images using the right click.', attachTo: { element: '.viewport-element', on: 'left', }, advanceOn: { selector: '.cornerstone-viewport-element', event: 'CORNERSTONE_TOOLS_MOUSE_UP', }, }, ], }, ], }, }, }; ``` #### Explanation of Parameters #### `tours` Array Each item in the `tours` array defines a specific tour for a particular route. The object contains the following properties: - **`id`**: A unique identifier for the tour. This helps in tracking whether the tour has been shown. - **`route`**: The route in the application where the tour is applicable. When the user navigates to this route, the tour can automatically trigger if it hasn't been shown before. - **`steps`**: An array of steps that define the individual guide elements in the tour. Each step corresponds to a UI element and guides the user through interactions. - **`tourOptions`**: An object that allows you to configure the overall behavior of the tour, such as using a modal overlay or defining default step options. #### `steps` Array Each step defines a part of the tour. Here's a breakdown of the properties you can define: - **`id`**: A unique identifier for the step within the tour. - **`title`**: The title of the step, which appears at the top of the tooltip for the step. - **`text`**: The content or description of the step, explaining what the user needs to do or understand. - **`attachTo`**: Specifies where the step should be attached in the DOM. It includes: - `element`: A string selector or a DOM element that the step should attach to. - `on`: Specifies the position of the tooltip relative to the element (e.g., 'top', 'left', 'bottom', 'right'). - **`advanceOn`**: Defines an event that will automatically advance the tour to the next step. This is useful for actions like clicking a button or scrolling. - `selector`: The CSS selector for the element that triggers the advance. - `event`: The event name that advances the step, this can be a OHIF service event, or a cornerstone event, or any native JS event (e.g., 'click', 'CORNERSTONE_TOOLS_MOUSE_WHEEL'). - **`beforeShowPromise`**: A function that returns a promise. When the promise resolves, the rest of the show logic for the step will execute. You can use this to ensure that the target element is ready before the step shows. #### `tourOptions` The `tourOptions` object allows you to configure the overall behavior of the tour. Here's a breakdown of the available properties: - **`useModalOverlay`**: A boolean that, if set to `true`, places the tour steps above a darkened modal overlay. The overlay creates an opening around the target element so it can remain interactive. - **`defaultStepOptions`**: Default options that apply to all steps in the tour. You can override these in individual steps. The following are some options available: - `buttons`: An array of button objects that appear in the footer of each step. Each button can trigger actions like advancing the tour or skipping it. For example: - **`text`**: The label text on the button. - **`action`**: A function to execute when the button is clicked. You can advance the tour using `this.next()`, or complete it using `this.complete()`. - **`secondary`**: A boolean that, when set to `true`, styles the button as secondary (often for actions like skipping). #### `floatingUIOptions` You can define positioning options for the steps using **Floating UI** middleware. This helps control how the steps are positioned, especially near the browser edges. For example, you can ensure that the steps maintain a margin of 24px from the viewport edges by configuring `preventOverflow` middleware: ```javascript floatingUIOptions: { middleware: [ preventOverflow({ padding: 24 }), flip(), // Allows the step to flip if it is overflowing ] } ``` #### Shepherd.js Lifecycle Events Each step and tour can have lifecycle events like `show`, `hide`, `complete`, or `cancel`. These events allow you to hook into the tour’s lifecycle to perform actions when certain events are triggered. For example: ```javascript when: { show() { console.log('Step shown!'); }, hide() { console.log('Step hidden.'); } } ``` #### Customizing Your Tour Once you have a basic tour in place, you can extend it with more advanced features like custom scrolling behavior, dynamic elements, and event-based step advancement. For more details, check out the [Shepherd.js documentation](https://shepherdjs.dev/). #### Licensing All versions below 14.0 for Shepherd.JS is under the MIT license, if you wish to use any version above 14.0, you can visit the ShepherdJS website to learn about their pricing and plans [Shepherd.js](https://www.shepherdjs.dev/) [LICENSE](https://github.com/shipshapecode/shepherd?tab=License-1-ov-file#readme) #### Demo ![Tour Demo]() #### Conclusion By leveraging **Shepherd.js**, you can provide users with interactive and informative guided tours of the viewer. This can greatly improve the user experience and help users understand how to use key features. --- ## URL Parameters Source: https://docs.ohif.org/llm/configuration/url.md #### URL You can modify the URL at any state of the app to get the desired result. Here are different part of the APP that you can modify: #### WorkList The WorkList can be modified by adding the following query parameters: #### PatientName The patient name can be modified by adding the `PatientName` query parameter. ```js /?patientName=myQuery ``` #### MRN The MRN can be modified by adding the `MRN` query parameter. ```js /?mrn=myQuery ``` #### Description The description can be modified by adding the `Description` query parameter. ```js /?description=myQuery ``` #### Modality The modality can be modified by adding the `modalities` query parameter. ```js /?modalities=MG ``` #### Accession Number The accession number can be modified by adding the `accession` query parameter. ```js /?accession=myQuery ``` #### DataSources If you happen to have multiple data sources configured, you can filter the WorkList by adding the `dataSources` query parameter. ```js /?dataSources=orthanc ``` Note1: You should pass the `sourceName` of the data source in the configuration file (not the friendly name nor the name) Note2: Make sure that the configuration file you are using actually includes that data source. You cannot use a data source from another configuration file. :::tip You can add `sortBy` and `sortDirection` query parameters to sort the WorkList ```js /?patientName=myquery&sortBy=studyDate&sortDirection=ascending ``` ::: #### Viewer The Viewer can be modified by adding the following query parameters: #### Mode As you have seen before, the Viewer can be configured to be in different modes. Each mode registers their `id` in the URL. For instance ```js /viewer?StudyInstanceUIDs=1.3.6.1.4.1.14519.5.2.1.7009.2403.871108593056125491804754960339 ``` will open the viewer in the basic (longitudinal) mode with the StudyInstanceUID 1.3.6.1.4.1.14519.5.2.1.7009.2403.871108593056125491804754960339. And if configured, the same study can be opened in the `tmtv` mode ```js /tmtv?StudyInstanceUIDs=1.3.6.1.4.1.14519.5.2.1.7009.2403.871108593056125491804754960339 ``` #### StudyInstanceUIDs You can open more than one study in the Viewer by adding the `StudyInstanceUIDs` ```js /viewer?StudyInstanceUIDs=1.3.6.1.4.1.25403.345050719074.3824.20170125095722.1&StudyInstanceUIDs=1.3.6.1.4.1.25403.345050719074.3824.20170125095258.1 ``` :::tip You can use this feature to open a current and prior study in the Viewer. Read more in the [Hanging Protocol Module](../platform/extensions/modules/hpModule.md#matching-on-prior-study-with-uid) section. You can also use commas to separate values. ::: #### SeriesInstanceUIDs Sometimes you need to only retrieve a specific series in a study, you can do that by providing series level QIDO query parameters in the URL such as SeriesInstanceUIDs. This does NOT work with instance or study level parameters. For example: ```js http://localhost:3000/viewer?StudyInstanceUIDs=1.3.6.1.4.1.25403.345050719074.3824.20170125095438.5&SeriesInstanceUIDs=1.3.6.1.4.1.25403.345050719074.3824.20170125095449.8 ``` This will only open the viewer with one series (one displaySet) loaded, and no queries made for any other series. Sometimes you need to only retrieve a subset of series in a study, you can do that by providing more than one series, separated by commas. For example: ```js http://localhost:3000/viewer?StudyInstanceUIDs=1.3.6.1.4.1.25403.345050719074.3824.20170125095438.5&SeriesInstanceUIDs=1.3.6.1.4.1.25403.345050719074.3824.20170125095449.8,1.3.6.1.4.1.25403.345050719074.3824.20170125095506.10 ``` This will only open the viewer with two series (two displaySets) loaded, and no queries made for any other series. #### initialSeriesInstanceUID Alternatively, sometimes you want to just open the study on a specified series, but allowing other series to be present too. This is the same behavior can be achieved by using the `initialSeriesInstanceUID` parameter. For example: ```js http://localhost:3000/viewer?StudyInstanceUIDs=1.3.6.1.4.1.25403.345050719074.3824.20170125095438.5&initialSeriesInstanceUID=1.3.6.1.4.1.25403.345050719074.3824.20170125095449.8 ``` This will open all the series in the study, but the viewer will start with the series specified by the `initialSeriesInstanceUID` parameter. Note that you can combine these, if you want to load a specific set of series plus show an initial one as the first one selected, for example: ```js http://localhost:3000/viewer?StudyInstanceUIDs=1.3.6.1.4.1.25403.345050719074.3824.20170125095438.5&SeriesInstanceUIDs=1.3.6.1.4.1.25403.345050719074.3824.20170125095449.8,1.3.6.1.4.1.25403.345050719074.3824.20170125095506.10&initialSeriesInstanceUID=1.3.6.1.4.1.25403.345050719074.3824.20170125095506.10 ``` #### initialSopInstanceUID You can also specify the initial SOP Instance to be displayed by using the `initialSopInstanceUID` parameter. For example: ```js http://localhost:3000/viewer?StudyInstanceUIDs=1.3.6.1.4.1.25403.345050719074.3824.20170125095438.5&SeriesInstanceUIDs=1.3.6.1.4.1.25403.345050719074.3824.20170125095449.8&initialSopInstanceUID=1.3.6.1.4.1.25403.345050719074.3824.20170125095501.9 ``` This will open the study with the filtered series, and navigate to the slice 101 which happens to be the SOP Instance specified by the `initialSopInstanceUID` Note: again you can mix and match ```js http://localhost:3000/viewer?StudyInstanceUIDs=1.3.6.1.4.1.25403.345050719074.3824.20170125095438.5&SeriesInstanceUIDs=1.3.6.1.4.1.25403.345050719074.3824.20170125095449.8,1.3.6.1.4.1.25403.345050719074.3824.20170125095506.10&initialSeriesInstanceUID=1.3.6.1.4.1.25403.345050719074.3824.20170125095506.10&initialSopInstanceUID=1.3.6.1.4.1.25403.345050719074.3824.20170125095510.8 ``` You can even load the whole study and only specify the initial SOP Instance to be displayed. Although it will take more time to match, but it works as expected. ```js http://localhost:3000/viewer?StudyInstanceUIDs=1.3.6.1.4.1.25403.345050719074.3824.20170125095438.5&initialSopInstanceUID=1.3.6.1.4.1.25403.345050719074.3824.20170125095510.8 ``` #### hangingProtocolId You can select the initial hanging protocol to apply by using the hangingProtocolId parameter. The selected parameter must be available in a hangingProtocolModule registration, but does not have to be active. For instance for loading a specific study in mpr mode from start you can use: ```js http://localhost:3000/viewer?StudyInstanceUIDs=1.3.6.1.4.1.25403.345050719074.3824.20170125095438.5&hangingProtocolId=@ohif/mnGrid ``` #### token Although not recommended, you can use the token param in the URL which will inject the token into the Authorization header of the request. --- ## DataSources ### Configuration UI Source: https://docs.ohif.org/llm/configuration/dataSources/configuration-ui.md #### Configuration UI OHIF provides for a generic mechanism for configuring a data source. This is most useful for those organizations with several data sources that share common (path) hierarchies. For example, an organization may have several DICOM stores in the Google Cloud Healthcare realm where each is organized into various projects, location, data sets and DICOM stores. By implementing the `BaseDataSourceConfigurationAPI` and `BaseDataSourceConfigurationAPIItem` in an [OHIF extension](../../platform/extensions/index.md), a data source can be made configurable via the generic UI as is depicted below for a Google Cloud Healthcare data source. ![Data source configuration UI](../../assets/img/data-source-configuration-ui.png) :::tip A datasource root URI can be [fully or partially specified](../../deployment/google-cloud-healthcare.md#configuring-google-cloud-healthcare-as-a-datasource-in-ohif) in the OHIF configuration file. ::: #### `BaseDataSourceConfigurationAPIItem` interface Each (path) item of a data source is represented by an instance of this interface. At the very least each of these items must expose two properties: |Property |Description| |---------|-----------| |id|a string that uniquely identifies the item| |name|a human readable name for the item| Note that information such as where in the path hierarchy the item exists has been omitted, but can be added in any concrete class that might implement this interface. For example, the the Google Cloud Healthcare implementation of this interface (`GoogleCloudDataSourceConfigurationAPIItem`) adds an `itemType` (i.e. projects, locations, datasets, or dicomStores) and `url`. #### `BaseDataSourceConfigurationAPI` interface The implementation of this interface is at the heart of the configuration process. It possesses several methods for building up a data source path based on various `BaseDataSourceConfigurationAPIItem` objects that are set via calls to the `setCurrentItem` method. The constructor for the concrete class implementation should accept whatever parameters are necessary for configuring the data source. One argument to the constructor must be the string identifying the name of the data source to be configured. Furthermore, considering that the `ExtensionManager` possesses API to configure and update data sources, it too will likely be an argument to the constructor. See [Creation via Customization Module](#creation-via-customization-module) for more information on how the constructor is invoked via a factory method. For an example implementation of this interface see `GoogleCloudDataSourceConfigurationAPI`. #### Interface Methods Each of the following subsections lists a method of the interface with a description detailing what the method should do. #### `getItemLabels` Gets the i18n labels (i.e. the i18n lookup keys) for each of the configurable items of the data source configuration API. For example, for the Google Cloud Healthcare API, this would be `['Project', 'Location', 'Data set', 'DICOM store']`. Besides the configurable item labels themselves, several other string look ups are used base on EACH of the labels returned by this method. For instance, for the label `{itemLabel}`, the following strings are fetched for translation... 1. No `{itemLabel}` available - used to indicate no such items are available - for example, for Google, No Project available would be 'No projects available' 2. Select `{itemLabel}` - used to direct selection of the item - for example, for Google, Select Project would be 'Select a project' 3. Error fetching `{itemLabel}` list - used to indicate an error occurred fetching the list of items - usually accompanied by the error itself - for example, for Google, Error fetching Project list would be 'Error fetching projects' 4. Search `{itemLabel}` list - used as the placeholder text for filtering a list of items - for example, for Google, Search Project list would be 'Search projects' #### `initialize` Initializes the cloud server API and returns the top-level sub-items that can be chosen to begin the process of configuring a data source. For example, for the Google Cloud Healthcare API, this would perform the initial request to fetch the top level projects for the logged in user account. #### `setCurrentItem` Sets the current path item that is passed as an argument to the method and returns the sub-items of that item that can be further chosen to configure a data source. When setting the last configurable item of the data source (path), this method returns an empty list AND configures the active data source with the selected items path. For example, for the Google Cloud Healthcare API, this would take the current item (say a data set) and queries and returns its sub-items (i.e. all of the DICOM stores contained in that data set). Furthermore, whenever the item to set is a DICOM store, the Google Cloud Healthcare API implementation would update the OHIF data source associated with this instance to point to that DICOM store. #### `getConfiguredItems` Gets the list of items currently configured for the data source associated with this API instance. The resultant array must be the same length as the result of `getItemLabels`. Furthermore the items returned should correspond (index-wise) with the labels returned from `getItemLabels`. #### Creation via Customization Module The generic UI (i.e. `DataSourceConfigurationComponent`) uses the [OHIF UI customization service](../../platform/services/customization-service/customizationService.md) to instantiate the `BaseDataSourceConfigurationAPI` instance to configure a data source. A UI configurable data source should have a `configurationAPI` field as part of its `configuration` in the OHIF config file. The `configurationAPI` value is the customization id of the customization module that provides the factory method to instantiate the `BaseDataSourceConfigurationAPI` instance. For example, the following is a snippet of a Google Cloud Healthcare data source configuration. ```js dataSources: [ { namespace: '@ohif/extension-default.dataSourcesModule.dicomweb', sourceName: 'google-dicomweb', configuration: { name: 'GCP', wadoUriRoot: 'https://healthcare.googleapis.com/v1/projects/ohif-cloud-healthcare/locations/us-east4/...', ... configurationAPI: 'ohif.dataSourceConfigurationAPI.google', ... }, }, ] ``` This suggests that the factory method is provided by the `'ohif.dataSourceConfigurationAPI.google'` customization module. That customization module is provided by the `default` extension's `getCustomizationModule` and looks something like the following snippet of code. Notice that the factory method's name MUST be `factory` and accept one argument - the data source name. Furthermore note how the constructor is invoked with anything required by the concrete configuration API class. ```js export default function getCustomizationModule({ servicesManager, extensionManager, }) { return [ { name: 'default', value: [ { // The factory for creating an instance of a BaseDataSourceConfigurationAPI for Google Cloud Healthcare id: 'ohif.dataSourceConfigurationAPI.google', factory: (dataSourceName: string) => new GoogleCloudDataSourceConfigurationAPI( dataSourceName, servicesManager, extensionManager ), }, ], }, ]; } ``` --- ### DICOM JSON Source: https://docs.ohif.org/llm/configuration/dataSources/dicom-json.md #### DICOM JSON You can launch the OHIF Viewer with a JSON file which points to a DICOMWeb server as well as a list of study and series instance UIDs along with metadata. An example would look like `https://viewer.ohif.org/viewer/dicomjson?url=https://ohif-dicom-json-example.s3.amazonaws.com/LIDC-IDRI-0001.json` As you can see the url to the location of the JSON file is passed in the query after the `dicomjson` string, which is `https://ohif-dicom-json-example.s3.amazonaws.com/LIDC-IDRI-0001.json` (this json file has been generated by OHIF team and stored in an amazon s3 bucket for the purpose of the guide). #### DICOM JSON sample Here we are using the LIDC-IDRI-0001 case which is a sample of the LIDC-IDRI dataset. Let's have a look at the JSON file: #### Metadata JSON file stores the metadata for the study level, series level and instance level. A JSON launch file should follow the same structure as the one below. :::tip You can use our script to generate the JSON file from a hosted endpoint. See `.scripts/dicom-json-generator.js` You could run it like this: ```bash node .scripts/dicom-json-generator.js '/path/to/study/folder' 'url/to/dicom/server/folder' 'json/output/file.json' ``` Some modalities require additional metadata to be added to the JSON file. You can read more about the minimum amount of metadata required for the viewer to work [here](../../faq/technical#what-are-the-list-of-required-metadata-for-the-ohif-viewer-to-work). We will handle this in the script. For example, the script will add the CodeSequences for SR in order to display the measurements in the viewer. ::: Note that at the instance level metadata we are storing both the `metadata` and also the `url` for the dicom file on the dicom server. In this case we are referring to `dicomweb:https://ohif-dicom-json-example.s3.amazonaws.com/LIDC-IDRI-0001/01-01-2000-30178/3000566.000000-03192/1-001.dcm` which is stored in another directory in our s3. (You can actually try downloading the dicom file by opening the url in your browser). The URL to the script in the given example is `https://ohif-dicom-json-example.s3.amazonaws.com/LIDC-IDRI-0001/01-01-2000-30178`. This URL serves as the parent directory that contains all the series within their respective folders. ```json { "studies": [ // first study metadata { "StudyInstanceUID": "1.3.6.1.4.1.14519.5.2.1.6279.6001.298806137288633453246975630178", "StudyDate": "20000101", "StudyTime": "", "PatientName": "", "PatientID": "LIDC-IDRI-0001", "AccessionNumber": "", "PatientAge": "", "PatientSex": "", "series": [ // first series metadata { "SeriesInstanceUID": "1.3.6.1.4.1.14519.5.2.1.6279.6001.179049373636438705059720603192", "SeriesNumber": 3000566, "Modality": "CT", "SliceThickness": 2.5, "instances": [ // first instance metadata { "metadata": { "Columns": 512, "Rows": 512, "InstanceNumber": 1, "SOPClassUID": "1.2.840.10008.5.1.4.1.1.2", "PhotometricInterpretation": "MONOCHROME2", "BitsAllocated": 16, "BitsStored": 16, "PixelRepresentation": 1, "SamplesPerPixel": 1, "PixelSpacing": [0.703125, 0.703125], "HighBit": 15, "ImageOrientationPatient": [1, 0, 0, 0, 1, 0], "ImagePositionPatient": [-166, -171.699997, -10], "FrameOfReferenceUID": "1.3.6.1.4.1.14519.5.2.1.6279.6001.229925374658226729607867499499", "ImageType": ["ORIGINAL", "PRIMARY", "AXIAL"], "Modality": "CT", "SOPInstanceUID": "1.3.6.1.4.1.14519.5.2.1.6279.6001.262721256650280657946440242654", "SeriesInstanceUID": "1.3.6.1.4.1.14519.5.2.1.6279.6001.179049373636438705059720603192", "StudyInstanceUID": "1.3.6.1.4.1.14519.5.2.1.6279.6001.298806137288633453246975630178", "WindowCenter": -600, "WindowWidth": 1600, "SeriesDate": "20000101" }, "url": "dicomweb:https://ohif-dicom-json-example.s3.amazonaws.com/LIDC-IDRI-0001/01-01-2000-30178/3000566.000000-03192/1-001.dcm" }, // second instance metadata { "metadata": { "Columns": 512, "Rows": 512, "InstanceNumber": 2, "SOPClassUID": "1.2.840.10008.5.1.4.1.1.2", "PhotometricInterpretation": "MONOCHROME2", "BitsAllocated": 16, "BitsStored": 16, "PixelRepresentation": 1, "SamplesPerPixel": 1, "PixelSpacing": [0.703125, 0.703125], "HighBit": 15, "ImageOrientationPatient": [1, 0, 0, 0, 1, 0], "ImagePositionPatient": [-166, -171.699997, -12.5], "FrameOfReferenceUID": "1.3.6.1.4.1.14519.5.2.1.6279.6001.229925374658226729607867499499", "ImageType": ["ORIGINAL", "PRIMARY", "AXIAL"], "Modality": "CT", "SOPInstanceUID": "1.3.6.1.4.1.14519.5.2.1.6279.6001.512235483218154065970649917292", "SeriesInstanceUID": "1.3.6.1.4.1.14519.5.2.1.6279.6001.179049373636438705059720603192", "StudyInstanceUID": "1.3.6.1.4.1.14519.5.2.1.6279.6001.298806137288633453246975630178", "WindowCenter": -600, "WindowWidth": 1600, "SeriesDate": "20000101" }, "url": "dicomweb:https://ohif-dicom-json-example.s3.amazonaws.com/LIDC-IDRI-0001/01-01-2000-30178/3000566.000000-03192/1-002.dcm" } // ..... other instances metadata ] } // ... other series metadata ], "NumInstances": 133, "Modalities": "CT" } // second study metadata ] } ``` ![](../../assets/img/dicom-json.png) #### Local Demo You can run OHIF with a JSON data source against you local datasets (given that their JSON metadata is extracted). First you need to put the JSON file and the folder containing the dicom files inside your `public` folder. Since files are served from your local server the `url` for the JSON file will be `http://localhost:3000/LIDC-IDRI-0001.json` and the dicom files will be `dicomweb:http://localhost:3000/LIDC-IDRI-0001/01-01-2000-30178/3000566.000000-03192/1-001.dcm`. After `yarn install` and running `yarn dev` and opening the browser at `http://localhost:3000/viewer/dicomjson?url=http://localhost:3000/LIDC-IDRI-0001.json` will display the viewer. Download JSON file from [here](https://www.dropbox.com/sh/zvkv6mrhpdze67x/AADLGK46WuforD2LopP99gFXa?dl=0) Sample DICOM files can be downloaded from [TCIA](https://wiki.cancerimagingarchive.net/display/Public/LIDC-IDRI) or directly from [here](https://www.dropbox.com/sh/zvkv6mrhpdze67x/AADLGK46WuforD2LopP99gFXa?dl=0) Your public folder should look like this: ![](../../assets/img/dicom-json-public.png) :::tip It is important to URL encode the `url` query parameter especially if the `url` parameter itself also contains query parameters. So for example, `http://localhost:3000/viewer/dicomjson?url=http://localhost:3000/LIDC-IDRI-0001.json?key0=val0&key1=val1` should be... `http://localhost:3000/viewer/dicomjson?url=http://localhost:3000/LIDC-IDRI-0001.json?key0=val0%26key1=val1` Notice the ampersand (`&`) is encoded as `%26`. ::: :::note When hosting the DICOM JSON files, it is important to be aware that certain providers do not automatically handle the 404 error and fallback to index.html. For example, Netlify handles this, but Azure does not. Consequently, when you attempt to access a link with a specific URL, a 404 error will be displayed. This issue also occurs locally, where the http-server does not handle it. However, if you utilize the `serve` package (npx serve ./dist -c ../public/serve.json), it effectively addresses this problem. ::: --- ### DICOMweb Proxy Source: https://docs.ohif.org/llm/configuration/dataSources/dicom-web-proxy.md #### DICOMweb Proxy You can launch the OHIF Viewer with a url that returns a JSON file which contains a DICOMWeb configuration. The DICOMweb Proxy constructs a DICOMweb datasource and delegates subsequent requests for metadata and images to that. Usage is similar to that of the [DICOM JSON](./dicom-json.md) datasource and might look like `https://viewer.ohif.org/viewer/dicomwebproxy?url=https://ohif-dicom-json-example.s3.amazonaws.com/dicomweb.json` The url to the location of the JSON file is passed in the query after the `dicomwebproxy` string, which is `https://ohif-dicom-json-example.s3.amazonaws.com/dicomweb.json` (this json file does not exist at the moment of this writing). #### DICOMweb JSON configuration sample The json returned by the url in this example contains a dicomweb configuration (see [DICOMweb](dicom-web.md)), in a "servers" object, which is then used to construct a dynamic DICOMweb datasource to delegate requests to. Here is an example configuration that might be returned using the url parameter. ```json { "servers": { "dicomWeb": [ { "name": "DCM4CHEE", "wadoUriRoot": "https://server.dcmjs.org/dcm4chee-arc/aets/DCM4CHEE/wado", "qidoRoot": "https://server.dcmjs.org/dcm4chee-arc/aets/DCM4CHEE/rs", "wadoRoot": "https://server.dcmjs.org/dcm4chee-arc/aets/DCM4CHEE/rs", "qidoSupportsIncludeField": true, "supportsReject": true, "imageRendering": "wadors", "thumbnailRendering": "wadors", "enableStudyLazyLoad": true, "supportsFuzzyMatching": true, "supportsWildcard": true } ] } } ``` The DICOMweb Proxy expects the json returned by the url parameter it is invoked with to include a servers object which contains a "dicomWeb" configuration array as above. It will only consider the first array item in the dicomWeb configuration. --- ### DICOMweb Source: https://docs.ohif.org/llm/configuration/dataSources/dicom-web.md #### DICOMweb #### Set up a local DICOM server ATTENTION! Already have a remote or local server? Skip to the [configuration section](#configuration-learn-more) below. While the OHIF Viewer can work with any data source, the easiest to configure are the ones that follow the [DICOMWeb][dicom-web] spec. 1. Choose and install an Image Archive 2. Upload data to your archive (e.g. with DCMTK's [storescu][storescu] or your archive's web interface) 3. Keep the server running For our purposes, we will be using `Orthanc`, but you can see a list of [other Open Source options](#open-source-dicom-image-archives) below. #### Requirements - Docker - [Docker for Mac](https://docs.docker.com/docker-for-mac/) - [Docker for Windows (recommended)](https://docs.docker.com/docker-for-windows/) - [Docker Toolbox for Windows](https://docs.docker.com/toolbox/toolbox_install_windows/) _Not sure if you have `docker` installed already? Try running `docker --version` in command prompt or terminal_ > If you are using `Docker Toolbox` you need to change the _PROXY_DOMAIN_ > parameter in _platform/app/package.json_ to http://192.168.99.100:8042 or > the ip docker-machine ip throws. This is the value [`WebPack`][webpack-proxy] > uses to proxy requests #### Open Source DICOM Image Archives There are a lot of options available to you to use as a local DICOM server. Here are some of the more popular ones: | Archive | Installation | | --------------------------------------------- | ---------------------------------- | | [DCM4CHEE Archive 5.x][dcm4chee] | [W/ Docker][dcm4chee-docker] | | [Orthanc][orthanc] | [W/ Docker][orthanc-docker] | | [DICOMcloud][dicomcloud] (**DICOM Web only**) | [Installation][dicomcloud-install] | | [OsiriX][osirix] (**Mac OSX only**) | Desktop Client | | [Horos][horos] (**Mac OSX only**) | Desktop Client | _Feel free to make a Pull Request if you want to add to this list._ Below, we will focus on `DCM4CHEE` and `Orthanc` usage: #### Running Orthanc _Start Orthanc:_ ```bash #### Runs orthanc so long as window remains open yarn run orthanc:up ``` _Upload your first Study:_ 1. Navigate to [Orthanc's web interface](http://localhost:8042/ui/app/index.html#/) at `http://localhost:8042/ui/app/index.html#/` in a web browser. 2. In the left you can see the upload button where you can drag and drop your DICOM files #### Orthanc: Learn More You can see the `docker-compose.yml` file this command runs at [`/platform/app/.recipes/Nginx-Orthanc`][orthanc-docker-compose], and more on Orthanc for Docker in [Orthanc's documentation][orthanc-docker]. #### Connecting to Orthanc Now that we have a local Orthanc instance up and running, we need to configure our web application to connect to it. Open a new terminal window, navigate to this repository's root directory, and run: ```bash #### If you haven't already, enable yarn workspaces yarn config set workspaces-experimental true #### Restore dependencies yarn install #### Run our dev command, but with the local orthanc config yarn run dev:orthanc ``` #### Configuration: Learn More > For more configuration fun, check out the > [Essentials Configuration](../configurationFiles.md) guide. Let's take a look at what's going on under the hood here. `yarn run dev:orthanc` is running the `dev:orthanc` script in our project's `package.json` (inside `platform/app`). That script is: ```js cross-env NODE_ENV=development PROXY_TARGET=/dicom-web PROXY_DOMAIN=http://localhost:8042 APP_CONFIG=config/docker-nginx-orthanc.js webpack-dev-server --config .webpack/webpack.pwa.js -w ``` - `cross-env` sets three environment variables - PROXY_TARGET: `/dicom-web` - PROXY_DOMAIN: `http://localhost:8042` - APP_CONFIG: `config/docker-nginx-orthanc.js` - `webpack-dev-server` runs using the `.webpack/webpack.pwa.js` configuration file. It will watch for changes and update as we develop. `PROXY_TARGET` and `PROXY_DOMAIN` tell our development server to proxy requests to `Orthanc`. This allows us to bypass CORS issues that normally occur when requesting resources that live at a different domain. The `APP_CONFIG` value tells our app which file to load on to `window.config`. By default, our app uses the file at `/platform/app/public/config/default.js`. Here is what that configuration looks like: ```js window.config = { routerBasename: null, extensions: [], modes: [], showStudyList: true, dataSources: [ { namespace: '@ohif/extension-default.dataSourcesModule.dicomweb', sourceName: 'dicomweb', configuration: { friendlyName: 'dcmjs DICOMWeb Server', name: 'DCM4CHEE', wadoUriRoot: 'https://server.dcmjs.org/dcm4chee-arc/aets/DCM4CHEE/wado', qidoRoot: 'https://server.dcmjs.org/dcm4chee-arc/aets/DCM4CHEE/rs', wadoRoot: 'https://server.dcmjs.org/dcm4chee-arc/aets/DCM4CHEE/rs', qidoSupportsIncludeField: true, supportsReject: true, imageRendering: 'wadors', thumbnailRendering: 'wadors', enableStudyLazyLoad: true, supportsFuzzyMatching: true, supportsWildcard: true, }, }, ], defaultDataSourceName: 'dicomweb', }; ``` #### Data Source Configuration Options The following properties can be added to the `configuration` property of each data source. #### `dicomUploadEnabled` A boolean indicating if the DICOM upload to the data source is permitted/accepted or not. A value of true provides a link on the OHIF work list page that allows for DICOM files from the local file system to be uploaded to the data source :::tip The [OHIF plugin for Orthanc](https://book.orthanc-server.com/plugins/ohif.html) by default utilizes the DICOM JSON data source and it has been discovered that only those studies uploaded to Orthanc AFTER the plugin has been installed are available as DICOM JSON. As such, if the OHIF plugin for Orthanc is desired for studies uploaded prior to installing the plugin, then consider switching to using [DICOMweb instead](https://book.orthanc-server.com/plugins/ohif.html#using-dicomweb). ::: ![toolbarModule-layout](../../assets/img/uploader.gif) Don't forget to add the customization to the config as well ```js customizationService: { dicomUploadComponent: '@ohif/extension-cornerstone.customizationModule.cornerstoneDicomUploadComponent', }, ``` #### `singlepart` A comma delimited string specifying which payloads the data source responds with as single part. Those not listed are considered multipart. Values that can be included here are `pdf`, `video`, `bulkdata`, `thumbnail` and `image`. For DICOM video and PDF it has been found that Orthanc delivers multipart, while DCM4CHEE delivers single part. Consult the DICOM conformance statement for your particular data source to determine which payload types it delivers. To learn more about how you can configure the OHIF Viewer, check out our [Configuration Guide](../configurationFiles.md). #### DICOM PDF See the [`singlepart`](#singlepart) data source configuration option. #### DICOM Video See the [`singlepart`](#singlepart) data source configuration option. #### BulkDataURI The `bulkDataURI` configuration option alters how the datasource uses the bulkdata end points for retrieving metadata if the data was originally not included in the response from the server. This is useful for the metadata information that are big and can/should be retrieved in a separate request. In case the bulkData URI is relative (instead of absolute) the `relativeResolution` option can be used to specify the resolution of the relative URI. The possible values are `studies`, `series`. The default value is shown below (this will be added if not included in the config). ```js bulkDataURI: { enabled: true, relativeResolution: 'series', }, ``` The other options allowed are: * transform - to take the string and return an updated string * startsWith and prefixWith - to remove a standard prefix and add an optional prefix * Used primarily for a reverse proxy or change in URL naming * relativeResolution - used to set bulkdata paths to studies resolution for incorrect bulkdata paths #### Running DCM4CHEE dcm4che is a collection of open source applications for healthcare enterprise written in Java programming language which implements DICOM standard. dcm4chee (extra 'e' at the end) is dcm4che project for an Image Manager/Image Archive which provides storage, retrieval and other functionalities. You can read more about dcm4chee in their website [here](https://www.dcm4che.org/) DCM4chee installation is out of scope for these tutorials and can be found [here](https://github.com/dcm4che/dcm4chee-arc-light/wiki/Run-minimum-set-of-archive-services-on-a-single-host) An overview of steps for running OHIF Viewer using a local DCM4CHEE is shown below:
[dcm4chee]: https://github.com/dcm4che/dcm4chee-arc-light [dcm4chee-docker]: https://github.com/dcm4che/dcm4chee-arc-light/wiki/Running-on-Docker [orthanc]: https://www.orthanc-server.com/ [orthanc-docker]: http://book.orthanc-server.com/users/docker.html [dicomcloud]: https://github.com/DICOMcloud/DICOMcloud [dicomcloud-install]: https://github.com/DICOMcloud/DICOMcloud#running-the-code [osirix]: http://www.osirix-viewer.com/ [horos]: https://www.horosproject.org/ [default-config]: https://github.com/OHIF/Viewers/blob/master/platform/app/public/config/default.js [html-templates]: https://github.com/OHIF/Viewers/tree/master/platform/app/public/html-templates [config-files]: https://github.com/OHIF/Viewers/tree/master/platform/app/public/config [storescu]: http://support.dcmtk.org/docs/storescu.html [webpack-proxy]: https://webpack.js.org/configuration/dev-server/#devserverproxy --- ### Data Source Introduction Source: https://docs.ohif.org/llm/configuration/dataSources/introduction.md #### Data Source The internal data structure of OHIF’s metadata follows naturalized DICOM JSON, a format pioneered by `dcmjs`. In short DICOM metadata headers with DICOM Keywords instead of tags and sequences as arrays, for easy development and clear code. Here in this section we will discuss couple of data sources that are commonly used and OHIF has provided the implementation for them. #### Custom Data Source Do you have a custom data source? or a custom data that you want to use in OHIF? You can easily write a data source to map your data to OHIF’s native format. You can read more in the [Data Source Module](../../platform/extensions/modules/data-source.md) --- ### Static DICOMweb Files Source: https://docs.ohif.org/llm/configuration/dataSources/static-files.md #### Static DICOMweb Files for Enhanced Performance This section describes how to generate and serve static DICOMweb files, significantly improving the performance of your OHIF Viewer setup. These files are pre-processed and compressed, minimizing storage space and reducing serving time to the bare minimum (disk read and HTTP stream write). #### Static-DICOMWeb Project The core tool for this process is the `static-wado` project, available on GitHub: [static-wado]: https://github.com/RadicalImaging/Static-DICOMWeb This project contains two main components: * **`static-wado-creator`:** Converts raw DICOM files into a DICOMweb-compliant directory structure, optimizing them for efficient serving. * **`static-wado-webserver`:** A simple web server specifically designed to serve the generated static DICOMweb files. #### Prerequisites - Node.js and npm (or yarn) installed on your system. #### Installation 1. **Clone the Repository:** ```bash git clone https://github.com/RadicalImaging/Static-DICOMWeb cd Static-DICOMWeb ``` 2. **Install Dependencies:** ```bash yarn install ``` #### Generating Static DICOMweb Files 1. **Prepare your DICOM data:** Organize your DICOM files into a directory. For example `/Users/alireza/dicom/test-static-script/ACRIN-CT`. 2. **Convert to DICOMweb Structure:** Use the `mkdicomweb.js` script from the `static-wado-creator` package to create the DICOMweb directory: ```bash node packages/static-wado-creator/bin/mkdicomweb.js '/Users/alireza/dicom/test-static-script/ACRIN-CT' -o '/Users/alireza/dicom/test-static-script/output' ``` * **Replace:** * `/Users/alireza/dicom/test-static-script/ACRIN-CT` with the path to your directory of DICOM files. * `/Users/alireza/dicom/test-static-script/output` with your desired output directory for the DICOMweb structure. This command will generate a directory structure similar to this in your output location: ![alt text](../../assets/img/static-dicom-web.png) #### Serving Static Files with the Web Server 1. **Start the Server:** Run the `dicomwebserver.mjs` script from the `static-wado-webserver` package, specifying the port and the DICOMweb directory: ```bash node packages/static-wado-webserver/bin/dicomwebserver.mjs -p 3001 -o /Users/alireza/dicom/test-static-script/output ``` * **`-p 3001`:** Sets the server to listen on port 3001. You can change this if needed. * **`-o /Users/alireza/dicom/test-static-script/output`:** Specifies the path to your generated DICOMweb directory. :::info The `-p` (port) and `-o` (output directory) flags are used to configure the server. ::: #### Running OHIF Viewer with Static Data 1. **Use the `local_static.js` Configuration:** Start the OHIF Viewer in development mode using the provided `local_static.js` configuration file: ```bash yarn dev:static ``` 2. **Configuration Details:** The `local_static.js` configuration file is pre-configured to point to: ```js qidoRoot: 'http://localhost:3001/dicomweb', wadoRoot: 'http://localhost:3001/dicomweb', ``` This matches the default port (3001) used by the `static-wado-webserver`. :::info If you change the port or output directory when running the `static-wado-webserver`, you **must** also update the `qidoRoot` and `wadoRoot` values in your `local_static.js` configuration file accordingly to ensure the OHIF Viewer can access the data. ::: --- # Deployment ## Authorization and Authentication Source: https://docs.ohif.org/llm/deployment/authorization.md #### Authorization and Authentication The OHIF Viewer can be configured to work with authorization servers that support one or more of the OpenID-Connect authorization flows. The Viewer finds it's OpenID-Connect settings on the oidc configuration key. You can set these values in your configuration files. For instance you can take a look at our `google.js` configuration file. ```js oidc: [ { // ~ REQUIRED authority: 'https://accounts.google.com', client_id: '723928408739-k9k9r3i44j32rhu69vlnibipmmk9i57p.apps.googleusercontent.com', redirect_uri: '/callback', response_type: 'id_token token', scope: 'email profile openid https://www.googleapis.com/auth/cloudplatformprojects.readonly https://www.googleapis.com/auth/cloud-healthcare', // email profile openid // ~ OPTIONAL post_logout_redirect_uri: '/logout-redirect.html', revoke_uri: 'https://accounts.google.com/o/oauth2/revoke?token=', automaticSilentRenew: true, revokeAccessTokenOnSignout: true, }, ], ``` You need to provide the following information: - authority: The URL of the authorization server. - client_id: The client id of your application (provided by the authorization server). - redirect_uri: The callback URL of your application. - response_type: The response type of the authorization flow (e.g. id_token token, [learn more about different flows](https://darutk.medium.com/diagrams-of-all-the-openid-connect-flows-6968e3990660)). - scope: The scopes that your application needs to access - post_logout_redirect_uri: The URL that the user will be redirected to after logout. - revoke_uri: The URL that the user will be redirected to after logout. - automaticSilentRenew: If true, the user will be automatically logged in after the token expires. - revokeAccessTokenOnSignout: If true, the access token will be revoked on logout. #### How it works The Viewer uses the `userAuthenticationService` to set the OpenID-Connect settings. The `userAuthenticationService` is a singleton service that is responsible for authentication and authorization. It is initialized by the app and you can grab it from the `servicesManager` ```js const userAuthenticationService = servicesManager.services.userAuthenticationService; ``` Then the userAuthenticationService will inject the token as Authorization header in the requests that are sent to the server (both metadata and pixelData). #### Token based authentication in URL Sometimes (although not recommended), some servers like to send the token in the query string. In this case, the viewer will automatically grab the token from the query string and add it to the userAuthenticationService and remove it from the query string (to prevent it from being logged in the console in future requests). and example would be ```js http://localhost:3000/viewer?StudyInstanceUIDs=1.2.3.4.5.6.6.7&token=e123125jsdfahsdf ``` #### Implicit Flow vs Authorization Code Flow The Viewer supports both the Implicit Flow and the Authorization Code Flow. The Implicit Flow is the default currently, as it is easier to set up and use. However, you can opt for better security by using the Authorization Code Flow. To do so, add `useAuthorizationCodeFlow` to the configuration and change the `response_type` from `id_token token` to `code`. Read more about Implicit Flow vs Authorization Code Flow [here](https://documentation.openiddict.com/guides/choosing-the-right-flow.html#:~:text=The%20implicit%20flow%20is%20similar,when%20using%20response_mode%3Dform_post%20) and [here](https://medium.com/@alysachan830/the-basics-of-oauth-2-0-authorization-code-implicit-flow-state-and-pkce-ed95d3478e1c) ```js oidc: [ { authority: 'https://accounts.google.com', client_id: '723928408739-k9k9r3i44j32rhu69vlnibipmmk9i57p.apps.googleusercontent.com', redirect_uri: '/callback', scope: 'email profile openid', post_logout_redirect_uri: '/logout-redirect.html', revoke_uri: 'https://accounts.google.com/o/oauth2/revoke?token=', revokeAccessTokenOnSignout: true, automaticSilentRenew: true, // CHANGE THESE ***************************** response_type: 'code', useAuthorizationCodeFlow: true, }, ], ``` In fact, since browsers are blocking third-party cookies, the Implicit Flow will cease functioning in the future (not specific to OHIF). Read more [here](https://support.okta.com/help/s/article/FAQ-How-Blocking-Third-Party-Cookies-Can-Potentially-Impact-Your-Okta-Environment?language=en_US). It is recommended to use the Authorization Code Flow and begin migrating to it. :::note For the Authorization Code Flow, when authenticating against Google, you must add the `client_secret` to the configuration as well. Unfortunately, this seems to occur only with Google. ::: --- ## Microsoft Azure Integration Source: https://docs.ohif.org/llm/deployment/azure.md #### Microsoft Azure This guide explains how to configure a DICOM datasource in OHIF using Azure Healthcare APIs. It focuses on the configuration details and parameters necessary for integration. --- #### Configuring Azure Healthcare APIs as a DICOMweb Data Source Follow these steps to set up Azure as a DICOM datasource for the OHIF Viewer. --- #### Azure AD Registration: 1. Navigate to the Azure Portal. 2. Select **"Azure Active Directory"** > **"App registrations"** > **"New registration"**. 3. Name your application. 4. Under **"Supported account types"**, select **"Accounts in any organizational directory (Any Azure AD directory - Multitenant) and personal Microsoft accounts (e.g. Skype, Xbox)"**. 5. Enter the following values in your redirect URI tab: ![Redirect URI](../assets/img/azure4.png) --- #### API Permissions: 1. Under your registered application, go to **"API permissions"**. 2. Click **"Add a permission"**. 3. Choose the Azure API for DICOM (**Dicom.ReadWrite**). If you can't find it, refer to the "Configure Azure DICOMWEB Service" section and then return to this step. ![API Permissions](../assets/img/azure1.png) --- #### Authentication: 1. Under **"Authentication"**, check the **"ID tokens"** box since we are using OpenID Connect. --- #### App Client ID and Tenant ID: 1. Copy your app client ID and tenant ID to prepare for use in configuring an OHIF datasource. --- #### Consent: 1. The first time a user logs in, they will be prompted to consent to the permissions your application has requested. 2. Once they grant consent, your application can use the obtained access token to call the specific Microsoft API on behalf of the user. ![Consent](../assets/img/azure5.png) --- #### Configure Azure DICOMWEB Service: 1. **Create a Health Data Services workspace**: ![Create Workspace](../assets/img/azure6.png) 2. Visit the newly created workspace and press **"Deploy DICOM Service"**: ![Deploy DICOM Service](../assets/img/azure7.png) 3. After the DICOM service is deployed, visit the **"CORS headers"** section: ![CORS Headers](../assets/img/azure8.png) 4. Set the headers and origins to `*` and specify the HTTP methods you'd like to use: ![Set Headers](../assets/img/azure9.png) 5. Save the changes. 6. Add the Microsoft emails of the users you'd like to grant access to your DICOM service in the **"Access control"** section and assign them the **"DICOM Data Owner"** role (or other roles depending on your requirements): ![Access Control](../assets/img/azure10.png) 7. Copy your DICOM service URL to prepare it for usage in OHIF as a datasource: ![DICOM Service URL](../assets/img/azure3.png) 8. Upload your DICOM files to your service. --- #### 1. Configure OIDC Authentication Azure uses OpenID Connect (OIDC) for authentication. Update the OIDC section in your configuration file with the following parameters: ```json "oidc": [ { "redirect_uri": "/callback", "response_type": "id_token token", "scope": "openid https://dicom.healthcareapis.azure.com/Dicom.ReadWrite", "post_logout_redirect_uri": "/logout-redirect.html", "automaticSilentRenew": false, "revokeAccessTokenOnSignout": true, "loadUserInfo": false, "authority": "https://login.microsoftonline.com/{tenant-id}/v2.0/", "client_id": "{client-id}" } ] ``` #### Parameters: - **redirect_uri**: The URL where users are redirected after successful authentication. - **response_type**: Specifies the authentication response type (id_token and token). - **scope**: Defines the level of access. Use `Dicom.ReadWrite` to allow read and write access to DICOM data. - **post_logout_redirect_uri**: The URL users are redirected to after logout. - **automaticSilentRenew**: Automatically renews tokens without user interaction. Set to `false` for manual renewal. - **revokeAccessTokenOnSignout**: Revokes access tokens upon logout for added security. - **loadUserInfo**: Disables loading additional user information; set to `false` for Azure as it is not supported. - **authority**: The Azure AD tenant URL for OIDC authorization. - **client_id**: The application’s client ID from Azure AD. --- #### 2. Add the Data Source Configuration Update the data source configuration file with your Azure Healthcare APIs details: ```json { "namespace": "@ohif/extension-default.dataSourcesModule.dicomweb", "sourceName": "ohif_azure", "friendlyName": "ohif_azure", "configuration": { "singlepart": "bulkdata,pdf,video", "imageRendering": "wadors", "thumbnailRendering": "wadors", "supportsWildcard": true, "enableStudyLazyLoad": true, "supportsFuzzyMatching": false, "supportsStow": true, "qidoRoot": "https://{your-dicom-instance}.dicom.azurehealthcareapis.com/v2", "wadoUriRoot": "https://{your-dicom-instance}.dicom.azurehealthcareapis.com/v2", "wadoRoot": "https://{your-dicom-instance}.dicom.azurehealthcareapis.com/v2" } } ``` #### Parameters: - **qidoRoot**: Base URL for QIDO-RS queries. - **wadoUriRoot**: Base URL for WADO-URI requests. - **wadoRoot**: Base URL for WADO-RS requests. --- #### 3. Running the Viewer with Azure Configuration 1. Save the above configurations in your OHIF Viewer configuration file. 2. Run the viewer: ```bash cd OHIFViewer yarn install APP_CONFIG=config/azure.js yarn run dev ``` Replace `config/azure.js` with the path to your configuration file. --- #### Additional Notes - Ensure that the Azure Healthcare API is enabled for your subscription and that the necessary permissions (e.g., `Dicom.ReadWrite`) are assigned to the OIDC client. - The `qidoRoot`, `wadoUriRoot`, and `wadoRoot` should point to your Azure DICOM service URL. Replace `{your-dicom-instance}` with your actual instance name. This setup allows OHIF to interact seamlessly with Azure's Healthcare APIs, enabling robust DICOM management and visualization. --- ## Build for Production Source: https://docs.ohif.org/llm/deployment/build-for-production.md #### Build for Production #### Build Machine Requirements - [Node.js & NPM](https://nodejs.org/en/download/) - [Yarn](https://yarnpkg.com/lang/en/docs/install/) - [Git](https://www.atlassian.com/git/tutorials/install-git) #### Getting the Code _With Git:_ ```bash #### Clone the remote repository to your local machine git clone https://github.com/OHIF/Viewers.git ``` More on: _[`git clone`](https://git-scm.com/docs/git-clone), [`git checkout`](https://git-scm.com/docs/git-checkout)_ _From .zip:_ [OHIF/Viewers: master.zip](https://github.com/OHIF/Viewers/archive/master.zip) #### Restore Dependencies & Build Open your terminal, and navigate to the directory containing the source files. Next run these commands: ```bash #### If you haven't already, enable yarn workspaces yarn config set workspaces-experimental true #### Restore dependencies yarn install #### Build source code for production yarn run build ``` If everything worked as expected, you should have a new `dist/` directory in the `platform/app/dist` folder. It should roughly resemble the following: ```bash title="platform/app/dist/" ├── app-config.js ├── app.bundle.js ├── app.css ├── index.html ├── manifest.json ├── service-worker.js └── ... ``` By default, the build output will connect to OHIF's publicly accessible PACS. If this is your first time setting up the OHIF Viewer, it is recommended that you test with these default settings. After testing, you can find instructions on how to configure the project for your own imaging archive below. #### Configuration The configuration for our viewer is in the `platform/app/public/config` directory. Our build process knows which configuration file to use based on the `APP_CONFIG` environment variable. By default, its value is [`config/default.js`][default-config]. The majority of the viewer's features, and registered extension's features, are configured using this file. The easiest way to apply your own configuration is to modify the `default.js` file. For more advanced configuration options, check out our [configuration essentials guide](../configuration/configurationFiles.md). #### Next Steps #### Deploying Build Output _Drag-n-drop_ - [Netlify: Drop](./static-assets#netlify-drop) _Easy_ - [Surge.sh](./static-assets#surgesh) - [GitHub Pages](./static-assets#github-pages) _Advanced_ - [AWS S3 + Cloudfront](./static-assets#aws-s3--cloudfront) - [GCP + Cloudflare](./static-assets#gcp--cloudflare) - [Azure](./static-assets#azure) #### Testing Build Output Locally A quick way to test your build output locally is to spin up a small webserver. You can do this by running the following commands in the `dist/` output directory: ```bash #### Install http-server as a globally available package yarn global add http-server #### Change the directory to the platform/app cd platform/app #### Serve the files in our current directory npx serve ./dist -c ../public/serve.json ``` #### Automating Builds and Deployments If you found setting up your environment and running all of these steps to be a bit tedious, then you are in good company. Thankfully, there are a large number of tools available to assist with automating tasks like building and deploying web application. For a starting point, check out this repository's own use of: - [CircleCI][circleci]: [config.yaml][circleci-config] - [Netlify][netlify]: [netlify.toml][netlify.toml] | [build-deploy-preview.sh][build-deploy-preview.sh] [circleci]: https://circleci.com/gh/OHIF/Viewers [circleci-config]: https://github.com/OHIF/Viewers/blob/master/.circleci/config.yml [netlify]: https://app.netlify.com/sites/ohif/deploys [netlify.toml]: https://github.com/OHIF/Viewers/blob/master/platform/app/netlify.toml [build-deploy-preview.sh]: https://github.com/OHIF/Viewers/blob/master/.netlify/build-deploy-preview.sh --- ## Cross-Origin Resource Sharing Source: https://docs.ohif.org/llm/deployment/cors.md #### Cross-Origin Information for OHIF This document describes various security configurations, settings and environments/contexts needed to fully leverage OHIF’s capabilities. One may need some configurations while others might need ALL of them - it all depends on the environment OHIF is expected to run in. In particular, three of OHIF’s features depend on these configurations: - [Embedding OHIF in an iframe](#embedding-ohif-in-an-iframe) - [XMLHttpRequests to fetch data from data sources](#cors-in-ohif) #### Embedding OHIF in an iframe As described [here](./iframe.md), there are cases where OHIF will be embedded in an iframe. The following links provide more information for setting up and configuring OHIF to work in an iframe: - [OHIF iframe documentation](./iframe.md#static-build) - [OHIF as a Cross-origin Resource in an iframe](#ohif-as-a-cross-origin-resource-in-an-iframe) #### Secure Context MDN defines a secure context as [“a Window or Worker for which certain minimum standards of authentication and confidentiality are met.“](https://developer.mozilla.org/en-US/docs/Web/Security/Secure_Contexts) Any local URL is considered secure. The following are some examples of local URLs that are considered secure… - http://localhost - http://127.0.0.1:3000 URLs that are NOT local must be delivered over `https://` or `wss://` (i.e. TLS) to be considered secure. See [When is a context considered secure](https://developer.mozilla.org/en-US/docs/Web/Security/Secure_Contexts#when_is_a_context_considered_secure) in MDN for more information. #### iframes A page embedded in an iframe is considered secure if it itself and every one of its embedding ancestors are delivered securely. Otherwise it is deemed insecure. #### Configuring/setting up a secure context [Local URLs are considered secure](https://developer.mozilla.org/en-US/docs/Web/Security/Secure_Contexts#when_is_a_context_considered_secure), and as such whenever OHIF is accessed via a local URL (e.g. http://localhost:3000) it is running in a secure context. For example, in a development environment using the default webpack setup, OHIF can be deployed and accessed in a secure context at http://localhost:3000. The best alternative is to host OHIF over HTTPS. :::tip OHIF can be served over HTTPS in a variety of ways (these are just some examples). - Website hosting services that offer HTTPS deployment (e.g,. Netlify) or offer HTTPS load balancers (AWS, Google Cloud etc.) - Setting up a reverse proxy (e.g. `nginx`) with a self-signed certificate that forwards requests to the OHIF server - [An OHIF Docker image can be set up this way](./docker/docker.md#ssl). ::: #### Origin Definition According to [MDN](https://developer.mozilla.org/en-US/docs/Glossary/Origin), a Web content’s origin is defined by the scheme (protocol), hostname (domain), and port of the URL used to access it. Two objects have the same origin only when the scheme, hostname, and port all match. #### CORS - Cross-Origin Resource Sharing A cross-origin resource is a resource (e.g. image, JSON, etc) that is served by one origin and used/referenced by a different origin. CORS is the protocol utilized by web servers and browsers whereby a server of one origin identifies and/or restricts which of its resources that other origins (i.e. other than its own) a browser should allow access to. By default a browser does not permit cross-origin resource sharing. The CORS mechanism relies on the HTTP response headers from the server to indicate if a resource can be shared with a different origin. See the [MDN CORS article](https://developer.mozilla.org/en-US/docs/Web/HTTP/CORS) for more information. #### CORS HTTP Headers The header that mostly concerns OHIF is listed below and should be configured accordingly on the DICOMweb server or any data source that OHIF would make XMLHttpRequests to for its data. ```http Access-Control-Allow-Origin: `` | * ``` :::tip The `Access-Control-Allow-Origin` header specifies which origins can access the served resource embedded in the response. Either a single, specific origin (i.e. ``) can be specified or ALL origins (i.e. *) See [MDN](https://developer.mozilla.org/en-US/docs/Web/HTTP/CORS#access-control-allow-origin) for more information. ::: #### CORS in OHIF OHIF fetches and displays data and images from data sources. It invokes XMLHttpRequests to some data sources such as DICOMweb data sources to fetch the information to render. Typically, a DICOMweb server is hosted on a completely different origin than the one serving OHIF. As such, those XMLHttpRequests use CORS. #### Troubleshooting CORS in OHIF The following is an example screenshot of the browser console when one of OHIF’s DICOMweb data source servers is not configured for CORS. ![CORS browser console errors](../assets/img/cors-browser-console-errors.png) And the following is what is in the accompanying network tab. ![CORS browser network panel errors](../assets/img/cors-network-panel-errors.png) :::info Setting the appropriate CORS header varies per server or service that is hosting the data source. What follows below is just one example to remedy the problem. ::: :::tip If Orthanc is the data source running in a Docker container composed with/behind nginx. And OHIF is being served at localhost:3000. The issue can be remedied by adding either of the following to Orthanc’s Docker container nginx.conf file. ```nginx add_header 'Access-Control-Allow-Origin' 'http://localhost:3000' always; ``` Or ```nginx add_header 'Access-Control-Allow-Origin' '*' always; ``` ::: #### Header Values (see [MDN](https://developer.mozilla.org/en-US/docs/Web/HTTP/Cross-Origin_Resource_Policy#usage) for more information) |Value|Description| |-----|-----------| |same-site|Only requests from the same site can read the resource.| |same-origin|Only requests from the same origin can read the resource.| |cross-origin|Requests from any origin can read the resource. The value is useful and [exists](https://developer.mozilla.org/en-US/docs/Web/HTTP/Cross-Origin_Resource_Policy#relationship_to_cross-origin_embedder_policy_coep) primarily for letting documents with the [COEP require-corp value](#header-values-pertinent-to-ohif-see-mdn-for-more-information-1) know that the resource is ok to be embedded| #### OHIF and CORP #### PDF from a Cross Origin DICOMweb Data Source There are some DICOMweb data sources (e.g. dcm4chee) whereby OHIF uses the data source’s `/rendered` endpoint to embed a DICOM PDF document in the OHIF DOM using an `` tag. As specified for the [COEP require-corp value](#header-values-pertinent-to-ohif-see-mdn-for-more-information-1), a page like OHIF with COEP header `require-corp` can embed cross-origin resources in DOM elements that have the [`crossorigin` attribute](https://developer.mozilla.org/en-US/docs/Web/HTML/Attributes/crossorigin) OR the resource is delivered with an appropriate CORP header. The `` tag does NOT support the `crossorigin` attribute. As such, the PDF must be delivered with a CORP header. :::tip Setting the CORP header varies per server or service that is hosting the data source. The following is just one example. For a dcm4chee DICOMweb data source composed in Docker behind nginx, the CORP header can be configured in the nginx.conf file as such: ```nginx add_header 'Cross-Origin-Resource-Policy' 'cross-origin' always; ``` If the dcm4chee server and the OHIF server are hosted on the same site, then the following would also work: ```nginx add_header 'Cross-Origin-Resource-Policy' 'same-site' always; ``` ::: --- ## Custom URL Access/Build Source: https://docs.ohif.org/llm/deployment/custom-url-access.md #### Hosting the Web Viewer on a Custom URL Path You can host the viewer on a subpath like `/abc` instead of the root `/`. There are **two levels** of customization depending on how you want to serve your static assets. #### Simple Setup (Recommended for Most Use Cases) If you want to make the viewer accessible from a custom path (e.g. `/abc`) and **don’t care where the assets are loaded from** (they’ll be fetched from the root `/`), this setup is for you. #### What You Get - Viewer available at `https://yourdomain.com/abc` - All assets (JS, WASM, etc.) still loaded from the root (`/app.js`, `/viewer.wasm`, etc.) #### How To Set It Up 1. Set `routerBasename` in your config file (e.g., `config/myConfig.js`) to `/abc` 2. Build the viewer with: ```bash APP_CONFIG=config/myConfig.js yarn build ``` #### Local Development ```bash APP_CONFIG=config/myConfig.js yarn dev ``` --- #### Advanced Setup (Custom Asset Path) If you want to host the viewer at `/abc` **and** serve static assets from a different location (e.g. `/my-private-assets`), this is a more advanced scenario. #### What You Get - Viewer accessible from `https://yourdomain.com/abc` - All assets loaded from `https://yourdomain.com/my-private-assets/` #### Why This is Tricky Some libraries (especially ones using WASM) load assets using **relative paths**, which can break if not handled carefully. To solve this: - Set `routerBasename` to `/abc` - Set `PUBLIC_URL` to `/my-private-assets/` - Webpack will load assets from the specified public URL. #### Local Development Notes In development, use proxy rewrites to handle relative asset paths. Example for `dicom-microscopy-viewer`: ```js proxy: { '/dicom-microscopy-viewer': { target: 'http://localhost:3000', pathRewrite: { '^/dicom-microscopy-viewer': `/${PUBLIC_URL}/dicom-microscopy-viewer`, }, }, } ``` This ensures local development can find assets even when libraries expect them at certain paths. #### Building and Serving in Production To build the viewer for production: ```bash PUBLIC_URL=/my-private-assets/ APP_CONFIG=config/myConfig.js yarn build ``` If you're using `npx serve`, make sure to update `serve.json`: ```json { "rewrites": [{ "source": "*", "destination": "/abc/index.html" }] } ``` Serve the viewer like this: ```bash cd platform/app mv dist abc # Rename dist folder to match your viewer route npx serve -c ./public/serve.json ``` --- #### 🐳 Using Docker? You're Covered If you’re using our Dockerfile, you’re all set — it already handles copying specific asset folders (like `dicom-microscopy-viewer`) to the root: ```Dockerfile COPY --from=builder /usr/src/app/platform/app/dist/dicom-microscopy-viewer /usr/share/nginx/html/dicom-microscopy-viewer ``` Keep an eye on the browser network tab for any assets that might fail to load — if any other libraries require similar treatment, you’ll need to handle those as well. --- #### Summary | Goal | routerBasename | PUBLIC_URL | Assets Load From | |-----------------------------------|----------------|-----------------------|--------------------------| | Viewer at `/abc`, assets from `/` | `/abc` | default | Root `/` | | Viewer at `/abc`, assets from `/my-private-assets` | `/abc` | `/my-private-assets/` | `/my-private-assets/` | --- ## Google Cloud Healthcare Integration Source: https://docs.ohif.org/llm/deployment/google-cloud-healthcare.md #### Google Cloud Healthcare > The [Google Cloud Healthcare API](https://cloud.google.com/healthcare/) is a > powerful option for storing medical imaging data in the cloud. An alternative to deploying your own PACS is to use a software-as-a-service provider such as Google Cloud. The Cloud Healthcare API promises to be a scalable, secure, cost effective image storage solution for those willing to store their data in the cloud. It offers an [almost-entirely complete DICOMWeb API](https://cloud.google.com/healthcare/docs/dicom) which requires tokens generated via the [OAuth 2.0 Sign In flow](https://developers.google.com/identity/protocols/oauth2). Images can even be transcoded on the fly if this is desired. #### Setup a Google Cloud Healthcare Project 1. Create a Google Cloud account 2. Create a project in Google Cloud A project in Google Cloud can be created by clicking the projects drop down box. ![Google projects drop down](../assets/img/google-projects-drop-down.png) And then clicking the `NEW PROJECT` button in the top-right corner of the dialogue that is displayed. 3. Enable the [Cloud Healthcare API](https://cloud.google.com/healthcare/) for your project :::tip An API can be enabled through the `APIs & Services > Enabled APIs & Services` console and clicking the `+ ENABLE APIS AND SERVICES` button. ![Google enable apis](../assets/img/google-enable-apis.png) ::: :::tip The principal (i.e. account) that is enabling the Cloud Healthcare API will require the following roles that can be set in the `IAM & Admin > IAM` console for the desired project. - Service Usage Viewer - Service Usage Admin ::: :::tip Roles can be added to a principal in the `IAM & Admin > IAM` console by clicking the `Edit principal` (i.e. pencil) icon to the right of a principal or by clicking the `GRANT ACCESS` button at the top of the list of principals. The `GRANT ACCESS` button is particularly useful if the `Edit principal` icon is disabled. ::: 4. (Optional): Create a Dataset and DICOM Data Store for storing your DICOM data :::tip To both list existing datasets as well as create a new dataset for your project, the principal (i.e. account) must have the following roles enabled in the `IAM & Admin > IAM` console. - Editor ::: 5. Enable the [Cloud Resource Manager API](https://cloud.google.com/resource-manager/) for your project. _Note:_ If you are having trouble finding the APIs, use the search box at the top of the Cloud console. 6. Go to APIs & Services > OAuth Consent Screen to create an OAuth Consent screen and fill in your application details. - Run through the three step process of adding an OAuth Consent Screen, clicking `SAVE AND CONTINUE` at the end of each step. ![Google OAuth Consent Screen steps](../assets/img/google-oauth-consent-steps.png) - For the Scopes step, for Google APIs, click the `ADD OR REMOVE SCOPES` button. - In the `Update selected scopes` dialogue that flies in from the right, add the following scopes to the `Manually add scopes` text box. - `https://www.googleapis.com/auth/cloudplatformprojects.readonly` - `https://www.googleapis.com/auth/cloud-healthcare` ![Google Manually Add Scopes](../assets/img/google-manually-add-scopes.png) - Click `ADD TO TABLE` and then click `UPDATE` 7. Go to APIs & Services > Credentials to create a new set of credentials: - Click `+ CREATE CREDENTIALS` and from the drop down select `OAuth Client ID`. See [OAuth 2.0 Client ID](https://developers.google.com/identity/protocols/oauth2/) for more information. ![Google Create Credentials](../assets/img/google-create-credentials.png) - Choose the "Web Application" type - Add your domain (e.g. `http://localhost:3000`) to the Authorized JavaScript origins. - Add your domain, plus `callback` (e.g. `http://localhost:3000/callback`) to the Authorized Redirect URIs. - Save your Client ID for later. 8. (Optional): Create a bucket containing DICOM files and import it into a Data Store - When importing a bucket into a Data Store, the following warning might be displayed indicating that the Cloud Healthcare Service Agent service account associated with the project does not have the `Storage Object Viewer` role. ![Google Create Credentials](../assets/img/google-healthcare-service-agent-warning.png) - The Cloud Healthcare Service Agent service account can be displayed in the `IAM & Admin > IAM` console by checking the `Include Google-provided role grants` checkbox. The `Storage Object Viewer` role can then be granted to the Cloud Healthcare Service Agent service account. ![Google Provided Accounts Checkbox](../assets/img/google-provided-accounts-checkbox.png) - More information regarding the Cloud Healthcare Service Agent service account can be found at https://cloud.google.com/healthcare-api/docs/permissions-healthcare-api-gcp-products 9. (Optional): Enable Public Datasets that are being hosted by Google: https://cloud.google.com/healthcare/docs/resources/public-datasets/ #### Run the viewer with your OAuth Client ID 1. Open the `config/google.js` file and change `YOURCLIENTID` to your Client ID value. 1. Run the OHIF Viewer using the config/google.js configuration file ```bash cd OHIFViewer yarn install APP_CONFIG=config/google.js yarn run dev ``` #### Configuring Google Cloud Healthcare as a datasource in OHIF A Google Cloud Healthcare DICOM store can be configured as a DICOMweb datasource in OHIF. A full or partial path is permitted in the configuration file. For partial paths, the [data source configuration UI](../configuration/dataSources/configuration-ui.md) will assist in filling in the missing pieces. For example, a configuration with empty `wadoUriRoot`, `qidoRoot` and `wadoRoot` will prompt for the entire path step-by-step starting with the project. --- ## Embedding OHIF in an iframe Source: https://docs.ohif.org/llm/deployment/iframe.md #### iframe With the transition to more advanced visualization, loading, and rendering techniques using WebWorkers, WASM, and WebGL, the script tag usage of the OHIF viewer v3 has been deprecated. An alternative option for script tag usage is to employ an iframe. You can utilize the iframe element to load the OHIF viewer and establish communication with it using the postMessage API if needed. We recommend utilizing modern development practices and incorporating OHIF viewer within your application using a more modular and integrated approach, such as leveraging bundlers, other UI components, and frameworks. #### Static Build You can use the iframe element to load the OHIF viewer as a child element of your application if you need the viewer to be embedded within your application. The iframe element can be used as follows (use your own custom styles) ```html #### Troubleshooting _Exit code 137_ This means Docker ran out of memory. Open Docker Desktop, go to the `advanced` tab, and increase the amount of Memory available. _Cannot create container for service X_ Use this one with caution: `docker system prune` _X is already running_ Stop running all containers: - Win: `docker ps -a -q | ForEach { docker stop $_ }` - Linux: `docker stop $(docker ps -a -q)` _Traceback (most recent call last):_ _File "urllib3/connectionpool.py", line 670, in urlopen_ _...._ Are you sure your docker is running? see explanation [here](https://github.com/docker/compose/issues/7896) #### Configuration After verifying that everything runs with default configuration values, you will likely want to update: - The domain: `http://127.0.0.1` #### OHIF Viewer The OHIF Viewer's configuration is imported from a static `.js` file. The configuration we use is set to a specific file when we build the viewer, and determined by the env variable: `APP_CONFIG`. You can see where we set its value in the `dockerfile` for this solution: `ENV APP_CONFIG=config/docker-nginx-orthanc.js` You can find the configuration we're using here: `/public/config/docker-nginx-orthanc.js` To rebuild the `webapp` image created by our `dockerfile` after updating the Viewer's configuration, you can run: - `docker-compose build` OR - `docker-compose up --build` #### Other All other files are found in: `/docker/Nginx-Orthanc/` | Service | Configuration | Docs | | ----------------- | --------------------------------- | ------------------------------------------- | | OHIF Viewer | [dockerfile][dockerfile] | You're reading them now! | | Nginx | [`/nginx.conf`][config-nginx] | | | Orthanc | [`/orthanc.json`][config-orthanc] | [Here][orthanc-docs] | #### Next Steps #### OHIF + Dcm4chee You can follow the similar steps above to run OHIF Viewer with Dcm4chee PACS. The recipe for this setup can be found at `platform/app/.recipes/Nginx-Dcm4chee`. The routes are as follows: - `127.0.0.1` for the OHIF viewer - `127.0.0.1/pacs` for the Dcm4chee UI :::info For uploading studies, you can see the following gif for the steps: ![alt text](../assets/img/dcm4chee-upload.gif) ::: #### Deploying to Production While you can deploy this solution to production, there is one main caveat: every user can access the app and the patient portal without any authentication. In the next step, we will add authentication with Keycloak to secure the app. #### Improving This Guide Here are some improvements this guide would benefit from, and that we would be more than happy to accept Pull Requests for: - Add Docker caching for faster builds #### Referenced Articles For more documentation on the software we've chosen to use, you may find the following resources helpful: - [Orthanc for Docker](http://book.orthanc-server.com/users/docker.html) For a different take on this setup, check out the repositories our community members put together: - [mjstealey/ohif-orthanc-dimse-docker](https://github.com/mjstealey/ohif-orthanc-dimse-docker) - [trypag/ohif-orthanc-postgres-docker](https://github.com/trypag/ohif-orthanc-postgres-docker) [nginx]: https://www.nginx.com/resources/glossary/nginx/ [understanding-cors]: https://medium.com/@baphemot/understanding-cors-18ad6b478e2b [orthanc-docs]: http://book.orthanc-server.com/users/configuration.html#configuration [lua-resty-openidc-docs]: https://github.com/zmartzone/lua-resty-openidc [dockerfile]: https://github.com/OHIF/Viewers/blob/master/platform/app/.recipes/OpenResty-Orthanc/dockerfile [config-nginx]: https://github.com/OHIF/Viewers/blob/master/platform/app/.recipes/OpenResty-Orthanc/config/nginx.conf [config-orthanc]: https://github.com/OHIF/Viewers/blob/master/platform/app/.recipes/OpenResty-Orthanc/config/orthanc.json --- ## Deploy Static Assets Source: https://docs.ohif.org/llm/deployment/static-assets.md #### Deploy Static Assets > WARNING! All of these solutions stand-up a publicly accessible web viewer. Do > not hook your hosted viewer up to a sensitive source of data without > implementing authentication. There are a lot of options for deploying static assets. Some services, like `netlify` and `surge.sh`, specialize in static websites. You'll notice that deploying with them requires much less time and effort, but comes at the cost of less product offerings. While not required, it can simplify things to host your Web Viewer alongside your image archive. Services with more robust product offerings, like `Google Cloud`, `Microsoft's Azure`, and `Amazon Web Services (AWS)`, are able to accommodate this setup. _Drag-n-drop_ - [Netlify: Drop](#netlify-drop) _Easy_ - [Surge.sh](#surgesh) - [GitHub Pages](#github-pages) _Advanced_ - [Deploy Static Assets](#deploy-static-assets) - [Drag-n-drop](#drag-n-drop) - [Netlify Drop](#netlify-drop) - [Easy](#easy) - [Surge.sh](#surgesh) - [GitHub Pages](#github-pages) - [Advanced](#advanced) - [AWS S3 + Cloudfront](#aws-s3--cloudfront) - [GCP + Cloudflare](#gcp--cloudflare) - [Azure](#azure) #### Drag-n-drop #### Netlify Drop
_GIF demonstrating deployment with Netlify Drop_ 1. https://app.netlify.com/drop 2. Drag your `build/` folder on to the drop target 3. ... 4. _annnd you're done_ **Features:** - Custom domains & HTTPS - Instant Git integration - Continuous deployment - Deploy previews - Access to add-ons (Non-free tiers include identity, FaaS, Forms, etc.) Learn more about [Netlify on their website](https://www.netlify.com/) #### Easy #### Surge.sh > Static web publishing for Front-End Developers. Simple, single-command web > publishing. Publish HTML, CSS, and JS for free, without leaving the command > line. ![surge.sh deploy example](../assets/img/surge-deploy.gif) _GIF demonstrating deployment with surge_ ```shell #### Add surge command yarn global add surge #### In the build directory surge ``` **Features:** - Free custom domain support - Free SSL for surge.sh subdomains - pushState support for single page apps - Custom 404.html pages - Barrier-free deployment through the CLI - Easy integration into your Grunt toolchain - Cross-origin resource support - And more… Learn more about [surge.sh on their website](https://surge.sh/) #### GitHub Pages > WARNING! While great for project sites and light use, it is not advised to use > GitHub Pages for production workloads. Please consider using a different > service for mission critical applications. > Websites for you and your projects. Hosted directly from your GitHub > repository. Just edit, push, and your changes are live. This deployment strategy makes more sense if you intend to maintain your project in a GitHub repository. It allows you to specify a `branch` or `folder` as the target for a GitHub Page's website. As you push code changes, the hosted content updates to reflect those changes. 1. Head over to GitHub.com and create a new repository, or go to an existing one. Click on the Settings tab. 2. Scroll down to the GitHub Pages section. Choose the `branch` or `folder` you would like as the "root" of your website. 3. Fire up a browser and go to `http://username.github.io/repository` Configuring Your Site: - [Setting up a custom domain](https://help.github.com/en/articles/using-a-custom-domain-with-github-pages) - [Setting up SSL](https://help.github.com/en/articles/securing-your-github-pages-site-with-https) Learn more about [GitHub Pages on its website](https://pages.github.com/) #### Advanced All of these options, while using providers with more service offerings, demonstrate how to host the viewer with their respective file storage and CDN offerings. While you can serve your static assets this way, if you're going through the trouble of using AWS/GCP/Azure, it's more likely you're doing so to avoid using a proxy or to simplify authentication. If that is the case, check out some of our more advanced `docker` deployments that target these providers from the left-hand sidepanel. These guides can be a bit longer and an update more frequently. To provide accurate documentation, we will link to each provider's own recommended steps: #### AWS S3 + Cloudfront - [Host a Static Website](https://docs.aws.amazon.com/AmazonS3/latest/dev/website-hosting-custom-domain-walkthrough.html) - [Speed Up Your Website with Cloudfront](https://docs.aws.amazon.com/AmazonS3/latest/dev/website-hosting-cloudfront-walkthrough.html) #### GCP + Cloudflare - [Things to Know Before Getting Started](https://code.luasoftware.com/tutorials/google-cloud-storage/things-to-know-before-hosting-static-website-on-google-cloud-storage/) - [Hosting a Static Website on GCP](https://cloud.google.com/storage/docs/hosting-static-website) #### Azure - Deploying viewer to Azure blob storage as a static website: Refer to [Host a static website](https://docs.microsoft.com/en-us/azure/storage/blobs/storage-blob-static-website) High level steps : 1. Go to Azure portal and create a storage account. 2. Under Overview->Capabilities, select Static website. 3. Enable Static website. Set the index document as ‘index.html’. 4. Copy the primary endpoint. This will serve as the root URL for the viewer. 5. Save. A new container named ‘$web’ will be created. 6. Copy OHIF viewer’s build output from ‘platform\app\dist’ folder to the ‘$web’ container. 7. Open browser and navigate to the viewer root URL copied in the step above. It should display OHIF viewer with data from default data source. ![image](https://github.com/OHIF/Viewers/assets/132684122/236a574b-0f05-4d90-a721-df8720d05949) Special consideration while accessing DicomJson data source : • Due to the way routing is handled in react, it may error out in production when trying to display data through dicomJson data source. E.g. https://[Static Website endpoint]/viewer/dicomjson?url= https://ohif-dicom-json-example.s3.amazonaws.com/LIDC-IDRI-0001.json • Resolution to this is to set error page to ‘index.html’ at the website level. This will ensure that all errors are redirected to root and requests are further served from root path. ![image](https://github.com/OHIF/Viewers/assets/132684122/87696c90-c344-489a-af15-b992434555f9) - [Add SSL Support](https://docs.microsoft.com/en-us/azure/storage/blobs/storage-https-custom-domain-cdn) - [Configure a Custom Domain](https://docs.microsoft.com/en-us/azure/storage/blobs/storage-custom-domain-name) --- ## User Account Control Source: https://docs.ohif.org/llm/deployment/user-account-control.md #### User Account Control :::danger DISCLAIMER: We make no claims or guarantees regarding the security of this approach. If you have any doubts, please consult an expert and conduct thorough audits. ::: Making a viewer and its medical imaging data accessible on the open web can provide a lot of benefits, but requires additional security to make sure sensitive information can only be viewed by authorized individuals. Most image archives are equipped with basic security measures, but they are not robust/secure enough for the open web. This guide covers one of many potential production setups that secure our sensitive data. #### Overview This guide builds on top of our [Nginx + Image Archive guide](./nginx--image-archive.md), wherein we used a [`reverse proxy`](https://en.wikipedia.org/wiki/Reverse_proxy) to retrieve resources from our image archive (Orthanc). To add support for "User Account Control" we introduce [Keycloak](https://www.keycloak.org/about.html). Keycloak is an open source Identity and Access Management solution that makes it easy to secure applications and services with little to no code. We improve upon our `reverse proxy` setup by integrating Keycloak and Nginx to create an `authenticating reverse proxy`. > An authenticating reverse proxy is a reverse proxy that only retrieves the > resources on behalf of a client if the client has been authenticated. If a > client is not authenticated they can be redirected to a login page. This setup allows us to create a setup similar to the one pictured below: ![userControlFlow](../assets/img/ohif-pacs-keycloak.png) **Nginx:** - Acts as a reverse proxy server that handles incoming requests to the domain (mydomain.com:80) and forwards them to the appropriate backend services. - It also ensures that all requests go through the OAuth2 Proxy for authentication. **OAuth2 Proxy:** - Serves as an intermediary that authenticates users via OAuth2. - Works in conjunction with Keycloak to manage user sessions and authentication tokens. - Once the user is authenticated, it allows access to specific routes (/ohif-viewer, /pacs, /pacs-admin). **Keycloak:** - An open-source identity and access management solution. - Manages user identities, including authentication and authorization. - Communicates with the OAuth2 Proxy to validate user credentials and provide tokens for authenticated sessions. **OHIF Viewer:** - Hosted under the route /ohif-viewer, which serves the static assets of the OHIF Viewer. **Orthanc/DCM4chee:** - PACS (Picture Archiving and Communication System) for managing medical imaging data. Exposes two routes: - /pacs: Accesses the DICOM web services. - /pacs-admin: Provides administrative and explorer interfaces. #### Getting Started - Orthanc #### Requirements - Docker - [Docker for Mac](https://docs.docker.com/docker-for-mac/) - [Docker for Windows](https://docs.docker.com/docker-for-windows/) _Not sure if you have `docker` installed already? Try running `docker --version` in command prompt or terminal_ #### Setup 1 - Trying Locally Navigate to the Orthanc Keycloak configuration directory: `cd platform\app\.recipes\Nginx-Orthanc-Keycloak` Due to the increased complexity of this setup, we've introduced a magic word `YOUR_DOMAIN`. Replace this word with your project IP address to follow along more easily. Since we are running this locally, we will use `127.0.0.1` as our IP address. In the `docker-compose.yml` file, replace `YOUR_DOMAIN` with `127.0.0.1`. In the Keycloak service: Before: ``` KC_HOSTNAME_ADMIN_URL: http://YOUR_DOMAIN/keycloak/ KC_HOSTNAME_URL: http://YOUR_DOMAIN/keycloak/ ``` After ``` KC_HOSTNAME_ADMIN_URL: http://127.0.0.1/keycloak/ KC_HOSTNAME_URL: http://127.0.0.1/keycloak/ ``` In the Keycloak healthcheck, replace `YOUR_DOMAIN` with `localhost`. In the Nginx config, change: ``` server_name YOUR_DOMAIN; ``` to: ``` server_name 127.0.0.1; ``` Since we're not using SSL, remove the following lines from the Nginx config file and create one server instead of two: Before (two servers one for http and one for https): ``` server { listen 80; server_name YOUR_DOMAIN; location /.well-known/acme-challenge/ { root /var/www/certbot; } location / { return 301 https://$host$request_uri; } } server { listen 443 ssl; server_name YOUR_DOMAIN; ssl_certificate /etc/letsencrypt/live/ohifviewer.duckdns.org/fullchain.pem; ssl_certificate_key /etc/letsencrypt/live/ohifviewer.duckdns.org/privkey.pem; root /var/www/html; ``` After (merging both servers into one only http server): ``` server { listen 80; server_name 127.0.0.1; location /.well-known/acme-challenge/ { root /var/www/certbot; } root /var/www/html; ``` In OAuth2-proxy configuration at `oauth2-proxy.cfg` Before: ``` redirect_url="http://YOUR_DOMAIN/oauth2/callback" oidc_issuer_url="http://YOUR_DOMAIN/keycloak/realms/ohif" ``` After: ``` redirect_url="http://127.0.0.1/oauth2/callback" oidc_issuer_url="http://127.0.0.1/keycloak/realms/ohif" ``` Finally, in the docker-nginx-orthanc-keycloak config file that lives in `platform/app/public/config/docker-nginx-orthanc-keycloak.js`, replace `YOUR_DOMAIN` with Before: ``` wadoUriRoot: 'http://YOUR_DOMAIN/pacs', qidoRoot: 'http://YOUR_DOMAIN/pacs', wadoRoot: 'http://YOUR_DOMAIN/pacs', ``` After: ``` wadoUriRoot: 'http://127.0.0.1/pacs', qidoRoot: 'http://127.0.0.1/pacs', wadoRoot: 'http://127.0.0.1/pacs', ``` :::note This is the config that is used inside the dockerfile to build the viewer, look at dockerfile `ENV APP_CONFIG=config/docker-nginx-orthanc-keycloak.js` ::: Run the following command to start the services: ``` docker-compose up --build ``` You can watch the following video, which will guide you through the process of setting up Orthanc with keycloak and OHIF locally. We have set up two predefined users in Keycloak: - `user: admin password: admin` - Has access to keycloak portal for managing users and clients - `user: viewer password: viewer` - Has access to the OHIF Viewer but not the pacs-admin - `user: pacsadmin password: pacsadmin` - Has access to both the pacs-admin for uploading and the OHIF Viewer You can navigate to: - `http://127.0.0.1` - This will redirect you to `http://127.0.0.1/ohif-viewer`, prompting you to log in with Keycloak using either user - `http://127.0.0.1/pacs-admin` - Only the `pacsadmin` user can access this route, while the `viewer` user cannot -
#### Step 2 - Trying via a Server Now that you have successfully set up Orthanc with Keycloak and OHIF locally, you can deploy it to a server. While you can rent a server from any provider, this tutorial will demonstrate the process using Linode as an example. You can watch the following video, which will guide you through the process. Some notes: - Since this is a remote machine we need to clone the repo - Typically a Linux machine, you need to download and install Docker on it - Use the Visual Studio Code Remote SSH extension to connect to the server - Use docker extension in Visual Studio Code to manage the containers - The public IP address of the server now becomes the YOUR_DOMAIN and is used in the configuration files. Still we have not set up SSL, so we will use HTTP instead of HTTPS. We should use the same one server configuration as we did locally for Nginx (but with the new server IP address) :::info Don't forget to change the `docker-ngix-orthanc-keycloak.js` file to use the new server IP address. ::: After you run `docker compose up --build` you can navigate to the server IP address and see the viewer will not work... We have encountered some strange issues with the Keycloak service not allowing non-HTTPS connections (around 10:00). To resolve this, we need to modify the Keycloak configuration to permit HTTPS. This requires accessing the container and making the necessary changes. After accessing the container shell ``` cd /opt/keycloak/bin ./kcadm.sh config credentials --server http://localhost:8080 --realm master --user admin ./kcadm.sh update realms/master -s sslRequired=NONE ``` After we need to change some configurations in the Keycloak UI to enable the connection in the server Navigate to ``` http://IP_ADDRESS/keycloak ``` which will redirect you to the Keycloak login page 0. login with the admin user `admin` and password `admin` 1. From the top left drop down menu, select `ohif` realm 2. Go to `Clients` and select `ohif_viewer` 3. In the `Access Settings` change all instances of `http://127.0.0.1` to `http://IP_ADDRESS` 1. Root URL: `http://IP_ADDRESS` 2. Home URL: `http://IP_ADDRESS` 3. Valid Redirect URIs: `http://IP_ADDRESS/oauth2/callback` 4. Valid post logout URIs: `*` 5. Web Origins: `http://IP_ADDRESS` 6. Admin URL: `http://IP_ADDRESS` Now if you navigate to the IP address it should work !!
#### Step 3 - Adding SSL and Deploying to Production Now we'll add an SSL certificate to our server to enable HTTPS. We'll use Let's Encrypt to generate the SSL certificate. Let's Encrypt requires a domain name, so we'll use a free domain name service like DuckDNS (duckdns.org). Follow these steps: 1. Visit https://www.duckdns.org/ and create an account. 2. Create a free domain name and point it to your server's IP address. You can watch a video guide for this process if needed. Replace `YOUR_DOMAIN` with your new domain name in the `docker-compose.yml` file and all other config files, as we did previously. Next, we'll add HTTPS support. Add the following lines to the Nginx config file: (Note: We'll have both HTTP and HTTPS servers, and the server IP will use HTTPS) ``` server { listen 80; server_name https://IP_ADDRESS; location /.well-known/acme-challenge/ { root /var/www/certbot; } location / { return 301 https://$host$request_uri; } } server { listen 443 ssl; server_name https://IP_ADDRESS; ssl_certificate /etc/letsencrypt/live/ohifviewer.duckdns.org/fullchain.pem; ssl_certificate_key /etc/letsencrypt/live/ohifviewer.duckdns.org/privkey.pem; root /var/www/html; ``` Don't forget to replace `YOUR_DOMAIN` with the new domain name in the `docker-nginx-orthanc-keycloak.js` file. :::info Remember to include `https://` when adding the domain name to the configurations. ::: Now, we need to add a certificate. Let's assume we have the domain name `hospital.duckdns.org` and the email we registered with DuckDNS is `your_email@example.com`. ``` docker run -it --rm --name certbot \ -v ./config/letsencrypt:/etc/letsencrypt \ -v ./config/certbot:/var/www/certbot \ -p 80:80 \ certbot/certbot certonly \ --standalone \ --preferred-challenges http \ --email your_email@example.com \ --agree-tos \ --no-eff-email \ -d hospital.duckdns.org ``` :::note Replace "hospital.duckdns.org" with your domain name and update the email address accordingly. ::: :::warning DuckDNS is suitable for testing and demonstration purposes only. For production environments, use a proper domain name and SSL certificate to ensure security. ::: If you follow these steps, you'll encounter the error `invalid parameter: redirect_uri` when attempting to log in to Keycloak. This occurs because the redirect URL isn't set up correctly in the Keycloak client configuration. To resolve this, we need to log in and adjust these settings. Navigate to: ``` http://IP_ADDRESS/keycloak ``` Log in using the admin credentials: - Username: `admin` - Password: `admin` Replace all IP addresses with the new domain name, using HTTPS.
#### Getting Started - DCM4CHEE You can follow the same steps as above to set up DCM4CHEE. The only difference is that you need to navigate to the correct directory. `platform\app\.recipes\Nginx-Dcm4chee-Keycloak` You can watch the following video, which will guide you through the process of setting up DCM4CHEE.
#### Troubleshooting _invalid parameter: redirect_uri_ This means the redirect URL isn't set up correctly in the Keycloak client configuration. To resolve this, log in to Keycloak and adjust the settings in the correct client (ohif_viewer) and correct realm (ohif). _Exit code 137_ This means Docker ran out of memory. Open Docker Desktop, go to the `advanced` tab, and increase the amount of Memory available. _Cannot create container for service X_ Use this one with caution: `docker system prune` _X is already running_ Stop running all containers: - Win: `docker ps -a -q | ForEach { docker stop $_ }` - Linux: `docker stop $(docker ps -a -q)` #### OHIF Viewer The OHIF Viewer's configuration is imported from a static `.js` file. The configuration we use is set to a specific file when we build the viewer, and determined by the env variable: `APP_CONFIG`. You can see where we set its value in the `dockerfile` for this solution: `ENV APP_CONFIG=config/docker-nginx-orthanc-keycloak.js` You can find the configuration we're using here: `/public/config/docker-nginx-orthanc-keycloak.js` To rebuild the `webapp` image created by our `dockerfile` after updating the Viewer's configuration, you can run: - `docker-compose build` OR - `docker-compose up --build` #### Next Steps #### Keycloak Theming The `Login` screen for the `ohif-viewer` client is using a Custom Keycloak theme. You can find the source files for it in `platform/app/.recipes/deprecated-recipes/OpenResty-Orthanc-Keycloak/volumes/keycloak-themes`. You can see how we add it to Keycloak in the `docker-compose` file, and you can read up on how to leverage custom themes in [Keycloak's own docs](https://www.keycloak.org/docs/latest/server_development/index.html#_themes). | Default Theme | OHIF Theme | | ---------------------------------------------------------------------- | ---------------------------------------------------------------- | | ![Keycloak Default Theme](../assets/img/keycloak-default-theme.png) | ![Keycloak OHIF Theme](../assets/img/keycloak-ohif-theme.png) | #### Resources #### Referenced Articles The inspiration for our setup was driven largely by these articles: - [Securing Nginx with Keycloak](https://edhull.co.uk/blog/2018-06-06/keycloak-nginx) - [Authenticating Reverse Proxy with Keycloak](https://eclipsesource.com/blogs/2018/01/11/authenticating-reverse-proxy-with-keycloak/) - [Securing APIs with Kong and Keycloak](https://www.jerney.io/secure-apis-kong-keycloak-1/) For more documentation on the software we've chosen to use, you may find the following resources helpful: - [Orthanc for Docker](http://book.orthanc-server.com/users/docker.html) - [OpenResty Guide](http://www.staticshin.com/programming/definitely-an-open-resty-guide/) - [Lua Ngx API](https://openresty-reference.readthedocs.io/en/latest/Lua_Nginx_API/) - [Auth0: Picking a Grant Type](https://auth0.com/docs/api-auth/which-oauth-flow-to-use) We chose to use a generic OpenID Connect library on the client, but it's worth noting that Keycloak comes packaged with its own: - [oidc-client-js](https://github.com/IdentityModel/oidc-client-js/wiki) - [Keycloak JavaScript Adapter](https://www.keycloak.org/docs/latest/securing_apps/index.html#_javascript_adapter) If you're not already drowning in links, here are some good security resources for OAuth: - [Diagrams of OpenID Connect Flows](https://medium.com/@darutk/diagrams-of-all-the-openid-connect-flows-6968e3990660) - [KeyCloak: OpenID Connect Flows](https://www.keycloak.org/docs/latest/securing_apps/index.html#authorization-code) For a different take on this setup, check out the repositories our community members put together: - [mjstealey/ohif-orthanc-dimse-docker](https://github.com/mjstealey/ohif-orthanc-dimse-docker) - [trypag/ohif-orthanc-postgres-docker](https://github.com/trypag/ohif-orthanc-postgres-docker) [orthanc-docs]: http://book.orthanc-server.com/users/configuration.html#configuration [lua-resty-openidc-docs]: https://github.com/zmartzone/lua-resty-openidc [config]: https://github.com/OHIF/Viewers/blob/master/platform/viewer/src/config.js [dockerfile]: https://github.com/OHIF/Viewers/blob/master/platform/viewer/.recipes/OpenResty-Orthanc-Keycloak/dockerfile [config-nginx]: https://github.com/OHIF/Viewers/blob/master/platform/viewer/.recipes/OpenResty-Orthanc-Keycloak/config/nginx.conf [config-orthanc]: https://github.com/OHIF/Viewers/blob/master/platform/viewer/.recipes/OpenResty-Orthanc-Keycloak/config/orthanc.json [config-keycloak]: https://github.com/OHIF/Viewers/blob/master/platform/viewer/.recipes/OpenResty-Orthanc-Keycloak/config/ohif-keycloak-realm.json --- ## Docker ### Docker Deployment Source: https://docs.ohif.org/llm/deployment/docker/docker.md #### Docker The OHIF source code provides a [Dockerfile](https://github.com/OHIF/Viewers/blob/master/Dockerfile) to create and run a Docker image that containerizes an [nginx](https://www.nginx.com/) web server serving the OHIF Viewer. :::info This Dockerfile is the same used to generate the [OHIF image(s) on Docker Hub](https://hub.docker.com/r/ohif/app/tags). ::: #### Running the Docker Container with our pre-built images from Docker Hub To run the Docker container, use the following command based on whether you're targeting a release or beta version. (Learn more about versioning [here](../../development/getting-started.md#branches).) ```sh #### beta version docker run -d -p 3000:80 ohif/app:v3.10.0-beta.33 #### release version docker run -d -p 3000:80 ohif/app:v3.9.2 ``` This will run the Docker container and serve the OHIF Viewer at `http://localhost:3000`. You can name the container anything you want by adding the `--name` flag (e.g., `docker run -d -p 3000:80 --name ohif-viewer-container ohif/app:v3.10.0-beta.33`). #### Building the Docker Image From Source :::tip Building a Docker image comes in handy when OHIF has been customized (e.g. with custom extensions, modes, hanging protocols, etc.). For convenience, there are basic OHIF images built in Docker Hub. Find the latest [release](https://hub.docker.com/r/ohif/app/tags?page=1&name=latest) and [dev](https://hub.docker.com/r/ohif/app/tags?page=1&name=beta) images all in Docker Hub. ::: #### Prerequisites The machine on which to build and run the Docker container must have: 1. All of the [requirements](../build-for-production.md#build-for-production) for building a production version of OHIF. 2. A checked out branch of the OHIF Viewer. 3. [Docker](https://docs.docker.com/get-docker/) installed. #### Building the Docker Image :::info In this tutorial, we will build the Docker image for the OHIF Viewer and OHIF server as defined in the `default.js` config which points to our server and our studies. If you need the Viewer to show your own server studies, you need to build the viewer with a custom configuration that points to your server and your studies. You can set build arguments to point to your custom configuration file. For more information on data sources, see [here](../../platform/extensions/modules/data-source.md). ::: To build the Docker image from the terminal: - Navigate to the OHIF Viewer code root directory (base of the monorepo). - Run a basic Docker build command: ```sh docker build . -t ohif-viewer-image ``` *Note*: The name `ohif-viewer-image` is an example. You can replace it with any name and tag of your choice by changing the `-t` value (e.g., `-t my-image:latest`). This naming is arbitrary for local Docker images. - To customize the build, you can include optional build arguments to set defaults for the app configuration, public path, or port: ```sh docker build . -t ohif-viewer-image \ --build-arg APP_CONFIG=config/e2e.js \ --build-arg PUBLIC_URL=/ohif/ \ --build-arg PORT=6000 ``` #### Available Build Arguments (Optional) You can use the following build arguments to customize the Docker image: - `APP_CONFIG`: (Optional) Sets the default app configuration (e.g., `config/e2e.js`). This value can be overridden later by setting an environment variable (you can set it in the docker run command). - `PUBLIC_URL`: (Optional) Specifies the public path for serving the OHIF Viewer (e.g., `/ohif/`). This value is baked into the build and cannot be changed without rebuilding the image. - `PORT`: (Optional) Sets the application’s port. #### Examples of Using Build Arguments Here are examples of how to use the `--build-arg` option: - Set the public path: ```sh docker build . --build-arg PUBLIC_URL=/ohif/ ``` - Set a custom app configuration: ```sh docker build . --build-arg APP_CONFIG=config/kheops.js ``` - Specify a port: ```sh docker build . --build-arg PORT=6000 ``` - Combine multiple arguments: ```sh docker build . --build-arg PUBLIC_URL=/ohif/ --build-arg APP_CONFIG=config/kheops.js --build-arg PORT=6000 ``` :::info PUBLIC_URL Explanation The `PUBLIC_URL` build argument sets the public path for serving the OHIF Viewer. For example, using `--build-arg PUBLIC_URL=/ohif/` will serve the worklist at `http://host/ohif/` and the viewer at `http://host/ohif/viewer`. While the worklist is also accessible at `http://host/`, it redirects to the `PUBLIC_URL`. ::: --- #### Running the Docker Container After building the Docker image, you can run it as a container using the following command. The name of the Docker image (`ohif-viewer-image`) is specified at the end, while the flags control various runtime settings. ```sh docker run -d -p 3000:80/tcp --name ohif-viewer-container ohif-viewer-image ``` - `-d`: Runs the container in the background and prints the container ID. - `-p {host-port}:{nginx-port}/tcp`: Maps the container's `nginx` port to a port on the host machine. For example, `3000:80` maps host port 3000 to container port 80. - `--name`: Assigns an arbitrary name to the container for easy identification (e.g., `ohif-viewer-container`). #### Configuring the `nginx` Listen Port The `nginx` server uses the `{PORT}` environment variable to determine the listening port inside the container. By default, this is set to `80`. You can override it during runtime or build: #### Setting the Port at Runtime Use the `-e PORT={container-port}` flag to set the listening port and publish it with `-p`. For example, the following command sets the container port to `8080` and maps it to host port `3000`: ```sh docker run -d -e PORT=8080 -p 3000:8080/tcp --name ohif-viewer-container ohif-viewer-image ``` #### Setting the Port During Build To bake the port configuration into the Docker image, use the `--build-arg PORT={container-port}` flag when building the image: ```sh docker build . --build-arg PORT=8080 ``` then you can run the container with the following command: ```sh docker run -d -p 3000:8080/tcp --name ohif-viewer-container ohif-viewer-image ``` --- #### Specifying the OHIF Configuration File You can specify the OHIF configuration file for the container in three ways: 1. **[Build Default](#build-default)**: Set the default configuration file during the build process. 2. **[Volume Mounting](#volume-mounting)**: Mount a local configuration file into the container. 3. **[Environment Variable](#environment-variable)**: Pass the configuration file contents directly as an environment variable. #### Build Default Set the configuration file during the build process using the `--build-arg APP_CONFIG={config-path}` flag. For example: ```sh docker build . --build-arg APP_CONFIG=config/kheops ``` --- #### Volume Mounting To use a local configuration file, mount it as a volume during runtime. For example, to use a file located at `/path/to/config/file.js`, use the `-v` flag: ```sh docker run -d -p 3000:80/tcp -v /path/to/config/file.js:/usr/share/nginx/html/app-config.js --name ohif-viewer-container ohif-viewer-image ``` :::tip Ensure the path to the local configuration file is absolute, as some Docker versions require it. ::: --- #### Environment Variable Alternatively, you can specify the configuration file contents directly as an environment variable (`APP_CONFIG`). This method is useful in environments like Google Cloud. **Important**: The `APP_CONFIG` variable must contain the file's contents, not its file path. Use the `cat` command to read the file and pass its contents as the environment variable: ```sh docker run -d -p 3000:80/tcp -e APP_CONFIG="$(cat /path/to/the/config/file)" --name ohif-viewer-container ohif-viewer-image ``` :::tip - Remove single-line comments (`//`) from the configuration file to prevent issues when serving the file to the OHIF client. - As an alternative to the `cat` command, you can convert the file to a single line and copy-paste it directly. Tools like [Visual Studio Code](https://stackoverflow.com/questions/46491061/shortcut-for-joining-two-lines) and [Notepad++](https://superuser.com/questions/518229/how-do-i-remove-linebreaks-in-notepad) offer "Join Lines" commands to help with this. - If both the [Volume Mounting](#volume-mounting) and [Environment Variable](#environment-variable) methods are used, the Volume Mounting method takes precedence. ::: --- This rewrite improves readability by reorganizing information into smaller, clear sections and providing consistent formatting for examples and tips. --- ### SSL Configuration for Docker Source: https://docs.ohif.org/llm/deployment/docker/ssl.md #### SSL :::caution We make no claims or guarantees regarding this section concerning security. If in doubt, enlist the help of an expert and conduct proper audits. ::: If OHIF is not deployed over SSL, this means information transferred to/from OHIF is not encrypted. Consideration must be given as to whether OHIF should be deployed in a secure context over SSL. #### Specifying the SSL Port, Certificate and Private Key For convenience, the [built Docker image](#building-the-docker-image) can be run over SSL by - setting the `{SSL_PORT}` environment variable - volume mounting the SSL certificate - volume mounting the SSL private key :::info The volume mounted SSL certificate and private key are mapped to the [`ssl_certificate`](http://nginx.org/en/docs/http/ngx_http_ssl_module.html#ssl_certificate) and [`ssl_certificate_key`](http://nginx.org/en/docs/http/ngx_http_ssl_module.html#ssl_certificate_key) `nginx` directives respectively. ::: Similar to the [`nginx` listen port](#configuring-the-nginx-listen-port), the `{SSL_PORT}` environment variable is the internal port that `nginx` listens on to serve the OHIF web server over SSL and has to be likewise published via the `-p` switch. The following is an example command running the Docker container over SSL. Note that depending on the version of Docker, an absolute path to the certificate and private key files might be required. ```sh docker run -d -e SSL_PORT=443 -p 3003:443/tcp -v /path/to/certificate:/etc/ssl/certs/ssl-certificate.crt -v /path/to/private/key:/etc/ssl/private/ssl-private-key.key --name ohif-viewer-container ohif-viewer-image ``` :::caution The above deploys OHIF over SSL using `nginx`'s default SSL configuration. For further OHIF server hardening and security configuration, consider enlisting an expert and then editing OHIF's `nginx` [SSL template configuration file](https://github.com/OHIF/Viewers/blob/8a8ae237d26faf123abeb073cbf0cd426c3e9ef2/.docker/Viewer-v3.x/default.ssl.conf.template) with further [security settings](https://nginx.org/en/docs/http/ngx_http_ssl_module.html) and [tweaks](http://nginx.org/en/docs/http/configuring_https_servers.html) and then [build a new Docker image](#building-the-docker-image) from there. ::: :::caution The private key is a secure entity and should have restricted access. Keep it safe! ::: :::caution The presence of the `{SSL_PORT}` environment variable is used to trigger to deploy over SSL as opposed to HTTP. If `{SSL_PORT}` is NOT defined, then HTTP is used even if the certificate and private key volumes are mounted. ::: :::tip The read and write permissions of the source, mounted volumes are preserved in the Docker container. The volume mounted certificate and private key require read permission. One way to ensure both are readable is to issue the following on the host system terminal prior to running the Docker container and mounting the certificate and private key volumes. ```sh sudo chmod 644 /path/to/certificate /path/to/private/key ``` ::: :::tip The SSL certificate and private key can be either [CA issued](#ca-signed-certificates) or [self-signed](#self-signed-certificates). ::: #### CA Signed Certificates According to [SSL.com](https://www.ssl.com/faqs/what-is-a-certificate-authority/), a global certificate authority (CA) is a trusted authority and organization that guarantees the identity of other, third-party entities and guarantees the integrity of the electronic information (e.g. web site data) those third-party entities provide and deliver. There are many globally trusted CAs. Below is a non-exhaustive list of some CAs including links to some documentation for creating and installing certificates and keys from those authorities to be used with `nginx`. - [GoDaddy](https://ca.godaddy.com/help/nginx-install-a-certificate-6722) - [Let's Encrypt](https://www.nginx.com/blog/using-free-ssltls-certificates-from-lets-encrypt-with-nginx/) - [digicert](https://www.digicert.com/kb/csr-ssl-installation/nginx-openssl.htm) #### Self-Signed Certificates According to [Entrust](https://www.entrust.com/resources/faq/what-is-a-self-signed-certificate), a self-signed certificate is one that is NOT signed by a trusted, public [CA authority](#ca-signed-certificates), but instead (typically) signed by the developer or individual or organization responsible for a web site. Browsers will treat self-signed certificates as not secure because the signer is not publicly recognized and trusted. When visiting a site encrypted with a self-signed certificate, the browser will present a screen similar to the following warning about the potential risk. ![Self-signed certificate warning](../../assets/img/self-signed-cert-warning.png) For a self-signed certificate this is normal and expected. Clicking the `Advanced` button displays further information as well as a link for proceeding to site that the certificate is encrypting. ![Self-signed certificate warning](../../assets/img/self-signed-cert-advanced-warning.png) Self-signed certificates might be appropriate for testing or perhaps deploying a site within an organization's internal LAN. In any case, consult an expert prior to deploying OHIF over SSL. :::tip A self-signed certificate can be generated using [`openssl`](https://www.openssl.org/) on the command line. ::: To create a self-signed certificate: 1. Open a command prompt. 2. Issue the following command: ```sh sudo openssl req -x509 -nodes -days 365 -newkey rsa:2048 -keyout /desired/key/directory/self-signed-private.key -out /desired/cert/directory/self-signed.crt ``` The chart below describes each of the items in the command. |Command Item|Description| |------------|-----------| |sudo|temporarily grant access as the root/super user to run the `openssl` command| |openssl|the command line tool for creating and managing certificates and keys| |req|this together with the subsequent `-x509` indicates to request to generate a self-signed certificate| |-x509|this together with the `req` indicates to request to generate a self-signed certificate| |-nodes|skip the option to secure the certificate with a passphrase; this allows `nginx` to start up with without intervention to enter a passphrase each time| |-days 365|the number of days the certificate will be valid for| |-newkey rsa:2048|create the a new certificate and key together and make an RSA key that is 2048 bits long| |-keyout|the path and file name where the private key will be written to| |-out|the path and file name where the certificate will be written to| 3. Answer the prompts that follow. The table below lists the various prompts. The default value for each prompt is shown within the square brackets. The most important prompt is `Common Name (e.g. server FQDN or YOUR name)`. For this enter the IP address of the OHIF server being secured. |Prompt| |------| |Country Name (2 letter code) [AU]| |State or Province Name (full name) [Some-State]| |Locality Name (eg, city) []| |Organization Name (eg, company) [Internet Widgets Pty Ltd]| |Organizational Unit Name (eg, section) []| |Common Name (e.g. server FQDN or YOUR name) []| |Email Address []| 4. Once completed, the self-signed certificate and private key will be in the locations specified by the `-keyout` and `-out` flags and can be [volume mounted](#specifying-the-ssl-port-certificate-and-private-key) accordingly to the OHIF Docker container. :::tip Windows' users can access `openssl` using [Windows Subsystem for Linux (WSL)](https://learn.microsoft.com/en-us/windows/wsl/). ::: --- # Development ## Android & iOS Debugging Source: https://docs.ohif.org/llm/development/android-ios-debugging.md #### Android & iOS Debugging for OHIF using Emulators This guide covers how to debug the OHIF viewer on Android and iOS emulators using Chrome DevTools and Safari Web Inspector, respectively. You can use these tools to inspect elements, debug JavaScript, and view console logs for the web content running on the emulators. #### Android Emulator Setup with Android Studio #### Prerequisites: - Install [Android Studio](https://developer.android.com/studio) - Ensure you have a recent Android SDK and Emulator installed via Android Studio - Google Chrome installed on your machine #### Steps to Run Android Emulator: 1. **Launch Android Studio:** - Open Android Studio and create a new project if you don't already have one. - Once your IDE opens up, click on the **Device Manager** icon in the right-side toolbar. 2. **Create a Virtual Device (if necessary):** - If you don’t have an existing virtual device, click **Create Virtual Device**. - Choose a device model (e.g., Pixel series) and click **Next**. - Select a system image with the required Android API version and click **Next**. - Finish the setup by clicking **Finish**. 3. **Start the Android Emulator:** - Once the device is created, click the **Play** button next to the virtual device to start the emulator. 4. **Open a Browser on the Emulator:** - Once the emulator is running, open the **Chrome** app on the virtual device. - Navigate to the OHIF Viewer URL to view the application. The URL will be 10.0.2.2:3000, you can read more about it [here](https://developer.android.com/studio/run/emulator-networking). 5. **Debug Using Chrome DevTools:** - On your development machine, open Google Chrome. - Type `chrome://inspect` in the Chrome address bar and hit **Enter**. - You will see your Android device listed under **Remote Target**. - Click **Inspect** to open DevTools for the browser on the Android emulator. 6. **Happy Debugging!:** - You can now use Chrome DevTools to inspect elements, debug JavaScript, and view console logs directly from the emulator’s browser. #### Video Tutorial --- #### iOS Emulator Setup with Xcode #### Prerequisites: - Install [Xcode](https://developer.apple.com/xcode/) from the Mac App Store. - Ensure you have the latest iOS SDK. #### Steps to Run iOS Emulator: 1. **Launch Xcode:** - Open Xcode and navigate to **Xcode > Settings**. - Go to the **Platform** tab and ensure you have an iOS simulator installed for the version of iOS you need. If not you can do so using the + button. 2. **Start the iOS Simulator:** - Open Xcode and navigate to **Xcode > Open Developer Tools > Simulator**. - Select your device from the list of available simulators and click on it. 3. **Open a Browser on the Simulator:** - Run the **Safari** browser 4. **Connect Safari DevTools to the iOS Simulator:** - On your development machine, open **Safari** on your Mac. - Click **Develop** in the menu bar and select your simulator under **Devices**. - You will see the web pages open on the iOS simulator. Select the page to open the inspector. 5. **Happy Debugging!:** - You can now use the Safari Web Inspector to inspect elements, debug JavaScript, and view logs for the OHIF Viewer on the iOS simulator. #### Video Tutorial --- ## OHIF Architecture Source: https://docs.ohif.org/llm/development/architecture.md #### Architecture In order to achieve a platform that can support various workflows and be extensible for the foreseeable future we went through extensive planning of possible use cases and decided to significantly change and improve the architecture. Below, we aim to demystify that complexity by providing insight into how `OHIF Platform` is architected, and the role each of its dependent libraries plays. #### Overview The [OHIF Medical Image Viewing Platform][viewers-project] is maintained as a [`monorepo`][monorepo]. This means that this repository, instead of containing a single project, contains many projects. If you explore our project structure, you'll see the following: ```bash │ ├── extensions │ ├── default # default functionalities │ ├── cornerstone # 2D/3D images w/ Cornerstonejs │ ├── cornerstone-dicom-sr # Structured reports │ ├── measurement-tracking # measurement tracking │ └── dicom-pdf # View DICOM wrapped PDFs in viewport | # and many more ... │ ├── modes │ └── longitudinal # longitudinal measurement tracking mode | └── basic-dev-mode # basic viewer with Cornerstone (a developer focused mode) | # and many more │ ├── platform │ ├── core # Business Logic │ ├── i18n # Internationalization Support │ ├── ui # React component library │ └── app # Connects platform and extension projects │ ├── ... # misc. shared configuration ├── lerna.json # MonoRepo (Lerna) settings ├── package.json # Shared devDependencies and commands └── README.md ``` OHIF v3 is composed of the following components, described in detail in further sections: - `@ohif/app`: The core framework that controls extension registration, mode composition and routing. - `@ohif/core`: A library of useful and reusable medical imaging functionality for the web. - `@ohif/ui`: A library of reusable components to build OHIF-styled applications with. - `Extensions`: A set of building blocks for building applications. The OHIF org maintains a few core libraries. - `Modes`: Configuration objects that tell @ohif/app how to compose extensions to build applications on different routes of the platform. #### Extensions The `extensions` directory contains many packages that provide essential functionalities such as rendering, study/series browsers, measurement tracking that modes can consume to enable a certain workflow. Extensions have had their behavior changed in `OHIF-v3` and their api is expanded. In summary: > In `OHIF-v3`, extensions no longer automatically hook themselves to the app. > Now, registering an extension makes its component available to `modes` that > wish to use them. Basically, extensions in `OHIF-v3` are **building blocks** > for building applications. OHIF team maintains several high value and commonly used functionalities in its own extensions. For a list of extensions maintained by OHIF, [check out this helpful table](../platform/extensions/index.md#maintained-extensions). As an example `default` extension provides a default viewer layout, a study/series browser and a datasource that maps to a DICOMWeb compliant backend. [Click here to read more about extensions!](../platform/extensions/index.md) #### Modes The `modes` directory contains workflows that can be registered with OHIF within certain `routes`. The mode will get used once the user opens the viewer on the registered route. OHIF extensions were designed to provide certain core functionalities for building your viewer. However, often in medical imaging we face a specific use case in which we are using some core functionalities, adding our specific UI, and use it in our workflows. Previously, to achieve this you had to create an extension to add have such feature. `OHIF-v3` introduces `Modes` to enable building such workflows by re-using the core functionalities from the extensions. Some common workflows may include: - Measurement tracking for lesions - Segmentation of brain abnormalities - AI probe mode for detecting prostate cancer In the mentioned modes above, they will share the same core rendering module that the `default` extension provides. However, segmentation mode will require segmentation tools which is not needed for the other two. As you can see, modes are a layer on top of extensions, that you can configure in order to achieve certain workflows. To summarize the difference between extensions and modes in `OHIF-v3` and extensions in `OHIF-v2` > - `Modes` are configuration objects that tell _@ohif/app_ how to compose > extensions to build applications on different routes of the platform. > - In v2 extensions are “plugins” that add functionality to a core viewer. > - In v3 extensions are building blocks that a mode uses to build an entire > viewer layout. [Click here to read more about modes!](../platform/modes/index.md) #### Platform #### `@ohif/app` This library is the core library which consumes modes and extensions and builds an application. Extensions can be passed in as app configuration and will be consumed and initialized at the appropriate time by the application. Upon initialization the viewer will consume extensions and modes and build up the route desired, these can then be accessed via the study list, or directly via url parameters. Upon release modes will also be plugged into the app via configuration, but this is still an area which is under development/discussion, and they are currently pulled from the window in beta. Future ideas for this framework involve only adding modes and fetching the required extension versions at either runtime or build time, but this decision is still up for discussion. #### `@ohif/core` OHIF core is a carefully maintained and tested set of web-based medical imaging functions and classes. This library includes managers and services used from within the viewer app. OHIF core is largely similar to the @ohif/core library in v2, however a lot of logic has been moved to extensions: however all logic about DICOMWeb and other data fetching mechanisms have been pulled out, as these now live in extensions, described later. #### `@ohif/ui` Firstly, a large time-consumer/barrier for entry we discovered was building new UI in a timely manner that fit OHIF’s theme. For this reason we have built a new UI component library which contains all the components one needs to build their own viewer. These components are presentational only, so you can reuse them with whatever logic you desire. As the components are presentational, you may swap out @ohif/ui for a custom UI library with conforming API if you wish to white label the viewer. The UI library is here to make development easier and quicker, but it is not mandatory for extension components to use. [Check out our component library!](https://ui.ohif.org/) #### Overview of the architecture OHIF-v3 architecture can be seen in the following figure. We will explore each piece in more detail. ![mode-archs](../assets/img/mode-archs.png) #### Common Questions > Can I create my own Viewer using Vue.js or Angular.js? You can, but you will not be able to leverage as much of the existing code and components. `@ohif/core` could still be used for business logic, and to provide a model for extensions. `@ohif/ui` would then become a guide for the components you would need to recreate. > When I want to implement a functionality, should it be in the mode or in an > extension? This is a great question. Modes are designed to consume extensions, so you should implement your functionality in one of the modules of your new extension, and let the mode consume it. This way, in the future, if you needed another mode that utilizes the same functionality, you can easily hook the extension to the new mode as well. [monorepo]: https://github.com/OHIF/Viewers/issues/768 [viewers-project]: https://github.com/OHIF/Viewers [viewer-npm]: https://www.npmjs.com/package/@ohif/app [pwa]: https://developers.google.com/web/progressive-web-apps/ [configuration]: ../configuration/configurationFiles.md [extensions]: ../platform/extensions/index.md [core-github]: https://github.com/OHIF/viewers/platform/core [ui-github]: https://github.com/OHIF/Viewers/tree/master/platform/ui --- ## Continuous Integration Source: https://docs.ohif.org/llm/development/continuous-integration.md #### Continuous Integration (CI) This repository uses `CircleCI` and `Netlify` for Continuous integration. #### Deploy Previews [Netlify Deploy previews][deploy-previews] are generated for every pull request. They allow pull request authors and reviewers to "Preview" the OHIF Viewer as if the changes had been merged. Deploy previews can be configured by modifying the `netlify.toml` file in the root of the repository. Some additional scripts/assets for netlify are included in the root `.netlify` directory. #### Workflows [CircleCI Workflows][circleci-workflows] are a set of rules for defining a collection of jobs and their run order. They are self-documenting and their configuration can be found in our CircleCI configuration file: `.circleci/config.yml`. #### Workflow: PR_CHECKS The PR_CHECKS workflow (Pull Request Checks) runs our automated unit and end-to-end tests for every code check-in. These tests must all pass before code can be merged to our `master` branch. ![PR_CHECKS](../assets/img/WORKFLOW_PR_CHECKS.png) #### Workflow: PR_OPTIONAL_DOCKER_PUBLISH The PR_OPTIONAL_DOCKER_PUBLISH workflow allows for "manual approval" to publish the pull request as a tagged docker image. This is helpful when changes need to be tested with the Google Adapter before merging to `master`. ![PR_Workflow](../assets/img/WORKFLOW_PR_OPTIONAL_DOCKER_PUBLISH.png) > NOTE: This workflow will fail unless it's for a branch on our `upstream` > repository. If you need this functionality, but the branch is from a fork, > merge the changes to a short-lived `feature/` branch on `upstream` #### Workflow: DEPLOY The DEPLOY workflow deploys the OHIF Viewer when changes are merged to master. It uses the Netlify CLI to deploy assets created as part of the repository's PWA Build process (`yarn run build`). The workflow allows for "Manual Approval" to promote the build to `STAGING` and `PRODUCTION` environments. ![WORKFLOW_DEPLOY](../assets/img/WORKFLOW_DEPLOY.png) | Environment | Description | URL | | ----------- | ---------------------------------------------------------------------------------- | --------------------------------------------- | | Development | Always reflects latest changes on `master` branch. | [Netlify][netlify-dev] / [OHIF][ohif-dev] | | Staging | For manual testing before promotion to prod. Keeps development workflow unblocked. | [Netlify][netlify-stage] / [OHIF][ohif-stage] | | Production | Stable, tested, updated less frequently. | [Netlify][netlify-prod] / [OHIF][ohif-prod] | #### Workflow: RELEASE The RELEASE workflow publishes our `npm` packages, updated documentation, and `docker` image when changes are merged to master. `Lerna` and "Semantic Commit Syntax" are used to independently version and publish the many packages in our monorepository. If a new version is cut/released, a Docker image is created. Documentation is generated with `gitbook` and pushed to our `gh-pages` branch. GitHub hosts the `gh-pages` branch with GitHub Pages. - Platform Packages: https://github.com/ohif/viewers/#platform - Extension Packages: https://github.com/ohif/viewers/#extensions - Documentation: https://docs.ohif.org/ ![WORKFLOW_RELEASE](../assets/img/WORKFLOW_RELEASE.png) [deploy-previews]: https://www.netlify.com/blog/2016/07/20/introducing-deploy-previews-in-netlify/ [circleci-workflows]: https://circleci.com/docs/2.0/workflows/ [netlify-dev]: https://ohif-dev.netlify.com [netlify-stage]: https://ohif-stage.netlify.com [netlify-prod]: https://ohif-prod.netlify.com [ohif-dev]: https://viewer-dev.ohif.org [ohif-stage]: https://viewer-stage.ohif.org [ohif-prod]: https://viewer-prod.ohif.org --- ## Contributing to OHIF Source: https://docs.ohif.org/llm/development/contributing.md #### Contributing #### How can I help? Fork the repository, make your change and submit a pull request. If you would like to discuss the changes you intend to make to clarify where or how they should be implemented, please don't hesitate to create a new issue. At a minimum, you may want to read the following documentation: - [Getting Started](/development/getting-started.md) - [Architecture](./architecture.md) Pull requests that are: - Small - [Well tested](./testing.md) - Decoupled Are much more likely to get reviewed and merged in a timely manner. #### When changes impact multiple repositories While this can be tricky, we've tried to reduce how often this situation crops up this with our [recent switch to a monorepo][monorepo]. Our maintained extensions, ui components, internationalization library, and business logic can all be developed by simply running `yarn run dev` from the repository root. Testing the viewer with locally developed, unpublished package changes from a package outside of the monorepo is most common with extension development. Let's demonstrate how to accomplish this with two commonly forked extension dependencies: #### Other linkage notes We're still working out some of the kinks with local package development as there are a lot of factors that can influence the behavior of our development server and bundler. If you encounter issues not addressed here, please don't hesitate to reach out on GitHub. Sometimes you might encounter a situation where the linking doesn't work as expected. This might happen when there are multiple linked packages with the same name. You can [remove][unlink] the linked packages inside yarn and try again. #### Any guidance on submitting changes? While we do appreciate code contributions, triaging and integrating contributed code changes can be very time consuming. Please consider the following tips when working on your pull requests: - Functionality is appropriate for the repository. Consider creating a GitHub issue to discuss your suggested changes. - The scope of the pull request is not too large. Please consider separate pull requests for each feature as big pull requests are very time consuming to understand. We will provide feedback on your pull requests as soon as possible. Following the tips above will help ensure your changes are reviewed. [example-url]: https://deploy-preview-237--ohif.netlify.com/viewer/?url=https://s3.eu-central-1.amazonaws.com/ohif-viewer/sampleDICOM.json [pr-237]: https://github.com/OHIF/Viewers/pull/237 [monorepo]: https://github.com/OHIF/Viewers/issues/768 [unlink]: https://stackoverflow.com/questions/58459698/is-there-a-command-to-unlink-all-yarn-packages-yarn-unlink-all --- ## Getting Started with OHIF Development Source: https://docs.ohif.org/llm/development/getting-started.md #### Getting Started #### Setup #### Fork & Clone If you intend to contribute back changes, or if you would like to pull updates we make to the OHIF Viewer, then follow these steps: - [Fork][fork-a-repo] the [OHIF/Viewers][ohif-viewers-repo] repository - [Create a local clone][clone-a-repo] of your fork - `git clone https://github.com/YOUR-USERNAME/Viewers` - Add OHIF/Viewers as a [remote repository][add-remote-repo] labeled `upstream` - Navigate to the cloned project's directory - `git remote add upstream https://github.com/OHIF/Viewers.git` With this setup, you can now [sync your fork][sync-changes] to keep it up-to-date with the upstream (original) repository. This is called a "Triangular Workflow" and is common for Open Source projects. The GitHub blog has a [good graphic that illustrates this setup][triangular-workflow]. #### Private Alternatively, if you intend to use the OHIF Viewer as a starting point, and you aren't as concerned with syncing updates, then follow these steps: 1. Navigate to the [OHIF/Viewers][ohif-viewers] repository 2. Click `Clone or download`, and then `Download ZIP` 3. Use the contents of the `.zip` file as a starting point for your viewer > NOTE: It is still possible to sync changes using this approach. However, > submitting pull requests for fixes and features are best done with the > separate, forked repository setup described in "Fork & Clone" #### Developing #### Branches #### `master` branch - The latest dev (beta) release - `master` - The latest dev release This is typically where the latest development happens. Code that is in the master branch has passed code reviews and automated tests, but it may not be deemed ready for production. This branch usually contains the most recent changes and features being worked on by the development team. It's often the starting point for creating feature branches (where new features are developed) and hotfix branches (for urgent fixes). Each package is tagged with beta version numbers, and published to npm such as `@ohif/ui@3.6.0-beta.1` #### `release/*` branches - The latest stable releases Once the `master` branch code reaches a stable, release-ready state, we conduct a comprehensive code review and QA testing. Upon approval, we create a new release branch from `master`. These branches represent the latest stable version considered ready for production. For example, `release/3.5` is the branch for version 3.5.0, and `release/3.6` is for version 3.6.0. After each release, we wait a few days to ensure no critical bugs. If any are found, we fix them in the release branch and create a new release with a minor version bump, e.g., 3.5.1 in the `release/3.5` branch. Each package is tagged with version numbers and published to npm, such as `@ohif/ui@3.5.0`. Note that `master` is always ahead of the `release` branch. We publish docker builds for both beta and stable releases. Here is a schematic representation of our development workflow: ![alt text](../assets/img/github-readme-branches-Jun2024.png) #### Requirements - [Node.js & NPM](https://nodejs.org/en/) - [Yarn](https://yarnpkg.com/en/) - Yarn workspaces should be enabled: - `yarn config set workspaces-experimental true` #### Kick the tires Navigate to the root of the project's directory in your terminal and run the following commands: ```bash #### Restore dependencies yarn install #### Start local development server yarn run dev ``` You should see the following output: ```bash @ohif/app: i 「wds」: Project is running at http://localhost:3000/ @ohif/app: i 「wds」: webpack output is served from / @ohif/app: i 「wds」: Content not from webpack is served from D:\code\ohif\Viewers\platform\viewer @ohif/app: i 「wds」: 404s will fallback to /index.html #### And a list of all generated files ``` #### 🎉 Celebrate 🎉
#### Building for Production > More comprehensive guides for building and publishing can be found in our > [deployment docs](./../deployment/index.md) ```bash #### Build static assets to host a PWA yarn run build ``` #### Troubleshooting - If you receive a _"No Studies Found"_ message and do not see your studies, try changing the Study Date filters to a wider range. - If you see a 'Loading' message which never resolves, check your browser's JavaScript console inside the Developer Tools to identify any errors. [fork-a-repo]: https://help.github.com/en/articles/fork-a-repo [clone-a-repo]: https://help.github.com/en/articles/fork-a-repo#step-2-create-a-local-clone-of-your-fork [add-remote-repo]: https://help.github.com/en/articles/fork-a-repo#step-3-configure-git-to-sync-your-fork-with-the-original-spoon-knife-repository [sync-changes]: https://help.github.com/en/articles/syncing-a-fork [triangular-workflow]: https://github.blog/2015-07-29-git-2-5-including-multiple-worktrees-and-triangular-workflows/#improved-support-for-triangular-workflows [ohif-viewers-repo]: https://github.com/OHIF/Viewers/ [ohif-viewers]: https://github.com/OHIF/Viewers --- ## Local Library Linking Source: https://docs.ohif.org/llm/development/link.md #### Introduction Local linking allows you to develop and test a library in the context of an application before it's published or when you encounter a bug that you suspect is related to a library. With Yarn, this can be achieved through the yarn link command. You can take a look at the Cornerstonejs tutorial for linking https://www.cornerstonejs.org/docs/contribute/linking --- ## OHIF Command Line Interface Source: https://docs.ohif.org/llm/development/ohif-cli.md #### OHIF Command Line Interface OHIF-v3 architecture has been re-designed to enable building applications that are easily extensible to various use cases (Modes) that behind the scene would utilize desired functionalities (Extensions) to reach the goal of the use case. Now, the question is _how to create/remove/install/uninstall an extension and/or mode?_ You can use the `cli` script that comes with the OHIF monorepo to achieve these goals. :::note Info In the long-term, we envision our `cli` tool to be a separate installable package that you can invoke anywhere on your local system to achieve the same goals. In the meantime, `cli` will remain as part of the OHIF monorepo and needs to be invoked using the `yarn` command. ::: #### CLI Installation You don't need to install the `cli` currently. You can use `yarn` to invoke its commands. #### Commands :::note Important All commands should run from the root of the monorepo. ::: There are various commands that can be used to interact with the OHIF-v3 CLI. If you run the following command, you will see a list of available commands. ``` yarn run cli --help ``` which will output ``` OHIF CLI Options: -V, --version output the version number -h, --help display help for command Commands: create-extension Create a new template extension create-mode Create a new template Mode add-extension [version] Adds an ohif extension remove-extension removes an ohif extension add-mode [version] Removes an ohif mode remove-mode Removes an ohif mode link-extension Links a local OHIF extension to the Viewer to be used for development unlink-extension Unlinks a local OHIF extension from the Viewer link-mode Links a local OHIF mode to the Viewer to be used for development unlink-mode Unlinks a local OHIF mode from the Viewer list List Added Extensions and Modes search [options] Search NPM for the list of Modes and Extensions help [command] display help for command ``` As seen there are commands for you such as: `create-extension`, `create-mode`, `add-extension`, `remove-extension`, `add-mode`, `remove-mode`, `link-extension`, `unlink-extension`, `link-mode`, `unlink-mode`, `list`, `search`, and `help`. Here we will go through each of the commands and describe them. #### create-mode If you need to create a new mode, you can use the `create-mode` command. This command will create a new mode template in the directory that you specify. The command will ask you couple of information/questions in order to properly create the mode metadata in the `package.json` file. ```bash yarn run cli create-mode ```
![image](../assets/img/create-mode.png)
Note 1: Some questions have a default answer, which is indicated inside the parenthesis. If you don't want to answer the question, just hit enter. It will use the default answer. Note 2: As you see in the questions, you can initiate a git repository for the new mode right away by answering `Y` (default) to the question. Note 3: Finally, as indicated by the green lines at the end, `create-mode` command only create the mode template. You will need to link the mode to the Viewer in order to use it. See the [`link-mode`](#link-mode) command. If we take a look at the directory that we created, we will see the following files:
![image](../assets/img/mode-template.png)
#### create-extension Similar to the `create-mode` command, you can use the `create-extension` command to create a new extension template. This command will create a new extension template in the directory that you specify the path. ```bash yarn run cli create-extension ``` Note: again similar to the `create-extension` command, you need to manually link the extension to the Viewer in order to use it. See the [`link-mode`](#link-mode) command. #### link-extension `link-extension` command will link a local OHIF extension to the Viewer. This command will utilize `yarn link` to achieve so. ```bash yarn run cli link-extension ``` #### unlink-extension There might be situations where you want to unlink an extension from the Viewer after some developments. `unlink-extension` command will do so. ```bash ohif-cli unlink-extension ``` #### link-mode Similar to the `link-extension` command, `link-mode` command will link a local OHIF mode to the Viewer. ```bash yarn run cli link-mode ``` #### unlink-mode Similar to the `unlink-extension` command, `unlink-mode` command will unlink a local OHIF mode from the Viewer. ```bash ohif-cli unlink-mode ``` #### add-mode OHIF is a modular viewer. This means that you can install (add) different modes to the viewer if they are published online . `add-mode` command will add a new mode to the viewer. It will look for the mode in the NPM registry and installs it. This command will also add the extension dependencies that the mode relies on to the Viewer (if specified in the peerDependencies section of the package.json). :::note Important `cli` will validate the npm package before adding it to the Viewer. An OHIF mode should have `ohif-mode` as one of its keywords. ::: Note: If you don't specify the version, the latest version will be used. ```bash yarn run cli add-mode [version] ``` For instance `@ohif-test/mode-clock` is an example OHIF mode that we have published to NPM. This mode basically has a panel that shows the clock :) We can add this mode to the Viewer by running the following command: ```bash yarn run cli add-mode @ohif-test/mode-clock ``` After installation, the Viewer has a new mode! ![image](../assets/img/add-mode.png) Note: If the mode has an extension peerDependency (in this case @ohif-test/extension-clock), `cli` will automatically add the extension to the Viewer too. The result ![image](../assets/img/clock-mode.png) ![image](../assets/img/clock-mode1.png) #### add-extension This command will add an OHIF extension to the Viewer. It will look for the extension in the NPM registry and install it. ```bash yarn run cli add-extension [version] ``` #### remove-mode This command will remove the mode from the Viewer and also remove the extension dependencies that the mode relies on from the Viewer. ```bash yarn run cli remove-mode ``` #### remove-extension Similar to the `remove-mode` command, this command will remove the extension from the Viewer. ```bash yarn run cli remove-extension ``` #### list `list` command will list all the installed extensions and modes in the Viewer. It uses the `PluginConfig.json` file to list the installed extensions and modes. ```bash yarn run cli list ``` an output would look like this:
![image](../assets/img/ohif-cli-list.png)
#### search Using `search` command, you can search for OHIF extensions and modes in the NPM registry. This tool can accept a `--verbose` flag to show more information about the results. ```bash yarn run cli search [--verbose] ```
![image](../assets/img/cli-search-no-verbose.png)
with the verbose flag `ohif-cli search --verbose` you will achieve the following output:
![image](../assets/img/cli-search-with-verbose.png)
#### PluginConfig.json To make all the above commands work, we have created a new file called `PluginConfig.json` which contains the information needed to run the commands. You **don't need to (and should not)** edit/update/modify this file as it is automatically generated by the CLI. You can take a look at what this file contains by going to `platform/app/PluginConfig.json` in your project's root directory. In short, this file tracks and stores all the extensions/modes and the their version that are currently being used by the viewer. #### Private NPM Repos For the `yarn cli` to view private NPM repos, create a read-only token with the following steps and export it as an environmental variable. You may also export an existing npm token. ``` npm login npm token create --read-only export NPM_TOKEN= ``` #### External dependencies The ohif-cli will add the path to the external dependencies to the webpack config, so that you can install them in your project and use them in your custom extensions and modes. To achieve this ohif-cli will update the webpack.pwa.js file in the platform/app directory. #### Video tutorials See the [Video Tutorials](./video-tutorials.md) for videos of some the above commands in action. --- ## OHIF Development Process Source: https://docs.ohif.org/llm/development/our-process.md #### Our Process Our process is a living, breathing thing. We strive to have regular [retrospectives][retrospective] that help us shape and adapt our process to our team's current needs. This document attempts to capture the broad strokes of that process in an effort to: - Strengthen community member involvement and understanding - Welcome feedback and helpful suggestions #### Issue Triage [GitHub issues][gh-issues] are the best way to provide feedback, ask questions, and suggest changes to the OHIF Viewer's core team. Community issues generally fall into one of three categories, and are marked with a `triage` label when created. | Issue Template Name | Description | | ---------------------- | ---------------------------------------------------------------------------------------- | | Community: Report 🐛 | Describe a new issue; Provide steps to reproduce; Expected versus actual result? | | Community: Request ✋ | Describe a proposed new feature. Why should it be implemented? What is the impact/value? | | Community: Question ❓ | Seek clarification or assistance relevant to the repository. | _table 1. issue template names and descriptions_ Issues that require `triage` are akin to support tickets. As this is often our first contact with would-be adopters and contributors, it's important that we strive for timely responses and satisfactory resolutions. We attempt to accomplish this by: 1. Responding to issue requiring `triage` at least once a week 2. Create new "official issues" from "community issues" 3. Provide clear guidance and next steps (when applicable) 4. Regularly clean up old (stale) issues > 🖋 Less obviously, patterns in the issues being reported can highlight areas > that need improvement. For example, users often have difficulty navigating > CORS issues when deploying the OHIF Viewer -- how do we best reduce our ticket > volume for this issue? #### Backlogged Issues Community issues serve as vehicles of discussion that lead us to "backlogged issues". Backlogged issues are the distilled and actionable information extracted from community issues. They contain the scope and requirements necessary for hand-off to a core-team (or community) contributor ^\_^ | Category | Description | Labels | | -------- | ---------------------------------------------------------------------------------------- | ------------------------------------------------------------------------------------------------------------------------------------ | | Bugs | An issue with steps that produce a bug (an unexpected result). | [Bug: Verified 🐛][label-bug] | | Stories | A feature/enhancement with a clear benefit, boundaries, and requirements. | [Story 🙌][label-story] | | Tasks | Changes that improve [UX], [DX], or test coverage; but don't impact application behavior | [Task: CI/Tooling 🤖][label-tooling], [Task: Docs 📖][label-docs], [Task: Refactor 🛠][label-refactor], [Task: Tests 🔬][label-tests] | _table 2. backlogged issue types ([full list of labels][gh-labels])_ #### Issue Curation (["backlog grooming"][groom-backlog]) If a [GitHub issue][gh-issues] has a `bug`, `story`, or `task` label; it's on our backlog. If an issue is on our backlog, it means we are, at the very least, committed to reviewing any community drafted Pull Requests to complete the issue. If you're interested in seeing an issue completed but don't know where to start, please don't hesitate to leave a comment! While we don't yet have a long-term or quarterly road map, we do regularly add items to our ["Active Development" GitHub Project Board][gh-board]. Items on this project board are either in active development by Core Team members, or queued up for development as in-progress items are completed. > 🖋 Want to contribute but not sure where to start? Check out [Up for > grabs][label-grabs] issues and our [Contributing > documentation][contributing-docs] #### Contributions (Pull Requests) Incoming Pull Requests (PRs) are triaged using the following labels. Code review is performed on all PRs where the bug fix or added functionality is deemed appropriate: | Labels | Description | | ---------------------------------------------- | ----------------------------------------------------------------------------------------------------------- | | **Classification** | | | [PR: Bug Fix][label-bug] | Filed to address a Bug. | | [PR: Draft][draft] | Filed to gather early feedback from the core team, but which is not intended for merging in the short term. | | **Review Workflow** | | | [PR: Awaiting Response 💬][awaiting-response] | The core team is waiting for additional information from the author. | | [PR: Awaiting Review 👀][awaiting-review] | The core team has not yet performed a code review. | | [PR: Awaiting Revisions 🖊][awaiting-revisions] | Following code review, this label is applied until the author has made sufficient changes. | | **QA** | | | [PR: Awaiting User Cases 💃][awaiting-stories] | The PR code changes need common language descriptions of impact to end users before the review can start | | [PR: No UX Impact 🙃][no-ux-impact] | The PR code changes do not impact the user's experience | We rely on GitHub Checks and integrations with third party services to evaluate changes in code quality and test coverage. Tests must pass and User cases must be present (when applicable) before a PR can be merged to master, and code quality and test coverage must not be changed by a significant margin. For some repositories, visual screenshot-based tests are also included, and video recordings of end-to-end tests are stored for later review. [You can read more about our continuous integration efforts here](/development/continuous-integration.md) #### Releases Releases are made automatically based on the type of commits which have been merged (major.minor.patch). Releases are automatically pushed to NPM. Release notes are automatically generated. Users can subscribe to GitHub and NPM releases. We host development, staging, and production environments for the Progressive Web Application version of the OHIF Viewer. [Development][ohif-dev] always reflects the latest changes on our master branch. [Staging][ohif-stage] is used to regression test a release before a bi-weekly deploy to our [Production environment][ohif-prod]. Important announcements are made on GitHub, tagged as Announcement, and pinned so that they remain at the top of the Issue page. The Core team occasionally performs full manual testing to begin the process of releasing a Stable version. Once testing is complete, the known issues are addressed and a Stable version is released. [groom-backlog]: https://www.agilealliance.org/glossary/backlog-grooming [retrospective]: https://www.atlassian.com/team-playbook/plays/retrospective [gh-issues]: https://github.com/OHIF/Viewers/issues/new/choose [gh-labels]: https://github.com/OHIF/Viewers/labels [label-story]: https://github.com/OHIF/Viewers/labels/Story%20%3Araised_hands%3A [label-tooling]: https://github.com/OHIF/Viewers/labels/Task%3A%20CI%2FTooling%20%3Arobot%3A [label-docs]: https://github.com/OHIF/Viewers/labels/Task%3A%20Docs%20%3Abook%3A [label-refactor]: https://github.com/OHIF/Viewers/labels/Task%3A%20Refactor%20%3Ahammer_and_wrench%3A [label-tests]: https://github.com/OHIF/Viewers/labels/Task%3A%20Tests%20%3Amicroscope%3A [label-bug]: https://github.com/OHIF/Viewers/labels/Bug%3A%20Verified%20%3Abug%3A [draft]: https://github.com/OHIF/Viewers/labels/PR%3A%20Draft [awaiting-response]: https://github.com/OHIF/Viewers/labels/PR%3A%20Awaiting%20Response%20%3Aspeech_balloon%3A [awaiting-review]: https://github.com/OHIF/Viewers/labels/PR%3A%20Awaiting%20Review%20%3Aeyes%3A [awaiting-stories]: https://github.com/OHIF/Viewers/labels/PR%3A%20Awaiting%20UX%20Stories%20%3Adancer%3A [awaiting-revisions]: https://github.com/OHIF/Viewers/labels/PR%3A%20Awaiting%20Revisions%20%3Apen%3A [no-ux-impact]: https://github.com/OHIF/Viewers/labels/PR%3A%20No%20UX%20Impact%20%3Aupside_down_face%3A [ohif-dev]: https://viewer-dev.ohif.org [ohif-stage]: https://viewer-stage.ohif.org [ohif-prod]: https://viewer.ohif.org [gh-board]: https://github.com/OHIF/Viewers/projects/4 [label-grabs]: https://github.com/OHIF/Viewers/issues?q=is%3Aissue+is%3Aopen+label%3A%22Up+For+Grabs+%3Araising_hand_woman%3A%22 [contributing-docs]: ./contributing.md --- ## Playwright End-to-End Testing Source: https://docs.ohif.org/llm/development/playwright-testing.md :::note You might need to run the `bun playwright install ` for the first time if you have not ::: #### Running the tests ```bash #### # run the tests bun test:e2e:ui ``` #### Writing PlayWright Tests Our Playwright tests are written using the Playwright test framework. We use these tests to test our OHIF Viewer and ensure that it is working as expected. In this guide, we will show you how to write Playwright tests for the OHIF Viewer. #### Using a specific study and mode If you would like to use a specific study, you can use the `studyInstanceUID` property to reference the study you would like to visit. for example, if you would like to use the study with StudyInstanceUID `2.16.840.1.114362.1.11972228.22789312658.616067305.306.2` and the mode `Basic Viewer`, you can use the following code snippet: ```ts import { test } from '@playwright/test'; import { visitStudy, checkForScreenshot, screenShotPaths } from './utils/index.js'; test.beforeEach(async ({ page }) => { const studyInstanceUID = '2.16.840.1.114362.1.11972228.22789312658.616067305.306.2'; const mode = 'Basic Viewer'; await visitStudy(page, studyInstanceUID, mode); }); test.describe('Some Test', async () => { test('should do something.', async ({ page }) => { // Your test code here... }); }); ``` #### Screenshots A good way to check your tests is working as expected is to capture screenshots at different stages of the test. You can use our `checkForScreenshot` function located in `tests/utils/checkForScreenshot.ts` to capture screenshots. You should also plan your screenshots in advance, screenshots need to be defined in the `tests/utils/screenshotPaths.ts` file. For example, if you would to capture a screenshot after a measurement is added, you can define a screenshot path like this: ```ts const screenShotPaths = { your_test_name: { measurementAdded: 'measurementAdded.png', measurementRemoved: 'measurementRemoved.png', }, }; ``` It's okay if the screenshot doesn't exist yet, this will be dealt with in the next step. Once you have defined your screenshot path, you can use the `checkForScreenshot` function in your test to capture the screenshot. For example, if you would like to capture a screenshot of the page after a measurement is added, you can use the following code snippet: ```ts import { test } from '@playwright/test'; import { visitStudy, checkForScreenshot, screenshotPath, } from './utils/index.js'; test.beforeEach(async ({ page }) => { const studyInstanceUID = '2.16.840.1.114362.1.11972228.22789312658.616067305.306.2'; const mode = 'Basic Viewer'; await visitStudy(page, studyInstanceUID, mode); }); test.describe('Some test', async () => { test('should do something', async ({ page }) => { // Your test code here to add a measurement await checkForScreenshot( page, page, screenshotPath.your_test_name.measurementAdded ); }); }); ``` The test will automatically fail the first time you run it, it will however generate the screenshot for you, you will notice 3 new entries in the `tests/screenshots` folder, under `chromium/your-test.spec.js/measurementAdded.png`, `firefox/your-test.spec.js/measurementAdded.png` and `webkit/your-test.spec.js/measurementAdded.png` folders. You can now run the test again and it will use those screenshots to compare against the current state of the example. Please verify that the ground truth screenshots are correct before committing them or testing against them. #### Simulating mouse drags If you would like to simulate a mouse drag, you can use the `simulateDrag` function located in `tests/utils/simulateDrag.ts`. You can use this function to simulate a mouse drag on an element. For example, if you would like to simulate a mouse drag on the `cornerstone-canvas` element, you can use the following code snippet: ```ts import { visitStudy, checkForScreenshot, screenShotPaths, simulateDrag, } from './utils/index.js'; test.beforeEach(async ({ page }) => { const studyInstanceUID = '2.16.840.1.114362.1.11972228.22789312658.616067305.306.2'; const mode = 'Basic Viewer'; await visitStudy(page, studyInstanceUID, mode); }); test.describe('Some Test', async () => { test('should do something..', async ({ page, }) => { const locator = page.locator('.cornerstone-canvas'); await simulateDrag(page, locator); }); }); ``` Our simulate drag utility can simulate a drag on any element, and avoid going out of bounds. It will calculuate the bounding box of the element and ensure that the drag stays within the bounds of the element. This should be good enough for most tools, and better than providing custom x, and y coordinates which can be error prone and make the code difficult to maintain. #### Running the tests After you have wrote your tests, you can run them by using the following command: ```bash yarn test:e2e:ci ``` If you want to use headed mode, you can use the following command: ```bash yarn test:e2e:headed ``` You will see the test results in your terminal, if you want an indepth report, you can use the following command: ```bash yarn playwright show-report tests/playwright-report ``` #### Serving the viewer manually for development By default, when you run the tests, it will call the `yarn start` command to serve the viewer first, then run the tests, if you would like to serve the viewer manually, you can use the same command. The viewer will be available at `http://localhost:3000`. This could speed up your development process since playwright will skip this step and use the existing server on port 3000. #### Accessing services, managers, configs and cornerstone in your tests If you would like to access the cornerstone3D, services, or command managers in your tests, you can use the `page.evaluate` function to access them. For example, if you would like to access the `services` so you can show a UI notifcation using the uiNotifcationService, you can use the following code snippet: ```ts await page.evaluate(({ services }: AppTypes.Test) => { const { uiNotificationService } = services; uiNotificationService.show({ title: 'Test', message: 'This is a test', type: 'info', }); }, await page.evaluateHandle('window')); ``` #### Playwright VSCode Extension and Recording Tests If you are using VSCode, you can use the Playwright extension to help you write your tests. The extension provides a test runner and many great features such as picking a locator using your mouse, recording a new test, and more. You can install the extension by searching for `Playwright` in the extensions tab in VSCode or by visiting the [Playwright extension page](https://marketplace.visualstudio.com/items?itemName=ms-playwright.playwright).
--- ## Testing OHIF Source: https://docs.ohif.org/llm/development/testing.md #### Running Tests for OHIF We introduce here various test types that is available for OHIF, and how to run each test in order to make sure your contribution hasn't broken any existing functionalities. Idea and philosophy of each testing category is discussed in the second part of this page. #### Unit test To run the unit test: ```bash yarn run test:unit:ci ``` Note: You should have already installed all the packages with `yarn install`. Running unit test will generate a report at the end showing the successful and unsuccessful tests with detailed explanations. #### End-to-end test For running the OHIF e2e test you need to run the following steps: - Open a new terminal, and from the root of the OHIF mono repo, run the following command: ```bash yarn test:data ``` This will download the required data to run the e2e tests (it might take a while). The `test:data` only needs to be run once and checks the data out. Read more about test data [below](#test-data). - Run the viewer with e2e config ```bash APP_CONFIG=config/e2e.js yarn start ``` You should be able to see test studies in the study list ![OHIF-e2e-test-studies](../assets/img/OHIF-e2e-test-studies.png) - Open a new terminal inside the OHIF project, and run the e2e cypress test ```bash yarn test:e2e ``` You should be able to see the cypress window open ![e2e-cypress](../assets/img/e2e-cypress.png) Run the tests by clicking on the `Run #number integration tests` . A new window will open, and you will see e2e tests being executed one after each other. ![e2e-cypress-final](../assets/img/e2e-cypress-final.png) ## Test Data The testing data is stored in two OHIF repositories. The first contains the binary DICOM data, at [viewer-testdata](https://github.com/OHIF/viewer-testdata.git) while the second module contains data in the DICOMweb format, installed as a submodule into OHIF in the `testdata` directory. This is retrieved via the command ```bash yarn test:data ``` or the equivalent command `git submodule update --init` When adding new data, run: ``` npm install -g dicomp10-to-dicomweb mkdicomweb -d dicomweb dcm ``` to update the local dicomweb submodule in viewer-testdata. Then, commit that data and update the submodules used in OHIF and in the viewer-testdata parent modules. All data MUST be fully anonymized and allowed to be used for open access. Any attributions should be included in the DCM directory. #### Testing Philosophy > Testing is an opinionated topic. Here is a rough overview of our testing > philosophy. See something you want to discuss or think should be changed? Open > a PR and let's discuss. You're an engineer. You know how to write code, and writing tests isn't all that different. But do you know why we write tests? Do you know when to write one, or what kind of test to write? How do you know if a test is a _"good"_ test? This document's goal is to give you the tools you need to make those determinations. Okay. So why do we write tests? To increase our... **CONFIDENCE** - If I do a large refactor, does everything still work? - If I changed some critical piece of code, is it safe to push to production? Gaining the confidence we need to answer these questions after every change is costly. Good tests allow us to answer them without manual regression testing. What and how we choose to test to increase that confidence is nuanced. #### Further Reading: Kinds of Tests Test's buy us confidence, but not all tests are created equal. Each kind of test has a different cost to write and maintain. An expensive test is worth it if it gives us confidence that a payment is processed, but it may not be the best choice for asserting an element's border color. | Test Type | Example | Speed | Cost | | ----------- | ------------------------------------------------------------------------ | ---------------- | ------------------------------------------------------------------------ | | Static | `addNums(1, '2')` called with `string`, expected `int`. | :rocket: Instant | :money_with_wings: | | Unit | `addNums(1, 2)` returns expected result `3` | :airplane: Fast | :money_with_wings::money_with_wings: | | Integration | Clicking "Sign In", navigates to the dashboard (mocked network requests) | :running: Okay | :money_with_wings::money_with_wings::money_with_wings: | | End-to-end | Clicking "Sign In", navigates to the dashboard (no mocks) | :turtle: Slow | :money_with_wings::money_with_wings::money_with_wings::money_with_wings: | - :rocket: Speed: How quickly tests run - :money_with_wings: Cost: Time to write, and to debug when broken (more points of failure) #### Static Code Analysis Modern tooling gives us this "for free". It can catch invalid regular expressions, unused variables, and guarantee we're calling methods/functions with the expected parameter types. Example Tooling: - [ESLint][eslint-rules] - [TypeScript][typescript-docs] or [Flow][flow-org] #### Unit Tests The building blocks of our libraries and applications. For these, you'll often be testing a single function or method. Conceptually, this equates to: _Pure Function Test:_ - If I call `sum(2, 2)`, I expect the output to be `4` _Side Effect Test:_ - If I call `resetViewport(viewport)`, I expect `cornerstone.reset` to be called with `viewport` #### When to use Anything that is exposed as public API should have unit tests. #### When to avoid You're actually testing implementation details. You're testing implementation details if: - Your test does something that the consumer of your code would never do. - IE. Using a private function - A refactor can break your tests #### Integration Tests We write integration tests to gain confidence that several units work together. Generally, we want to mock as little as possible for these tests. In practice, this means only mocking network requests. #### End-to-End Tests These are the most expensive tests to write and maintain. Largely because, when they fail, they have the largest number of potential points of failure. So why do we write them? Because they also buy us the most confidence. #### When to use Mission critical features and functionality, or to cover a large breadth of functionality until unit tests catch up. Unsure if we should have a test for feature `X` or scenario `Y`? Open an issue and let's discuss. #### General - [Assert(js) Conf 2018 Talks][assert-js-talks] - [Write tests. Not too many. Mostly integration.][kent-talk] - Kent C. Dodds - [I see your point, but…][gleb-talk] - Gleb Bahmutov - [Static vs Unit vs Integration vs E2E Testing][kent-blog] - Kent C. Dodds (Blog) #### End-to-end Testing w/ Cypress - [Getting Started](https://docs.cypress.io/guides/overview/why-cypress.html) - Be sure to check out `Getting Started` and `Core Concepts` - [Best Practices](https://docs.cypress.io/guides/references/best-practices.html) - [Example Recipes](https://docs.cypress.io/examples/examples/recipes.html) [eslint-rules]: https://eslint.org/docs/rules/ [mini-pacs]: https://github.com/OHIF/viewer-testdata [typescript-docs]: https://www.typescriptlang.org/docs/home.html [flow-org]: https://flow.org/ [assert-js-talks]: https://www.youtube.com/playlist?list=PLZ66c9_z3umNSrKSb5cmpxdXZcIPNvKGw [kent-talk]: https://www.youtube.com/watch?v=Fha2bVoC8SE [gleb-talk]: https://www.youtube.com/watch?v=5FnalKRjpZk [kent-blog]: https://kentcdodds.com/blog/unit-vs-integration-vs-e2e-tests [testing-trophy]: https://twitter.com/kentcdodds/status/960723172591992832?ref_src=twsrc%5Etfw%7Ctwcamp%5Etweetembed%7Ctwterm%5E960723172591992832&ref_url=https%3A%2F%2Fkentcdodds.com%2Fblog%2Fwrite-tests [aaron-square]: https://twitter.com/Carofine247/status/966727489274961920 [gleb-pyramid]: https://twitter.com/Carofine247/status/966764532046684160/photo/3 [testing-pyramid]: https://dojo.ministryoftesting.com/dojo/lessons/the-mobile-test-pyramid [testing-dorito]: https://twitter.com/denvercoder/status/960752578198843392 [testing-dorito-img]: https://pbs.twimg.com/media/DVVHXycUMAAcN-F?format=jpg&name=4096x4096 --- ## Global Types and Service Extensions Source: https://docs.ohif.org/llm/development/types.md #### Extending App Types and Services in Your Application This documentation provides an overview and examples on how to use and extend `withAppTypes`, integrate custom properties, and add services in the global namespace of the application. This helps in enhancing the application's modularity and extensibility. #### Overview of `withAppTypes` The `withAppTypes` function is a TypeScript utility that extends the base properties of components or modules with the application's core service and manager types. It allows for a more flexible and type-safe way to pass around core functionality and custom properties. #### Using `withAppTypes` `withAppTypes` can be enhanced using generics to include custom properties. This is particularly useful for passing additional data or configurations specific to your component or service. #### Extending with Custom Properties You can extend `withAppTypes` to include custom properties by defining an interface for the props you need. For example: ```typescript interface ColorbarProps { viewportId: string; displaySets: Array; colorbarProperties: ColorbarProperties; } export function Colorbar({ viewportId, displaySets, commandsManager, // injected type servicesManager, // injected type colorbarProperties, }: withAppTypes): ReactElement { // Component logic here } ``` In this example, `ColorbarProps` is a custom interface that extends the application types through `withAppTypes`. #### Typing the custom extensions's new services Extensions can define additional services that integrate seamlessly into the application's global service architecture, and will be available on the ServicesManager for use across the application. #### Adding the extension's services Types Declare your service in the global namespace and use it across your application as demonstrated below: `extensions/my-extension/src/types/whatever.ts` ```typescript declare global { namespace AppTypes { // only add if you need direct access to the service ex. AppTypes.MicroscopyService export type MicroscopyService = MicroscopyServiceType; // add to the global Services interface, and to withAppTypes export interface Services { microscopyService?: MicroscopyServiceType; } } } ``` Doing the above adds the `microscopyService` to the global Services interface, which ServicesManager uses by default `public services: AppTypes.Services = {};` to type services, and is also used by withAppTypes to inject services into components. You will also get access to the seperate services via `AppTypes.YourServiceName` in your application. ```typescript export function CustomComponent({ servicesManager, }: withAppTypes): ReactElement { const { microscopyService } = servicesManager.services; microscopyService.someMethod(); // auto completation available } ``` ```typescript export function CustomComponent2( microscopyService: AppTypes.MicroscopyService, ): ReactElement { microscopyService.someMethod(); // auto completation available } ``` --- ## OHIF Development Video Tutorials Source: https://docs.ohif.org/llm/development/video-tutorials.md #### Video Tutorials #### Creating, Linking and Publishing OHIF Modes and Extensions The [OHIF CLI](./ohif-cli.md) facilitates the creation, linkage and publication of OHIF modes and extensions. The videos below walk through how to use the CLI for - creating modes and extensions - linking local modes and extensions - publishing modes and extensions to NPM - adding published modes and extensions to OHIF - submitting a mode to OHIF The videos build on top of one another whereby the mode and extension created in each of the first two videos are published to NPM and then the published entities are added to OHIF. #### Creating and Linking a Mode The first video demonstrates the creation and linkage of a mode.
#### Creating and Linking an Extension The second video creates and links an extension. The mode from the first video is modified to reference the extension.
#### Publishing an Extension to NPM The third video shows how the extension created in the second video can be published to NPM.
#### Publishing a Mode to NPM The fourth video shows how the mode created in the first video can be published to NPM.
#### Adding a Mode from NPM The fifth video adds the mode and extension published in NPM to OHIF. Note that since the mode references the extension both are added with one CLI command.
#### Submitting a Mode to OHIF The sixth video demonstrates how a mode can be submitted to OHIF to have it appear in OHIF's mode gallery.
--- ## Web Workers Implementation Guide Source: https://docs.ohif.org/llm/development/webWorkers.md #### Web Worker Implementation Guide #### Overview Web Workers enable running computationally intensive tasks in background threads without blocking the UI. This guide explains how to implement them step by step. #### Basic Setup #### 1. Create Your Worker File First, create a worker file with your background tasks: ```javascript // myWorker.js import { expose } from 'comlink'; const obj = { // Simple task basicCalculation({ data }) { // Your computation here return result; }, // Task with progress updates longRunningTask({ data }, progressCallback) { const total = data.length; for (let i = 0; i < total; i++) { // Your processing logic if (progressCallback) { const progress = Math.round((i / total) * 100); progressCallback(progress); } } return result; } }; expose(obj); ``` #### 2. Register the Worker In the main thread, can be your service, commands module, etc. ```javascript import { getWebWorkerManager } from '@cornerstonejs/core'; const workerManager = getWebWorkerManager(); // Define worker creation function const workerFn = () => { return new Worker( new URL('./myWorker.js', import.meta.url), { name: 'my-worker' } ); }; // Registration options const options = { maxWorkerInstances: 1, // Number of concurrent workers autoTerminateOnIdle: { enabled: true, idleTimeThreshold: 3000, // Terminate after 3s idle }, }; // Register the worker workerManager.registerWorker('my-worker', workerFn, options); ``` :::info It is recommended to register the worker in top of the commands module. So that it gets registered before any commands that need to use the worker. ::: #### 3. Execute Tasks ```javascript // Basic execution try { const result = await workerManager.executeTask( 'my-worker', 'basicCalculation', { data: myData } ); } catch (error) { console.error('Task failed:', error); } // Execution with progress callback try { const result = await workerManager.executeTask( 'my-worker', 'longRunningTask', { data: myData }, { callbacks: [ (progress) => { console.log(`Progress: ${progress}%`); } ] } ); } catch (error) { console.error('Task failed:', error); } ``` #### Progress Events (Optional) If you want to show progress in your UI as a loading spinner, you can implement a progress event system: #### 1. Publish Progress Events ```javascript // Helper to trigger progress events const publishProgress = (eventTarget, progress, taskId) => { triggerEvent(eventTarget, 'WEB_WORKER_PROGRESS', { progress, // number 0-100 type: 'YOUR_TASK_TYPE', // can be any string identifier id: taskId, // unique task identifier }); }; // Usage in your application async function runTaskWithProgress(data) { // Start progress publishProgress(eventTarget, 0, data.id); try { const result = await workerManager.executeTask( 'my-worker', 'longRunningTask', { data }, { callbacks: [ (progress) => { publishProgress(eventTarget, progress, data.id); } ] } ); // Complete progress publishProgress(eventTarget, 100, data.id); return result; } catch (error) { console.error('Task failed:', error); throw error; } } ``` Note: Publishing the `WEB_WORKER_PROGRESS` event on Cornerstone's `eventTarget` will automatically trigger the built-in loading spinner. This gives users visual feedback while your worker runs in the background. #### Multiple Methods in One Worker You can define multiple related methods in a single worker file: ```javascript // complexWorker.js import { expose } from 'comlink'; const obj = { processingMethod1({ data }, progressCallback) { // Implementation }, processingMethod2({ data }, progressCallback) { // Implementation }, processingMethod3({ data }, progressCallback) { // Implementation }, // Shared helper methods _internalHelper() { // Helper logic } }; expose(obj); ``` --- # Faq ## How to add a custom icon to the viewport corners Source: https://docs.ohif.org/llm/faq/add-viewport-icon.md #### How to add a custom icon to the viewport corners #### Question How can I add a custom icon or dropdown to one of the viewport corners in OHIF? #### Answer OHIF provides a customizable viewport action menu system that allows you to add icons, buttons, or dropdowns to any of the four corners of a viewport (topLeft, topRight, bottomLeft, bottomRight). This is done through the `customizationService` and the viewport action corners API. Here's a complete example that shows how to add a mode switch dropdown to the top-left corner of the viewport: ```tsx import React from 'react'; import { Icons } from '@ohif/ui-next'; import { useSystem } from '@ohif/core'; import { DropdownMenu, DropdownMenuTrigger, DropdownMenuContent, DropdownMenuItem, DropdownMenuLabel, Button, } from '@ohif/ui-next'; // This is a complete, self-contained component that shows a dropdown menu // for switching modes when clicked function getModeSwitchMenu({ viewportId, element, location }) { const ModeSwitchMenu = () => { const { servicesManager } = useSystem(); const { router } = servicesManager.services; const { viewportActionCornersService } = servicesManager.services; const handleModeSwitch = (mode) => { const currentStudyInstanceUID = router.query.StudyInstanceUIDs; // Navigate to the selected mode with the current study router.navigate(`/${mode}?StudyInstanceUIDs=${currentStudyInstanceUID}`); }; // Get proper alignment based on the location let align = 'center'; let side = 'bottom'; if (location !== undefined) { const positioning = viewportActionCornersService.getAlignAndSide(location); align = positioning.align; side = positioning.side; } return (
Mode handleModeSwitch('longitudinal')}> Longitudinal handleModeSwitch('segmentation')}> Segmentation handleModeSwitch('tmtv')}> TMTV handleModeSwitch('microscopy')}> Microscopy
); }; return ; } // In your mode or extension, add this to the customizations // This example shows how to add it in the onModeEnter lifecycle hook function onModeEnter({ servicesManager }) { const { customizationService } = servicesManager.services; // Add the mode switch icon to the top-left corner of the viewport customizationService.setCustomizations({ 'viewportActionMenu.topLeft': { // Use $push to add to existing items or $set to replace all items $push: [ { id: 'modeSwitch', enabled: true, component: getModeSwitchMenu, }, ], }, }); } ``` #### Key Concepts 1. **Location-based customization**: The viewport is divided into four corners identified by: - `viewportActionMenu.topLeft` - `viewportActionMenu.topRight` - `viewportActionMenu.bottomLeft` - `viewportActionMenu.bottomRight` 2. **Component structure**: - `id` - A unique identifier for your component - `enabled` - Boolean to control if the component should be displayed - `component` - A function that returns a React component to render 3. **Component positioning**: The component's position within a corner is determined by its order in the array. Components are rendered in the order they appear. 4. **Dropdown positioning**: Use the `viewportActionCornersService.getAlignAndSide()` method to get the correct alignment for your dropdown menu based on its location. #### Adding Multiple Components If you want to add multiple components to the same corner or different corners, you can do it in a single customization: ```js customizationService.setCustomizations({ 'viewportActionMenu.topLeft': { $push: [ { id: 'modeSwitch', enabled: true, component: getModeSwitchMenu, }, ], }, 'viewportActionMenu.topRight': { $push: [ { id: 'anotherComponent', enabled: true, component: getAnotherComponent, }, ], }, }); ``` #### Replacing Existing Components If you want to replace all components in a corner instead of adding to them, use `$set` instead of `$push`: ```js customizationService.setCustomizations({ 'viewportActionMenu.topLeft': { $set: [ { id: 'modeSwitch', enabled: true, component: getModeSwitchMenu, }, // This will be the only components in the top-left corner ], }, }); ``` Remember that this customization will affect all viewports in the active mode. If you need different behavior for different viewports, you should check the `viewportId` parameter in your component's logic. --- ## General FAQ Source: https://docs.ohif.org/llm/faq/general.md #### General FAQ #### How do I report a bug? Navigate to our [GitHub Repository][new-issue], and submit a new bug report. Follow the steps outlined in the [Bug Report Template][bug-report-template]. #### How can I request a new feature? At the moment we are in the process of defining our roadmap and will do our best to communicate this to the community. If your requested feature is on the roadmap, then it will most likely be built at some point. If it is not, you are welcome to build it yourself and [contribute it](../development/contributing.md). If you have resources and would like to fund the development of a feature, please [contact us](https://ohif.org/get-support). #### Who should I contact about Academic Collaborations? [Gordon J. Harris](https://www.dfhcc.harvard.edu/insider/member-detail/member/gordon-j-harris-phd/) at Massachusetts General Hospital is the primary contact for any academic collaborators. We are always happy to hear about new groups interested in using the OHIF framework, and may be able to provide development support if the proposed collaboration has an impact on cancer research. #### Does OHIF offer support? yes, you can contact us for more information [here](https://ohif.org/get-support) #### Does The OHIF Viewer have [510(k) Clearance][501k-clearance] from the U.S. F.D.A or [CE Marking][ce-marking] from the European Commission? **NO.** The OHIF Viewer is **NOT** F.D.A. cleared or CE Marked. It is the users' responsibility to ensure compliance with applicable rules and regulations. The [License](https://github.com/OHIF/Viewers/blob/master/LICENSE) for the OHIF Platform does not prevent your company or group from seeking F.D.A. clearance for a product built using the platform. If you have gone this route (or are going there), please let us know because we would be interested to hear about your experience. #### Is there a DICOM Conformance Statement for the OHIF Viewer? Yes, check it here [DICOM Conformance Statement](https://docs.google.com/document/d/1hbDlUApX4svX33gAUGxGfD7fXXZNaBsX0hSePbc-hNA/edit?usp=sharing) #### Is The OHIF Viewer [HIPAA][hipaa-def] Compliant? **NO.** The OHIF Viewer **DOES NOT** fulfill all of the criteria to become HIPAA Compliant. It is the users' responsibility to ensure compliance with applicable rules and regulations. #### Could you provide me with a particular study from the OHIF Viewer Demo? You can check out the studies that we have put in this [Dropbox link](https://www.dropbox.com/scl/fo/66xidsx13pn0zf3b9cbfq/ADaCgn7aT29WMlnTdT_WRXM?rlkey=rratvx6g4kfxnswjdbupewjye&dl=0) [general]: general [technical]: technical [report-bug]: how-do-i-report-a-bug [new-feature]: how-can-i-request-a-new-feature [commercial-support]: does-ohif-offer-commercial-support [academic]: who-should-i-contact-about-academic-collaborations [fda-clearance]: does-the-ohif-viewer-have-510k-clearance-from-the-us-fda-or-ce-marking-from-the-european-commission [hipaa]: is-the-ohif-viewer-hipaa-compliant [501k-clearance]: https://www.fda.gov/MedicalDevices/DeviceRegulationandGuidance/HowtoMarketYourDevice/PremarketSubmissions/PremarketNotification510k/ [ce-marking]: https://ec.europa.eu/growth/single-market/ce-marking_en [hipaa-def]: https://en.wikipedia.org/wiki/Health_Insurance_Portability_and_Accountability_Act [new-issue]: https://github.com/OHIF/Viewers/issues/new/choose [bug-report-template]: https://github.com/OHIF/Viewers/issues/new?assignees=&labels=Bug+Report+%3Abug%3A&template=---bug-report.md&title= --- ## OHIF Viewer FAQ Source: https://docs.ohif.org/llm/faq/index.md #### General FAQ #### How do I report a bug? Navigate to our [GitHub Repository][new-issue], and submit a new bug report. Follow the steps outlined in the [Bug Report Template][bug-report-template]. #### How can I request a new feature? At the moment we are in the process of defining our roadmap and will do our best to communicate this to the community. If your requested feature is on the roadmap, then it will most likely be built at some point. If it is not, you are welcome to build it yourself and [contribute it](../development/contributing.md). If you have resources and would like to fund the development of a feature, please [contact us](https://ohif.org/get-support). #### Who should I contact about Academic Collaborations? [Gordon J. Harris](https://www.dfhcc.harvard.edu/insider/member-detail/member/gordon-j-harris-phd/) at Massachusetts General Hospital is the primary contact for any academic collaborators. We are always happy to hear about new groups interested in using the OHIF framework, and may be able to provide development support if the proposed collaboration has an impact on cancer research. #### Does OHIF offer support? yes, you can contact us for more information [here](https://ohif.org/get-support) #### Does The OHIF Viewer have [510(k) Clearance][501k-clearance] from the U.S. F.D.A or [CE Marking][ce-marking] from the European Commission? **NO.** The OHIF Viewer is **NOT** F.D.A. cleared or CE Marked. It is the users' responsibility to ensure compliance with applicable rules and regulations. The [License](https://github.com/OHIF/Viewers/blob/master/LICENSE) for the OHIF Platform does not prevent your company or group from seeking F.D.A. clearance for a product built using the platform. If you have gone this route (or are going there), please let us know because we would be interested to hear about your experience. #### Is there a DICOM Conformance Statement for the OHIF Viewer? Yes, check it here [DICOM Conformance Statement](https://docs.google.com/document/d/1hbDlUApX4svX33gAUGxGfD7fXXZNaBsX0hSePbc-hNA/edit?usp=sharing) #### Is The OHIF Viewer [HIPAA][hipaa-def] Compliant? **NO.** The OHIF Viewer **DOES NOT** fulfill all of the criteria to become HIPAA Compliant. It is the users' responsibility to ensure compliance with applicable rules and regulations. #### Could you provide me with a particular study from the OHIF Viewer Demo? You can check out the studies that we have put in this [Dropbox link](https://www.dropbox.com/scl/fo/66xidsx13pn0zf3b9cbfq/ADaCgn7aT29WMlnTdT_WRXM?rlkey=rratvx6g4kfxnswjdbupewjye&dl=0) [general]: #general [technical]: #technicalß˚ [report-bug]: #how-do-i-report-a-bug [new-feature]: #how-can-i-request-a-new-feature [commercial-support]: #does-ohif-offer-commercial-support [academic]: #who-should-i-contact-about-academic-collaborations [fda-clearance]: #does-the-ohif-viewer-have-510k-clearance-from-the-us-fda-or-ce-marking-from-the-european-commission [hipaa]: #is-the-ohif-viewer-hipaa-compliant [501k-clearance]: https://www.fda.gov/MedicalDevices/DeviceRegulationandGuidance/HowtoMarketYourDevice/PremarketSubmissions/PremarketNotification510k/ [ce-marking]: https://ec.europa.eu/growth/single-market/ce-marking_en [hipaa-def]: https://en.wikipedia.org/wiki/Health_Insurance_Portability_and_Accountability_Act [new-issue]: https://github.com/OHIF/Viewers/issues/new/choose [bug-report-template]: https://github.com/OHIF/Viewers/issues/new?assignees=&labels=Bug+Report+%3Abug%3A&template=---bug-report.md&title= --- ## Technical FAQ Source: https://docs.ohif.org/llm/faq/technical.md #### Technical FAQ * [How to add a custom icon to the viewport corners](./add-viewport-icon.md) #### Viewer opens but does not show any thumbnails Thumbnails may not appear in your DICOMWeb application for various reasons. This guide focuses on one primary scenario, which is you are using the `supportsWildcard: true` in your configuration file while your sever does not support it. One For instance for the following filtering in the worklist tab we send this request ![](../assets/img/filtering-worklist.png) `https://d33do7qe4w26qo.cloudfront.net/dicomweb/studies?PatientName=*Head*&limit=101&offset=0&fuzzymatching=false&includefield=00081030%2C00080060` Which our server can respond properly. If your server does not support this type of filtering, you can disable it by setting `supportsWildcard: false` in your configuration file, or edit your server code to support it for instance something like ```js Pseudocode: For each filter in filters: if filter.value contains "*": Convert "*" to SQL LIKE wildcard ("%") Add "metadataField LIKE ?" to query else: Add "metadataField = ?" to query ``` #### What are the list of required metadata for the OHIF Viewer to work? #### Mandatory **All Modalities** - `StudyInstanceUID`, `SeriesInstanceUID`, `SOPInstanceUID`: Unique identifiers for the study, series, and object. - `PhotometricInterpretation`: Describes the color space of the image. - `Rows`, `Columns`: Image dimensions. - `PixelRepresentation`: Indicates how pixel data should be interpreted. - `Modality`: Type of modality (e.g., CT, MR, etc.). - `PixelSpacing`: Spacing between pixels. - `BitsAllocated`: Number of bits allocated for each pixel sample. - `SOPClassUID`: Specifies the DICOM service class of the object (though you might be able to render without it for most regular images datasets, but it is pretty normal to have it) **Rendering** You need to have the following tags for the viewer to render the image properly, otherwise you should use the windowing tools to adjust the image to your liking: - `RescaleIntercept`, `RescaleSlope`: Values used for rescaling pixel values for visualization. - `WindowCenter`, `WindowWidth`: Windowing parameters for display. **Some Datasets** - `InstanceNumber`: Useful for sorting instances (without it the instances might be out of order) **For MPR (Multi-Planar Reformatting) rendering and tools** - `ImagePositionPatient`, `ImageOrientationPatient`: Position and orientation of the image in the patient. **SEG (Segmentation)** - `FrameOfReferenceUID` for handling segmentation layers. - sequences - `ReferencedSeriesSequence` - `SharedFunctionalGroupsSequence` - `PerFrameFunctionalGroupsSequence` **RTSTRUCT (Radiotherapy Structure)** - `FrameOfReferenceUID` for handling segmentation layers. - sequences - `ROIContourSequence` - `StructureSetROISequence` - `ReferencedFrameOfReferenceSequence` **US (Ultrasound)** - `NumberOfFrames`: Number of frames in a multi-frame image. - `SequenceOfUltrasoundRegions`: For measurements. - `FrameTime`: Time between frames if specified. **SR (Structured Reporting)** - Various sequences for encoding the report content and template. - `ConceptNameCodeSequence` - `ContentSequence` - `ContentTemplateSequence` - `CurrentRequestedProcedureEvidenceSequence` - `ContentTemplateSequence` - `CodingSchemeIdentificationSequence` **PT with SUV Correction (Positron Tomography Standardized Uptake Value)** - Sequences and tags related to radiopharmaceuticals, units, corrections, and timing. - `RadiopharmaceuticalInformationSequence` - `SeriesDate` - `SeriesTime` - `CorrectedImage` - `Units` - `DecayCorrection` - `AcquisitionDate` - `AcquisitionTime` - `PatientWeight` **PDF** - `EncapsulatedDocument`: Contains the PDF document. **Video** - `NumberOfFrames`: Video frame count . #### Optional There are various other optional tags that will add to the viewer experience, but are not required for basic functionality. These include: Patient Information, Study Information, Series Information, Instance Information, and Frame Information. #### How do I handle large volumes for MPR and Volume Rendering Currently there are two ways to handle large volumes for MPR and Volume Rendering if that does not fit in the memory of the client machine. #### `useNorm16Texture` WebGL officially supports only 8-bit and 32-bit data types. For most images, 8 bits are not enough, and 32 bits are too much. However, we have to use the 32-bit data type for volume rendering and MPR, which results in suboptimal memory consumption for the application. Through [EXT_texture_norm16](https://registry.khronos.org/webgl/extensions/EXT_texture_norm16/) , WebGL can support 16 bit data type which is ideal for most images. You can look into the [webgl report](https://webglreport.com/?v=2) to check if you have that extension enabled. ![](../assets/img/webgl-report-norm16.png) This is a flag that you can set in your [configuration file](../configuration/configurationFiles.md) to force usage of 16 bit data type for the volume rendering and MPR. This will reduce the memory usage by half. For instance for a large pt/ct study ![](../assets/img/large-pt-ct.jpeg) Before (without the flag) the app shows 399 MB of memory usage ![](../assets/img/memory-profiling-regular.png) After (with flag, running locally) the app shows 249 MB of memory usage ![](../assets/img/webgl-int16.png) :::note Using the 16 bit texture (if supported) will not have any effect in the rendering what so ever, and pixelData would be exactly shown as it is. For datasets that cannot be represented with 16 bit data type, the flag will be ignored and the 32 bit data type will be used. Read more about these discussions in our PRs - https://github.com/Kitware/vtk-js/pull/2058 ::: :::warning Although the support for 16 bit data type is available in WebGL, in some settings (e.g., Intel-based Macos) there seems to be still some issues with it. You can read and track bugs below. - https://bugs.chromium.org/p/chromium/issues/detail?id=1246379 - https://bugs.chromium.org/p/chromium/issues/detail?id=1408247 ::: #### `preferSizeOverAccuracy` This is another flag that you can set in your [configuration file](../configuration/configurationFiles.md) to force the usage of the `half_float` data type for volume rendering and MPR. The main reason to choose this option over `useNorm16Texture` is its broader support across hardware and browsers. However, it is less accurate than the 16-bit data type and may lead to some rendering artifacts. ```js Integers between 0 and 2048 can be exactly represented (and also between −2048 and 0) Integers between 2048 and 4096 round to a multiple of 2 (even number) Integers between 4096 and 8192 round to a multiple of 4 Integers between 8192 and 16384 round to a multiple of 8 Integers between 16384 and 32768 round to a multiple of 16 Integers between 32768 and 65519 round to a multiple of 32 ``` As you see in the ranges above 2048 there will be inaccuracies in the rendering. Memory snapshot after enabling `preferSizeOverAccuracy` for the same study as above ![](../assets/img/preferSizeOverAccuracy.png) #### How to dynamically load a measurement You can dynamically load a measurement by using a combination of `MeasurementService` and `CornerstoneTools` Annotation API. Here, we will demonstrate this with an example of loading a `Rectangle` measurement. ![alt text](faq-measure-1.png) So if we look at the terminal and get the measurement service we can see there is one measurement ![alt text](faq-measure-2.png) However, this is the `mapped` cornerstone measurement inside OHIF, and it has additional information such as `geReport` and `source`, which are internal details of OHIF Viewers that you don't need to worry about. we can call the `cornerstoneTools` api to grab the raw annotation data with the `uid` `cornerstoneTools.annotation.state.getAnnotation("ea45a45c-0731-47d4-9438-d2a53ffea4ff")` ![alt text](faq-measure3.png) :::note Note: There is a `pointsInShape` attribute inside the data that stores the points within the annotation for some tools like `Rectangle` and `EllipticalRoi`. However, you can remove that attribute as well. ::: For the sake of this example, I have extracted those keys and uploaded them to our server for fetching. ` https://ohif-assets.s3.us-east-2.amazonaws.com/ohif-faq/rectangle-roi.json ` Now, let's discuss how to load this measurement dynamically and programmatically. There are numerous places in OHIF where you can add annotations, but we always recommend having your own extensions and modes to maintain full control over your custom API. For this example, I will add the logic in the `longitudinal` mode. However, as mentioned, you can create your own extension and mode, and either use `onModeEnter` or other lifecycle hooks to add annotations. Learn more about lifecycle hooks [here](../platform/extensions/lifecycle.md). Of course, you need to load the appropriate measurement for each study. However, for simplicity's sake, I will hardcode the URL in this example. ```js import * as cs3dTools from '@cornerstonejs/tools'; onModeEnter: function ({ servicesManager, extensionManager, commandsManager }: withAppTypes) { // rest of logic const annotationResponse = await fetch( 'https://ohif-assets.s3.us-east-2.amazonaws.com/ohif-faq/rectangle-roi.json' ); const annotationData = await annotationResponse.json(); cs3dTools.annotation.state.addAnnotation(annotationData); }, ``` As you can see, we use the CornerstoneTools API to add the annotation. Since OHIF has mappers set up for CornerstoneTools (`extensions/cornerstone/src/utils/measurementServiceMappings/measurementServiceMappingsFactory.ts`), it will automatically map the annotation to the OHIF measurement service. If you refresh the viewer, you'll see the measurement loaded on the image. ![alt text](faq-measure-4.png) But if you notice it does not appear on the right panel, the reason is that the right panel is the tracking measurement panel. You can switch to a non-tracking measurement by changing `rightPanels: [dicomSeg.panel, tracked.measurements],` to `rightPanels: [dicomSeg.panel, '@ohif/extension-default.panelModule.measure'],` which then it will look like ![alt text](faq-measure-5.png) :::info There is also dedicated example for this in the [cornerstone3D examples](https://www.cornerstonejs.org/live-examples/dynamicallyaddannotations). ::: #### How do I sort the series in the study panel by a specific value You need to enable the experimental StudyBrowserSort component by setting the `experimentalStudyBrowserSort` to true in your config file. This will add a dropdown in the study panel to sort the series by a specific value. This component is experimental since we are re-deigning the study panel and it might change in the future, but the functionality will remain the same. ```js { experimentalStudyBrowserSort: true, } ``` The component will appear in the study panel and will allow you to sort the series by a specific value. It comes with 3 default sorting functions, Series Number, Series Image Count, and Series Date. You can sort the series in the study panel by a specific value by adding a custom sorting function in the customizationModule, you can use the existing customizationModule in `extensions/default/src/getCustomizationModule.tsx` or create your own in your extension. The value to be used for the entry is `studyBrowser.sortFunctions` and should be under the `default` key. #### Example ```js export default function getCustomizationModule({ servicesManager, extensionManager }) { return [ { name: 'default', value: [ { id: 'studyBrowser.sortFunctions', values: [ { label: 'Series Number', sortFunction: (a, b) => { return a?.SeriesNumber - b?.SeriesNumber; }, }, // Add more sort functions as needed ], }, ], }, ]; } ``` #### Explanation This function will be retrieved by the StudyBrowserSort component and will be used to sort all displaySets, it will reflect in all parts of the app since it works at the displaySetService level, which means the thumbnails in the study panel will also be sorted by the desired value. You can define multiple functions and pick which sort to use via the dropdown in the StudyBrowserSort component that appears in the study panel. #### How can i change the sorting of the thumbnail / study panel / study browser We are currently redesigning the study panel and the study browser. During this process, you can enable our undesigned component via the `experimentalStudyBrowserSort` flag. This will look like: ![alt text](study-sorting.png) You can also add your own sorting functions by utilizing the `customizationService` and adding the `studyBrowser.sortFunctions` key, as shown below: ``` customizationService.addModeCustomizations([ { id: 'studyBrowser.sortFunctions', values: [{ label: 'Series Images', sortFunction: (a, b) => { return a?.numImageFrames - b?.numImageFrames; }, }], }, ]); ``` :::note Notice the arrays and objects, the values are arrays ::: #### How do I change the cine auto mount behavior You can change the cine auto mount behavior by adding the `autoCineModalities` mode customization, the value is an array of modalities that should be mounted with cine. By default the viewer will mount with cine enabled for `OT` and `US` modalities. ```js customizationService.addModeCustomizations([ { id: 'autoCineModalities', modalities: ['OT', 'US'], }, ]); ``` --- # Migration-guide ## Migration Guide from 3.7 to 3.8 Source: https://docs.ohif.org/llm/migration-guide/from-3p7-to-3p8.md #### Migration Guide There are two main things that need to be taken care of. #### New Toolbar Button definitions #### Update Active Tool Handling The concept of `activeTool` and its associated getter and setter has been removed. The active tool should now be derived from the toolGroup and the viewport. **Action Needed** Remove any code that sets the default tool using `toolbarService.setDefaultTool()` and activates the tool using `toolbarService.recordInteraction()`. For example, the following code should be removed: ```javascript let unsubscribe; toolbarService.setDefaultTool({ groupId: "WindowLevel", itemId: "WindowLevel", interactionType: "tool", commands: [ { commandName: "setToolActive", commandOptions: { toolName: "WindowLevel", }, context: "CORNERSTONE", }, ], }); const activateTool = () => { toolbarService.recordInteraction(toolbarService.getDefaultTool()); unsubscribe(); }; ({ unsubscribe } = toolGroupService.subscribe( toolGroupService.EVENTS.VIEWPORT_ADDED, activateTool )); ``` Instead, focus on defining the buttons and their placement in the toolbar using `toolbarService.addButtons()` and `toolbarService.createButtonSection()`. For example: ```javascript toolbarService.addButtons([...toolbarButtons, ...moreTools]); toolbarService.createButtonSection("primary", [ "MeasurementTools", "Zoom", "WindowLevel", "Pan", "Capture", "Layout", "MPR", "Crosshairs", "MoreTools", ]); ``` #### Update Button Definitions The concept of button types (toggle, action, tool) has been removed. Buttons are now defined using a simplified object-based definition. **Action Needed** Update your button definitions to use the new object-based format and remove the `type` property. Use the `uiType` property for the top-level UI type definition. For example: ```javascript // Old Implementation { id: 'Capture', type: 'ohif.action', props: { icon: 'tool-capture', label: 'Capture', type: 'action', commands: [ { commandName: 'showDownloadViewportModal', commandOptions: {}, context: 'CORNERSTONE', }, ], }, }, ``` is now ```javascript // New Implementation { id: 'Capture', uiType: 'ohif.radioGroup', props: { icon: 'tool-capture', label: 'Capture', commands: [ { commandName: 'showDownloadViewportModal', context: 'CORNERSTONE', }, ], evaluate: 'evaluate.action', }, }, ``` #### Add Evaluators to Button Definitions Introduce the evaluate property in your button definitions to determine the state of the button based on the app context. **Action Needed** Add the appropriate `evaluate` property to each button definition. For example: - Use `evaluate.cornerstoneTool` if the button should be highlighted only when it is the active primary tool (left mouse). - Use `evaluate.cornerstoneTool.toggle` if the tool is a toggle tool (like reference lines or image overlay). Refer to the `modes/longitudinal/src/toolbarButtons.ts` file for examples of using the `evaluate` property. Additional Resources - For more information on the new toolbar module and its usage, refer to the [Toolbar documentation](../platform/extensions/modules/toolbar.md). - Consult the updated button definitions in `modes/longitudinal/src/toolbarButtons.ts` for examples of the new object-based button definition format and the usage of evaluators. #### Tool listeners Some tools can be configured to listen to events to trigger, for example ```ts createButton({ id: 'ReferenceLines', icon: 'tool-referenceLines', label: 'Reference Lines', tooltip: 'Show Reference Lines', commands: 'toggleEnabledDisabledToolbar', listeners: { [ViewportGridService.EVENTS.ACTIVE_VIEWPORT_ID_CHANGED]: ReferenceLinesListeners, [ViewportGridService.EVENTS.VIEWPORTS_READY]: ReferenceLinesListeners, }, evaluate: 'evaluate.cornerstoneTool.toggle', }), ``` If you have a custom viewport component, and you are overriding the ```onElementEnabled``` handler, than ensure to call ```viewportGridService.setViewportIsReady(viewportId, true)``` in your own handler so that eventually the ```VIEWPORTS_READY``` event fires as expected, if you are not modifying the handler, then an existing handler that is automatically passed down via the props will call that for you, it is passed down from ```ViewportGrid.tsx``` ```ts 1 ? viewportLabel : ''} viewportId={viewportId} dataSource={dataSource} viewportOptions={viewportOptions} displaySetOptions={displaySetOptions} needsRerendering={displaySetsNeedsRerendering} isHangingProtocolLayout={isHangingProtocolLayout} onElementEnabled={() => { viewportGridService.setViewportIsReady(viewportId, true); }} /> ``` #### Toolbar Service toolbarService.init is not a function. **Action Needed** remove the call to toolbarService.init() from your codebase. #### leftPanelDefaultClosed and rightPanelDefaultClosed Now they are renamed to `leftPanelClosed` and `rightPanelClosed` respectively. #### StudyInstanceUID in the URL param Previously there were two params that you could choose: seriesInstanceUID and seriesInstanceUIDs, they have been replaced with seriesInstanceUIDs so even if you would like to filter one series use ``seriesInstanceUIDs` #### UI #### Header Header in @ohif/ui now needs servicesManager and appConfig as input. #### Panels Left and right panel lists are no longer injected into the LayoutTemplate, and have been moved to a PanelService where you have to fetch them from. If you're using the main layout, you're fine. However, if you have a custom layout, you'll need to update it. To get the panels, see the `extensions/default/src/ViewerLayout/index.tsx` #### Refactoring - TimingEnum (and I guess all enums exported from OHIF core have now moved from Types to Enums export). --- ## Migration Guide from 2.x to 3.5 Source: https://docs.ohif.org/llm/migration-guide/from-v2.md #### Migration Guide On this page, we will provide a guide to migrating from OHIF v2 to v3. Please note that this document is a work in progress and will be updated as we move forward. This document is not meant to be used as a migration recipe but as a migration overview. #### Introduction #### Importance of Migration - Enhanced UX: the new design and UI of OHIF v3 provides a more intuitive and user-friendly experience. OHIF v3 adds an improved side panels and toolbar, and a new layout system that lets you customize the layout of your application. - Improved Performance: OHIF v3 leverages the new Cornerstone3D rendering and tooling libraries, which significantly improve performance and provide a more robust and stable foundation for your application for rendering and interacting with medical images. Some of the new advanced features in Cornerstone3D include: OffScreen Rendering and GPU Acceleration for all viewports, streaming of the volume data, 3D annotations and measurements, sharing tool states between viewports and more. - Improved Customizability: With addition of Modes and Extensions, OHIF v3 provides a more modular and customizable framework for building medical imaging applications, this will let you focus on your use case and not worry about the underlying infrastructure and also have less worry to keep up to date with the latest changes. - Community driven Modes: OHIF v3 provides a gallery of modes that you can use as a starting point for your application. These - Future-Proofing: By migrating to v3, you align your application with the latest advancements in the OHIF framework, ensuring ongoing support, updates, and access to new features. - Community Support: OHIF v3 benefits from an active community of developers and contributors who provide valuable support, bug fixes, and continuous improvements. #### Migration Timeframe The duration of the migration process can vary depending on factors such as the complexity of custom changes made in v2, familiarity with v3's architecture, and the size of the codebase. If you don't have any custom changes in v2, the migration process should be relatively straightforward. If you have custom changes, you will need to update them to work with the new architecture and new rendering and tooling engines. #### Complexity and Pain Points Certain scenarios can make the migration process more complex and potentially introduce pain points: - Extensive Customizations: If your v2 implementation includes extensive custom changes and overrides, adapting those customizations to the new structure and APIs of v3 may require additional effort and careful refactoring. - UI Customizations: Since in OHIF v3 we moved our component library to Tailwind CSS if you have any custom UI components, you will need to migrate them to Tailwind CSS too, and this might be a bit time consuming. - Hardware requirements: Since Cornerstone3D uses WebGL for rendering volumeViewport (although it has a CPU rendering fallback), you need to make sure that your target hardware supports WebGL. You can check if your hardware supports WebGL [here](https://get.webgl.org/). Also regarding the GPU requirements, you can check the tier of your GPU [here](https://pmndrs.github.io/detect-gpu/), if it is tier 1 and above, you should be good to go. #### Summary of Changes OHIF v3 is a major re-architecture of the OHIF v2 to make it more modular and easier to maintain. The main differences are: - platform/viewer (@ohif/viewer) has been renamed to platform/app (@ohif/app) (explanation below) - Extensions are available to be used by modes on request, but are still injected as module components. - To use the modules provided by the extensions, you need to write a [Mode](../platform/modes/index.md). Modes are configuration objects that will be used by the viewer to load the modules. This lets users to be able to use common extensions with different configurations, and enhances the customizability of the viewer. - App configuration structure is different, mainly the `servers` is renamed to `dataSources`. - Apps can be customized significantly more than previously by providing configuration code int he customizationModule section. - The viewer UI is completely re-written in Tailwind CSS for better maintainability, although it is a WIP but already provides a better user experience. - cornerstone-core and cornerstone-tools are removed and OHIF v3 is using the new Cornerstone3D rendering library and tools. Moving to Cornerstone3D has enabled us to provide a more robust and stable foundation for 3D rendering and 3D annotations and measurements. In addition, Cornerstone3D provides APIs to load and stream data into a volume which has huge performance benefits. - A new CLI tool to help you create extensions and modes (more [here](../development/ohif-cli.md)) - redux store has been removed and replaced with a simpler state management system via React Context API. New significant additions that might be useful for you that weren't available in OHIF v2: - [OHIF CLI](../development/ohif-cli.md) - [New Rendering Engine and Toolings](https://www.cornerstonejs.org/) - [Modes](../platform/modes/index.md) - [Mode Gallery](https://ohif.org/modes) - [Layouts](../platform/extensions/modules/layout-template.md) - [Data Sources](../platform/extensions/modules/data-source.md) - [Hanging Protocols](../platform/services/data/HangingProtocolService.md) - [URL Params](../configuration/url.md) #### Platform/viewer (@ohif/viewer) -> platform/app (@ohif/app) To ensure proper versioning of OHIF v3, we have made a decision to rename the platform/viewer to platform/app. Previously, the platform/viewer package followed software engineering versioning (currently at v4.12.51). However, going forward, we aim to align the versioning of platform/app with the product version (e.g., v3.4.0, v3.5.0, etc.). Since the platform/viewer (@ohif/viewer) is already at v4.12.51, we opted to rename it as platform/app to enable versioning in accordance with the product versioning approach. If you were utilizing any exports from @ohif/viewer, please update them to use @ohif/app instead. #### Configuration :::tip There are various configurations available to customize the viewer. Each configuration is represented by a custom-tailored object that should be used with the viewer to work effectively with a specific server. Here are some examples of configuration files found in the platform/app/public/config directory. Some server-specific configurations that you should be aware are: `supportsWildcard`, `bulkDataURI`, `omitQuotationForMultipartRequest`, `staticWado` (Read more about them [here](../configuration/configurationFiles.md)). - default.js: This is our default configuration designed for our main server, which uses a Static WADO datasource hosted on Amazon S3. - local_orthanc.js: Use this configuration when working with our local Orthanc server. - local_dcm4chee.js: This configuration is intended for our local dcm4chee server. - netlify.js: This configuration is the same as default.js and is used for deployment on Netlify. - google.js: Use this configuration to run the viewer against the Google Health API. ::: OHIF v3 has a new configuration structure. The main difference is that the `servers` is renamed to `dataSources` and the configuration is now asynchronous. Datasources are more abstract and far more capable than servers. Read more about dataSources [here](../platform/extensions/modules/data-source.md). - `StudyPrefetcher` is only available in OHIF v3.9 beta and will be available in the next stable 3.9 release. - The `servers` object has been replaced with a `dataSources` array containing objects representing different data sources. - The cornerstoneExtensionConfig property has been removed, you should use `customizationService` instead (you can read more [here](../platform/services/customization-service/customizationService.md)) - The maxConcurrentMetadataRequests property has been removed in favor of `maxNumRequests` - The hotkeys array has been updated with different command names and options, and some keys have been removed. - New properties have been added, including `maxNumberOfWebWorkers`, `omitQuotationForMultipartRequest`, `showWarningMessageForCrossOrigin`, `showCPUFallbackMessage`, `showLoadingIndicator`, `strictZSpacingForVolumeViewport`. - you should see if `supportsWildcard` is supported in your server, some servers don't support it and you need to make it false. #### Modes As mentioned briefly above, modes are configuration objects that will be used by the viewer to load extensions. This lets users to be able to use common extensions with different configurations. So as OHIF developers can focus on creating extensions while you as the user can focus on creating modes having your own use case and configuration/initialization logic in mind. Separating the configuration from the extensions also makes it so that you can have multiple modes in a single application each focusing on certain tasks. For example, you can have a mode for segmentation which uses specific panels and tools which you don't need for a mode that will be used for reading (read more about modes [here](../platform/modes/index.md)) :::info Previously, the viewer was designed around registered extensions. If you had a specific use case, you had to duplicate the viewer code and incorporate your customizations through extensions. However, with the introduction of a new layer of abstraction called Modes, you no longer need to fork the viewer. Modes provide a flexible approach where you can create your own mode and utilize the necessary extensions within that mode. This eliminates the need for duplicating the viewer codebase. Furthermore, Modes offer the advantage of having multiple applications within a single viewer. For instance, you can have a mode dedicated to segmentation tasks and another mode focused on reading. Each mode can have its own unique configuration, initialization logic, layout, tools, and hanging protocols. This ensures a cleaner user interface in the viewer and an improved user experience overall. ::: Upon entering a mode, the Viewer will register its declared extensions and load them. And you can specify which modules you need from each extension in the mode configuration. For instance ```js const ohif = { layout: '@ohif/extension-default.layoutTemplateModule.viewerLayout', sopClassHandler: '@ohif/extension-default.sopClassHandlerModule.stack', measurements: '@ohif/extension-default.panelModule.measure', thumbnailList: '@ohif/extension-default.panelModule.seriesList', }; const cs3d = { viewport: '@ohif/extension-cornerstone.viewportModule.cornerstone', }; const tmtv = { hangingProtocol: '@ohif/extension-tmtv.hangingProtocolModule.ptCT', petSUV: '@ohif/extension-tmtv.panelModule.petSUV', ROIThresholdPanel: '@ohif/extension-tmtv.panelModule.ROIThresholdSeg', }; function modeFactory({ modeConfiguration }) { routes: [ { path: 'tmtv', layoutTemplate: ({ location, servicesManager }) => { return { id: ohif.layout, props: { // leftPanels: [ohif.thumbnailList], rightPanels: [tmtv.ROIThresholdPanel, tmtv.petSUV], viewports: [ { namespace: cs3d.viewport, displaySetsToDisplay: [ohif.sopClassHandler], }, ], }, }; }, }, ], } ``` In the example above, we are using the `tmtv` mode which is a mode for reading PET/CT scans and as you can see we are specifying the layout, the panels and the viewports that we need for this mode. The `tmtv` mode is using the `cs3d` extension for rendering and the `ohif` extension. As you see you can reference the modules from the extensions using the `namespace` via strings. So for instance, if you need to use the `viewportModule` from the `@ohif/extension-cornerstone` you can use `@ohif/extension-cornerstone.viewportModule.cornerstone` as the namespace. :::tip `ExtensionManager` will register and load the modules from the extensions and make them available to the viewer by their namespaces. ::: Below you can see a screen shot from the demo showcasing 3 modes for the opened study. ![Alt text](../assets/img/migration-modes.png) :::tip How do I decide certain thing should go inside a mode or extension, Here are some considerations to help you make the decision: - **Functionality Scope**: If the functionality is specific to a particular use case or task within your viewer, it is often best suited to be included within a mode. Modes allow you to create customized configurations, layouts, panels, tools, and other components specific to a particular task or workflow. This includes which tool to be active by default, which panels to be displayed, and which layout to be used. - **Reusability**: If the functionality can be used across multiple modes, it is better to implement it as an extension. Extensions provide a modular approach where you can encapsulate and share functionality across different modes. For instance, if you have a custom panel that you want to use in multiple modes, you can implement it as an extension and include it in the mode configuration. - **Complexity**: If the functionality requires significant customizations, complex logic, or extensive modifications to the viewer's core behavior, it might be better suited as an extension. - **New Service**: If you are writing a new service, it is preferable to implement it as an extension. Services are used to provide a common interface for interacting with external systems and data sources. There is a new way to register new services which are extendible by other extensions. Remember that there is no strict rule for deciding between modes and extensions. It's a matter of understanding the specific requirements of your application. ::: #### Routes In OHIF v2 a study was loaded and mounted on `/viewer/:studyInstanceUID` route. In OHIF v3 we have reworked the route registration to enable more sophisticated routing. Now, Modes are tied to specific routes in the viewer, and multiple modes/routes can be present within a single application, making "routes" configuration the most important part of mode configuration. - Routes with a dataSourceName: `{mode.id}/{dataSourceName}` - Routes without a dataSourceName: `{mode.id}` which uses the default dataSourceName This makes a mode flexible enough to be able to connect to multiple datasources without rebuild of the app for use cases such as reading from one PACS and writing to another.
Can I register a custom route to OHIF v3? Yes, you can take advantage of the customizationService and register your own routes. see [custom routes](../platform/services/customization-service/customRoutes.md)
#### DICOM Endpoints In OHIF v3 there is a new end point that your DICOM server should be able to respond to `WADO-RS GET studies/{studyInstanceUid}/series` This is used in the viewer for fetching the series list for a study to use for the hanging protocol. #### LifeCycle Hooks OHIF v2 had `preRegistration` hook for extensions for initialization. In OHIF v3 you have even more control using `onModeEnter` and `onModeExit` hooks on the extensions and on the modes. - `preRegistration`: is called before the extension is registered to the viewer. So very early in the lifecycle of the viewer. - `onModeEnter` is called when the mode is entered (component on the route is mounted, e.g., when you click on the mode to enter it) - `onModeExit` is called when the mode is exited (component on the route is unmounted, e.g., when you navigate back to the worklist) #### Extensions Since extensions in OHIF v2 were the main way of customizing the viewer, we will spend some time below to explain how you can migrate your extensions to OHIF v3. #### Default Extension Lots of common functionalities in the platform/core has been moved inside the `@ohif/extension-default` extension. This extension is loaded by default in the viewer and it provides the following functionalities: - common datasources such as DICOMWeb, DICOMLocal, and DICOMJSON datasource. - default measurement panel and panel study browser - common toolbar button layouts - common hanging protocol configurations
how can I integrate to my google health api? is there support for that? You can right now, take a look into our google configuration that we use for our QA located at `config/google.js`. Also we have some exciting UI changes coming up for the next release that will make it easier to integrate with google health api.
Is there any recommendation for PACS integration You can take a look at open source PACS such as dcm4chee or orthanc. We have support for them. Also we have a new static wado datasource that you can use to take benefit of new deduplicated metadata and caching features.
#### Cornerstone Extension In OHIF v2, the Cornerstone extension provided modules like Cornerstone ViewportModule, ToolbarModule, and CommandsModule for controlling viewport actions. It relied on `react-cornerstone-viewport` for rendering viewports, `cornerstone-tools` for tools, and `cornerstone-core` for core functionalities. However, in OHIF v3, there have been significant changes. The rendering and tooling logic has been migrated to a new library called [`Cornerstone3D`](https://github.com/cornerstonejs/cornerstone3D-beta/). This means that all viewport rendering and tool functionalities are now handled by Cornerstone3D. Additionally, in OHIF v3, the native support for 3D functionalities previously provided by the `vtk` extension has been integrated into Cornerstone3D. As a result, any vtkjs logic is encapsulated on CS3D. Things now are much more cleaner and simpler. To migrate from OHIF v2 to OHIF v3: #### Loading Previously we used `cornerstone-wado-image-loader` for loading images. However, we have fully switched the a new library called `@cornerstonejs/dicom-image-loader` which is a fork of `cornerstone-wado-image-loader` with typescript support and bug fixes. We have deprecated `cornerstone-wado-image-loader` and you should also switch to `@cornerstonejs/dicom-image-loader` as well. The process is very simple, you can follow this [PR](https://github.com/OHIF/Viewers/pull/3339) to see how we have migrated. There is also a new loader and package `@cornerstonejs/streaming-image-volume-loader`, which provides streaming of the image data into a volume using web workers and web assembly. You can look into the cornerstone documentation and read more about the volumeViewport and volumeLoader. #### Rendering The significant difference between cornerstone-core and cornerstone3D is that cornerstone3D fully utilizes [vtk.js](https://kitware.github.io/vtk-js/) for rendering, however in cornerstone-core we used a mix of webGL and vtk for rendering. While you don't need to do a migration for this, you should be aware that the rendering is now fully performed in the world coordinate system and the image is placed in the world coordinate system using the `imagePositionPatient` and `imageOrientationPatient` attributes of the image. This means that you can now share the tool states between multiple viewports and you can also use the same tool states for 2D and 3D viewports. :::tip In OHIF v3, we have removed the OHIF's vtk extension and migrated all the 3D functionalities to Cornerstone3D. Also you need to remove any dependencies on `react-cornerstone-viewport`, `cornerstone-tools`, and `cornerstone-core`. ::: #### Tools If you don't have any custom tools, you most likely won't need to make any changes as have tried to migrate all the tools from `cornerstone-tools` to Cornerstone3D (except `ROIWindowLevel` which is work in progress right now). Cornerstone3D has moved the coordinate system of tools to the world coordinate system enabling sharing tool states between multiple viewports, and as a result the toolData is now stored in the world coordinate system as well. So to migrate your tools, you will need to update your toolData to be stored in the world coordinate system. You can look into the simplest tool for instance LengthTool in both `cornerstone-tools` and `cornerstone3D` to see the difference. By following these steps, you can leverage the improved rendering and tooling capabilities of Cornerstone3D and eliminate the need for the old ohif's vtk extension in OHIF v3.
Is there any name standard for modes and extensions? No naming standard, you can have your organization name as a prefix for your modes and extensions as we do for ohif (`@ohif/extension-*` and `@ohif/mode-*`).
What happens if I have create a mode with same name as existing one You shouldn't. Modes are configuration objects that you can simply. There is no real use case for creating a mode with same name as existing one. If you do so, the last one will override the previous one
How to remove an "core" extension/mode? You can use the OHIF cli tool to add/remove/link and unlink extensions and modes. You can find more information about the cli tool [here](../development/ohif-cli.md)
If I have vtkjs implementation how can I port it? Should I create a specific extension for that? Cornerstone3D has support for some vtk.js actor and mappers including imageData, polyData and volume. If you have another implementation of vtk.js actor or mapper, you might be able to use `viewport.addActor` to include it in the rendering pipeline, but depending on the implementation and how much it interfere with the cornerstone3D rendering pipeline, you might not get the expected result.
#### DICOM Segmentation & DICOM RT In OHIF v3, the equivalent extensions for RT and SEG exists with similar logic, but with various improvements such as enhanced ui/ux for segmentation panel, faster loading and interaction, and better support for multiple viewports, animations for jump to segment, volumetric rendering, and more. Additionally, OHIF v3 introduces new functionalities with the SEG Viewport and RT Viewport. :::tip In OHIF v3, Segmentation objects are loading using the frame of reference by default which means that if there are two viewports that are using the same frame of reference, if you load a segmentation (labelmap or RT) which lives in the same frame of reference, it will be loaded in both viewports. ::: When loading a series that contains SEG (Segmentation) or RT (RT Structure Set) data, the viewport will automatically switch to the corresponding SEG or RT viewport. The user will then be prompted to decide whether to load the segmentation or RT structure set into the viewer. This new feature addresses a common use case in which there are multiple segmentation series in a study, and the user only wants to load specific ones. In OHIF v3, the Segmentations are all loaded as 3D volumes and as a result a volume viewport is used to display them. (Stack Segmentation in Cornerstone3D is still a work in progress.) In OHIF v2, the user had to load all the segmentation series and then manually delete the ones they didn't want to see. However, in OHIF v3, the user has more control. The temporary SEG or RT viewport does not immediately load (hydrate) the segmentation or RT structure set. Instead, the user can decide which ones to load, reducing unnecessary loading and providing a more efficient workflow. This enhancement in OHIF v3 allows users to selectively load specific segmentations or RT structure sets, improving the usability and efficiency of the viewer when working with multiple SEG or RT series.
Can I load one seg in one viewport and another in another viewport? If there is another viewport in the grid that is using the same frame of reference, the segmentation will be loaded in that viewport as well. However, since we split the concept of `load` (`hydration`) and `preview`, you can use the preview (not load), which makes sure the SEG is contained within the viewport, but it is not hydrated so you cannot edit it. In future however, we will add more controls over, hiding the segmentation in other viewports via UI, however, you can right now do it via code.
Does it support nifti? Nifit support for both image and segmentation is coming soon. We are working on it.
#### DICOM SR In OHIF v2, DICOM SR functionality was integrated into the Cornerstone extension. However, in OHIF v3, DICOM SR is now a separate extension. The DICOM SR extension in OHIF v3 retains the same loading and hydrating logic using dcmjs adapters. Additionally, it introduces a new type of viewport called the SR Viewport, which is used to display SR data. Similar to the temporary SEG and RT viewports, when a SR display set is selected in OHIF v3, the user is prompted to decide whether to load the SR data into the viewer and initiate the tracking. The SR viewport allows the user to switch between different measurements within the SR instance by utilizing the arrow buttons located at the top of the viewport. :::tip This separation of DICOM SR into its own extension in OHIF v3 provides a dedicated viewport type for SR data and offers enhanced functionality for interacting with SR measurements within the viewer. ::: #### DICOM Tag Browser In OHIF v2, the DICOM Tag Browser was a separate extension that provided a dedicated user interface for exploring DICOM tags. However, in OHIF v3, we have integrated the DICOM Tag Browser functionality into the `default` extension. The DICOM Tag Browser is a powerful tool for debugging and inspecting DICOM metadata, and we wanted to make it easily accessible to users. As a result, it is now available as a toolbar icon within the `default` extension. This allows users to conveniently access the DICOM Tag Browser directly from the toolbar, eliminating the need for a separate extension.
Now that dicom tag is integrated back to default extension, how can I port my code that was implemented in the old extension? Should I create an extension or change directly into default? If you have a custom tag browser, you have two options, either modify the default tag browser (if you think the features you added is useful for everyone, feel free to open a PR!), or create your own extension with your custom tag browser which then you can add to the toolbar.
#### DICOM HTML Since we have added graphical overlay of DICOM SR in OHIF v3, we have temporarily downgraded the priority of displaying DICOM HTML within the viewer. While DICOM HTML support is not available in the current version of OHIF v3, we acknowledge its importance and plan to reintroduce this functionality in future updates.
is there any easy way for supporting my own dicom html viewer? Should I use extension? Yes, you can write your own sopClassHandler and custom viewport in your custom extensions. After, you need to associate that with the viewport that you will use in the mode configuration, this way when that sopClassUID is requested it will use your custom viewport.
#### DICOM Microscopy In OHIF v2, the DICOM microscopy engine was based on an older version of the [DICOM microscopy viewer](https://github.com/ImagingDataCommons/dicom-microscopy-viewer) maintained by our friends at IDC (Imaging Data Commons). However, in OHIF v3, we have upgraded to the latest version of the DICOM microscopy viewer. This new version offers significant improvements in terms of robustness and performance, providing users with an enhanced microscopy viewing experience. One notable addition in the latest DICOM microscopy viewer is the support for annotations within the whole slide images (SM images). This feature allows users to annotate and mark specific regions of interest directly within the microscopy images. :::tip Looking ahead, our future plans include adding DICOM SR (Structured Reporting) support for export of annotations in microscopy images. While we will enhance our support for SM images (color profiles etc.), we recommend utilizing the [SLIM Viewer](https://github.com/ImagingDataCommons/slim) developed by IDC for more sophisticated microscopy use cases. ::: #### Extension Modules v3 Extension is likely the same as in v2. Extensions can (like before) have modules exported via `get{ModuleName}Module` (e.g., `getViewportModule`). :::info There are new types of modules that can be exported from extensions (such as `HangingProtocolModule`, `LayoutModule`, read more about modules in v3 [here](../platform/extensions/index.md)). ::: The main difference between v3 and v2 is that exported modules were represented as a single object, whereas in OHIF v3, they are represented as an array of objects, each having a name property. This change was implemented to enable extensions to export multiple named submodules, providing more flexibility and modularity. To access these modules in OHIF v3, you can use the namespace provided by the `ExtensionManager`. For example, consider the following code snippet ```js getUtilityModule({ servicesManager }) { return [ { name: 'common', exports: { getCornerstoneLibraries: () => { return { cornerstone, cornerstoneTools }; }, getEnabledElement, dicomLoaderService, registerColormap, }, }, { name: 'core', exports: { Enums: cs3DEnums, }, }, { name: 'tools', exports: { toolNames, Enums: cs3DToolsEnums, }, }, ]; }, ``` In this example, the extension is exporting multiple submodules named 'common', 'core', and 'tools'. To access the 'common' submodule provided by the @ohif/extension-cornerstone extension, you can use the following code: ```js extensionManager.getModuleEntry( '@ohif/extension-cornerstone.utilityModule.common' ); ``` This allows you to access the specific submodule provided by the extension and utilize its functionalities within your application.
How can I have a lazy-loaded component and import it from another extension? If an extension is exporting a component, you can import it from another extension. For example, if you have an extension that exports a component called `MyComponent`, you can import it from another extension like this: ```js import { MyComponent } from '@ohif/extension-my-extension'; ```
#### ToolbarModule In OHIF v2, the toolbarModule was used to add buttons to the toolbar. For example, the following code snippet demonstrates adding a zoom tool button to the toolbar: In OHIF v2 ```js { id: 'Zoom', label: 'Zoom', icon: 'search-plus', // type: TOOLBAR_BUTTON_TYPES.SET_TOOL_ACTIVE, commandName: 'setToolActive', commandOptions: { toolName: 'Zoom' }, }, ``` However, in OHIF v3, the toolbarModule has been repurposed to define different button types. For instance, OHIF v3 introduces the ohif.radioGroup and ohif.splitButton button types, which provide more flexibility in defining toolbar buttons for each mode. ```js { name: 'ohif.radioGroup', defaultComponent: ToolbarButton, clickHandler: () => {}, }, { name: 'ohif.splitButton', defaultComponent: ToolbarSplitButton, clickHandler: () => {}, }, ``` To use these button types within your modes, you can define the buttons in your mode's configuration. In the onModeEnter hook, you can add the defined buttons to the toolbar using the toolbarService. Here's an example of how to add buttons to the toolbar: ```js // toolbar button { id: 'Zoom', type: 'ohif.radioGroup', props: { type: 'tool', icon: 'tool-zoom', label: 'Zoom', commands: _createSetToolActiveCommands('Zoom'), }, }, ``` and in `onModeEnter` ```js onModeEnter: ({ servicesManager, extensionManager, commandsManager }) => { const { toolbarService, toolGroupService, } = servicesManager.services; // Init tool groups (see cornerstone3D for more details) initToolGroups(extensionManager, toolGroupService, commandsManager); toolbarService.addButtons(toolbarButtons); toolbarService.createButtonSection('primary', [ 'MeasurementTools', 'Zoom', 'WindowLevel', 'Pan', 'Capture', 'Layout', 'Crosshairs', 'MoreTools', ]); }, ``` By using the updated toolbarModule in OHIF v3, you can define and add toolbar buttons specific to each mode, providing greater flexibility and customization options for the toolbar configuration. An example of split button icon in v3 is shown below ![Alt text](../assets/img/migration-split-button.png)
Is the tool state shared between two different modes? No, the tool state is not shared between different modes in OHIF v3. Each mode operates independently and maintains its own tool state.
I have a custom icon. How can I add it to the toolbar? You need to first register it via `addIcon` in the src/components/Icon, and then you can referenced it by name in the toolbar configuration for mode
Can I change the toolbar's location? Can I add a secondary toolbar? Not in our default layout, but you can write your own layout in your custom extension and use it instead of the default one.
Can I have different tool sets for each viewport? We don't have fully support for this yet, but we have plans for it. Basically, the plan is to use the viewport action bar in the top of the viewport to provide viewport-specific tool sets.
Are all tools from v2 support in v3? Almost all with the exception of ROIWindow, but we have plans to add it in the future. However, there are much more tools in v3 that are not available in v2 such as referenceLines, Stack Image Sync, and Calibration tool.
#### CommandsModule The structure of the commands module is the same as before. The only difference is that we use Cornerstone3D for rendering and tools. So, if you have a custom command that you were using in the v2, you need to migrate it to the new Cornerstone3D API. You can visit the migration guide for cornerstone [here](https://www.cornerstonejs.org/docs/migrationGuides). #### PanelModule Previously in OHIF v2 you had ```js return { menuOptions: [ { icon: 'list', label: 'Segmentations', target: 'segmentation-panel', stateEvent: SegmentationPanelTabUpdatedEvent, }, ], components: [ { id: 'segmentation-panel', component: ExtendedSegmentationPanel, }, ], defaultContext: ['VIEWER'], }; ``` but in OHIF v3 you have ```js return [ { name: 'panelSegmentation', iconName: 'tab-segmentation', iconLabel: 'Segmentation', label: 'Segmentation', component: wrappedPanelSegmentation, }, ]; ```
How can I add my own custom panel? To add your own custom panel in OHIF v3, you can follow these steps: - Create a new React component that represents your custom panel. - Provide it in the getPanelModule of your extension. - Inside your mode, add the panel namespace to the mode's configuration for the layout module.
How to enhance an existing panel? To enhance an existing panel in OHIF v3, you can create a new React component that extends or wraps the existing panel component. In your enhanced component, you can add additional functionality, modify the appearance, or incorporate new features specific to your use case. You can also look into the customizationService to see how you can use the registered points to customize the panel.
How to change the order of appearance of panels? To change the order of appearance of panels in OHIF v3, you can modify the panel layout configuration in the mode configuration. The panel layout configuration specifies the order and arrangement of panels within the viewer interface.
Is there a way to change the viewer layout to present right panels on the left and the toolbar on the right? Not with our default layout which the default extension provides. However, you can write a new layout and provide it in the `getLayoutModule` which you can reference in the `layout` property of the mode configuration.
#### SopClassHandlerModule The least changed module is the SopClassHandlerModule, although this now returns an array instead of a single instance. The purpose of this module is to create a list of displaySets based on the metadata. OHIF App uses this module to create one or more displaySets for each series. The displaySet is then used to then get assigned on each viewport and the viewport renders the image. The `DisplaySet` created by the handler can have a member function `addInstances` which will update the display set with new SOP instance data, allowing the preservation of the display set UID when required. Multiple display sets will be returned when different parts of the series are to be shown separately, for example, to split scout images from volume images. #### ViewportModule In OHIF v3, viewports are tied to series of SOP Class UIDs (sopClassUIDs). Each extension provides its own viewport for specific SOP Class UIDs, and you can choose which viewports and SOP Class UIDs your mode can handle in the mode configuration. For example, in the longitudinal mode configuration, there are multiple viewports specified along with their associated SOP Class Handler Modules: ```js viewports: [ { namespace: '@ohif/extension-measurement-tracking.viewportModule.cornerstone-tracked', displaySetsToDisplay: [ '@ohif/extension-default.sopClassHandlerModule.stack'], }, { namespace: '@ohif/extension-cornerstone-dicom-sr.viewportModule.dicom-sr', displaySetsToDisplay: [ '@ohif/extension-cornerstone-dicom-sr.sopClassHandlerModule.dicom-sr'], }, // additional viewports ], ``` In this example, there are six viewports specified, each identified by a unique namespace. Each viewport is associated with a specific SOP Class Handler Module through the displaySetsToDisplay property. To add a new viewport, you would need to create a new SOP Class Handler Module and a new Viewport Module. The SOP Class Handler Module handles the logic for loading and handling specific SOP Class UIDs, while the Viewport Module defines the rendering and behavior of the viewport. In addition to the viewports, the mode configuration should include and register each SOP Class Handler Module that your mode can handle: ```js sopClassHandlers: [ '@ohif/extension-default.sopClassHandlerModule.stack', '@ohif/extension-cornerstone-dicom-sr.sopClassHandlerModule.dicom-sr', '@ohif/extension-dicom-video.sopClassHandlerModule.dicom-video', '@ohif/extension-dicom-pdf.sopClassHandlerModule.dicom-pdf', '@ohif/extension-cornerstone-dicom-seg.sopClassHandlerModule.dicom-seg', '@ohif/extension-cornerstone-dicom-rt.sopClassHandlerModule.dicom-rt', ] ``` Here, each SOP Class Handler Module is specified with its namespace. By configuring the viewports and SOP Class Handler Modules in your mode, you can define how your mode interacts with different types of DICOM data and specify the appropriate rendering and behavior for each SOP Class UID. #### Metadata Store and Provider In OHIF v2, we utilized the `platform/core/classes/metadata` module, which included the classes StudyeMetadata, SeriesMetadata, and InstanceMetadata for storing metadata. However, in OHIF v3, we have replaced these classes with a more versatile metadata store called `DICOMMetadataStore`. This new metadata store is used by each datasource to store the metadata associated with studies, series, and instances. The DICOMMetadataStore API allows you to add study/series/instance metadata to the store and retrieve metadata from it. Although we have transitioned to using DICOMMetadataStore as the primary metadata storage mechanism, you still have access to OHIF's MetadataProvider. The MetadataProvider can be found in the same `platform/core/classes` location. The MetadataProvider is internally used to retrieve instance-based metadata based on UIDs, perform queries, and includes some legacy support for older versions of the loading logic. #### Build We have recently transitioned from bundling all the extensions and the viewer into a single bundle to a more modular approach. In this new approach, the required extensions are dynamically loaded inside a mode as needed. This change brings several advantages, including: - Faster build time: Bundling only the necessary extensions reduces the build time, as you no longer need to bundle all extensions upfront. - Smaller bundle size: By loading extensions on-demand, the initial bundle size is reduced, resulting in faster page load times for users. - Faster reload for development: During development, the incremental build process allows for faster reloads, improving developer productivity. This new approach does not impact the deployment process of the viewer. You can continue to follow our deployment guides, such as the [Build for Production](../deployment/build-for-production.md) guide, to deploy the viewer effectively. #### Script tag usage of the OHIF viewer With the transition to more advanced visualization, loading, and rendering techniques using WebWorkers, WASM, and WebGL, the script tag usage of the OHIF viewer has been deprecated. However, if you still prefer to use the script tag usage, it is theoretically possible to bundle all the required dependencies and utilize the script tag approach. An alternative option for script tag usage is to employ an `iframe`. You can utilize the iframe element to load the OHIF viewer and establish communication with it using the postMessage API. This allows you to exchange messages and data between the parent window and the iframe, enabling interaction and coordination with the OHIF viewer embedded within the iframe. Please note that while these alternatives exist, we recommend utilizing modern development practices and incorporating OHIF viewer within your application using a more modular and integrated approach, such as leveraging bundlers, and import statements to ensure better maintainability, extensibility, and compatibility with the OHIF ecosystem.
I use OHIF v2 in an iframe. Is there any impediment for v3? No, there is no impediment for using OHIF v3 in an iframe. OHIF v3 is designed to be compatible with iframe usage, allowing you to embed the viewer within other applications or web pages seamlessly. You can still communicate with the OHIF v3 viewer using the postMessage API to exchange information and trigger actions between the parent window and the embedded iframe.
Does the build support dynamic imports? How can I use it? Yes, the build configuration in OHIF v3 supports dynamic imports. Dynamic imports allow you to asynchronously load modules or components on demand, improving performance and reducing the initial bundle size. In fact we are using this method for our viewport components. In general you can: ``` import('path/to/module').then((module) => { // Use the imported module here }).catch((error) => { // Handle any error that occurs during dynamic import }); ``` By using dynamic imports, you can selectively load modules or components at runtime when they are needed, enhancing the efficiency and responsiveness of your application. However, note that these components must be available at BUILD time, and cannot be updated after build.
How can I enhance the existing build to consume my own webpack script? You can't enhance the existing build to consume your own webpack script as of now. However, you can modify the webpack.base.js and webpakc.pwa.js files to add your own webpack script/modules if needed.
#### UI Components Migrating to Tailwind CSS, OHIF v3 is now able to have a component-oriented styling approach, speeding up development, ensuring consistent styling, making responsive design easier, and enabling extensibility We have gone through extensive re-design of each part of the UI, and we have also added new components to the OHIF viewer.
I have a huge complex styles using native CSS, how can I reuse them? You can leverage the power of Tailwind CSS (https://TailwindCSS.com/) in OHIF v3 to reuse your existing styles. Tailwind CSS is a utility-first approach, allowing you to create reusable CSS classes by composing utility classes together. You can migrate your existing styles to Tailwind CSS by breaking them down into utility classes and utilizing the extensive set of predefined utilities provided by Tailwind CSS.
How can I change the page color from being purplish to blueish? In OHIF v3, you can easily modify the page color by customizing the Tailwind CSS configuration. You can locate the tailwind.config.js file in your project and update the theme section, specifically the colors property, to define your desired color palette. By adjusting the values for the colors, you can change the page color to any shade of blue or other colors according to your preference.
Can I have my own React UI component working in the application? Is there a way to use the current build for it as well? Yes, you can integrate your own React UI components seamlessly into the OHIF v3 application. You can even have external UI dependencies and by creating your own component inside your extensions and importing it into the application, you can use it as if it was part of the OHIF v3 application.
How can I replace the existing component ui/tooltip? You need to write your own component, and inside your mode layout you can replace the existing component with your own. As of now, for the tooltip component, you need to use the customizationService to customize it; however, the customizationService requires a registration of the to-be-customized property before you can customize it. Read more about customizationService.
How can I add/consume logos/images/icons? For logos you can use the whiteLabelling inside the configuration. However, if you need a more complex UI for your toolbar you need to create you own layout. See `getLayoutModule`.
#### Redux store In OHIF v3, we made the decision to move away from the Redux store and adopt a new approach utilizing React context providers and services with a pub/sub pattern. This shift was driven by the need for a more flexible and scalable architecture that better aligns with the plugin and extension system of OHIF. This offers - Modularity and Scalability: Context providers and services enable a modular architecture for easy addition and removal of plugins and extensions. - Reduced Boilerplate: eliminate Redux boilerplate for simpler development. - Flexible Pub/Sub Pattern: Services provide a pub/sub pattern for inter-component communication.
Now that redux store is gone, how can I access the user information? You can use the `authenticationService` for that purpose.
--- ## Migration Guides Overview Source: https://docs.ohif.org/llm/migration-guide/index.md import DocCardList from '@theme/DocCardList'; import {useCurrentSidebarCategory} from '@docusaurus/theme-common'; #### Migration Guides Based on the version you are migrating from, you can find the migration guide for the latest version of the platform. --- ## 3p10-to-3p11 ### updateStoredPositionPresentation Source: https://docs.ohif.org/llm/migration-guide/3p10-to-3p11/commands.md #### updateStoredPositionPresentation now uses displaySetInstanceUIDs instead of displaySetInstanceUID as a parameter. #### `loadSRMeasurements` Command **Key Changes:** * The `loadSRMeasurements` command, previously part of the `@ohif/extension-cornerstone-dicom-sr` extension, has been **removed**. * Its functionality of hydrating a Structured Report (SR) and displaying its referenced series in a viewport is now primarily handled by the new `hydrateSecondaryDisplaySet` command available in the `@ohif/extension-cornerstone` extension. * The `hydrateStructuredReport` command (from `@ohif/extension-cornerstone-dicom-sr`) now solely focuses on hydrating the SR and returning its data, without directly manipulating viewports. **Migration Steps:** If you were previously using the `loadSRMeasurements` command to load and display SR measurements, you should update your code to use the `hydrateSecondaryDisplaySet` command. 1. **Identify `loadSRMeasurements` Usage:** Locate where your code calls `commandsManager.runCommand('loadSRMeasurements', ...)`. 2. **Update to `hydrateSecondaryDisplaySet`:** Replace the call to `loadSRMeasurements` with `hydrateSecondaryDisplaySet`. You will need to pass the full `displaySet` object for the SR and the target `viewportId`. ```diff - // Old way: using loadSRMeasurements - commandsManager.runCommand('loadSRMeasurements', { - displaySetInstanceUID: srDisplaySetInstanceUID, - // viewportId was implicitly the active one or not directly specifiable here - }); - + // New way: using hydrateSecondaryDisplaySet + const { displaySetService, viewportGridService } = servicesManager.services; + + // 1. Get the SR displaySet object + const srDisplaySet = displaySetService.getDisplaySetByUID(srDisplaySetInstanceUID); + + // 2. Determine the target viewportId (e.g., active viewport) + const viewportId = viewportGridService.getActiveViewportId(); // Or your specific viewportId + + if (srDisplaySet && viewportId) { + commandsManager.runCommand('hydrateSecondaryDisplaySet', { + displaySet: srDisplaySet, + viewportId: viewportId, + }); + } else { + console.warn('SR DisplaySet or ViewportId not found, cannot hydrate.'); + } ``` **Explanation:** * The `loadSRMeasurements` command was responsible for both hydrating the SR (getting its measurement data and referenced series UIDs) and then updating the viewport to show the referenced series. * The new `hydrateSecondaryDisplaySet` command, when given an SR `displaySet` (`displaySet.Modality === 'SR'`), will: 1. Internally call the `hydrateStructuredReport` command to parse the SR and get its details (including `SeriesInstanceUIDs` of referenced images). 2. Then, it will automatically find the corresponding image display sets for those `SeriesInstanceUIDs`. 3. Finally, it will update the specified `viewportId` to display the primary referenced image series. * This change centralizes the logic for hydrating secondary display sets (like SR, SEG, RTSTRUCT) and updating viewports into the `hydrateSecondaryDisplaySet` command within the core Cornerstone extension. **Note on UI/Button Changes:** The UI button typically associated with "Load SR" (often seen in viewport corners or specific contexts) has also been refactored. The hydration of SRs is now often triggered by: * The `TrackedMeasurementsContext` if the `@ohif/extension-measurement-tracking` is in use. * The new `ModalityLoadBadge` component, which can appear in viewports containing SR, SEG, or RTSTRUCT display sets, offering a "LOAD" action that calls `hydrateSecondaryDisplaySet`. If you had custom UI invoking `loadSRMeasurements`, you'll need to adapt it to call `hydrateSecondaryDisplaySet` as described above. --- ### Hydration Source: https://docs.ohif.org/llm/migration-guide/3p10-to-3p11/hydration.md #### Update Hydration Logic: * The `promptHydrateSEG` and `promptHydrateRT` functions have been updated to use the generic `utils.promptHydrationDialog` from `@ohif/extension-cornerstone`. * The actual hydration is now often triggered by the `hydrateSecondaryDisplaySet` command. *Example: `promptHydrateRT` change* ```diff // extensions/cornerstone-dicom-rt/src/utils/promptHydrateRT.ts - const RESPONSE = { - NO_NEVER: -1, - CANCEL: 0, - HYDRATE_SEG: 5, - }; + import { utils, Types } from '@ohif/extension-cornerstone'; function promptHydrateRT({ servicesManager, rtDisplaySet, viewportId, preHydrateCallbacks, hydrateRTDisplaySet, -}: withAppTypes) { - const { uiViewportDialogService, customizationService } = servicesManager.services; - // ... lots of old promise and dialog logic - return new Promise(async function (resolve, reject) { - // ... - }); -} - -function _askHydrate( - // ... -) { - // ... -} +}: { + servicesManager: AppTypes.ServicesManager; + rtDisplaySet: AppTypes.DisplaySet; + viewportId: string; + preHydrateCallbacks?: Types.HydrationCallback[]; + hydrateRTDisplaySet: Types.HydrationCallback; +}) { + return utils.promptHydrationDialog({ + servicesManager, + viewportId, + displaySet: rtDisplaySet, + preHydrateCallbacks, + hydrateCallback: hydrateRTDisplaySet, + type: 'RTSTRUCT', + }); } ``` The `hydrateRTDisplaySet` callback passed to this function would now typically involve the `hydrateSecondaryDisplaySet` command. ```diff // extensions/cornerstone-dicom-rt/src/viewports/OHIFCornerstoneRTViewport.tsx useEffect(() => { if (rtIsLoading) { return; } promptHydrateRT({ servicesManager, viewportId, rtDisplaySet, - preHydrateCallbacks: [storePresentationState], - hydrateRTDisplaySet, - }).then(isHydrated => { - if (isHydrated) { - setIsHydrated(true); - } + hydrateRTDisplaySet: async () => { + return commandsManager.runCommand('hydrateSecondaryDisplaySet', { + displaySet: rtDisplaySet, + viewportId, + }); + }, }); - }, [servicesManager, viewportId, rtDisplaySet, rtIsLoading]); + }, [servicesManager, viewportId, rtDisplaySet, rtIsLoading, commandsManager]); ``` --- ### Migration Guide Source: https://docs.ohif.org/llm/migration-guide/3p10-to-3p11/index.md #### Migration Guide This guide provides information about migrating from OHIF version 3.10 to version 3.11. --- ### other Source: https://docs.ohif.org/llm/migration-guide/3p10-to-3p11/other.md **Key Changes:** * **`connectToolsToMeasurementService` parameters:** The `connectToolsToMeasurementService` function from the `@ohif/cornerstone-extensions` now take different arguments. * **`data-viewportId`** The `data-viewportId` naming was not compliant with react and was causing warnings. Rename references to `data-viewportid`. **Migration Steps:** 1. **Update `connectToolsToMeasurementService` Method Calls:** * Now the connectToolsToMeasurementService receives all service object arguments (servicesManager, commandsManager and extensionManager). ```diff // Before - connectToolsToMeasurementService(servicesManager); // After + connectToolsToMeasurementService({ + servicesManager, + commandsManager, + extensionsManager + }); ``` --- ### toolbarService Source: https://docs.ohif.org/llm/migration-guide/3p10-to-3p11/toolbarService.md **Key Changes:** * **`ViewportActionCornersService` Removed:** The `ViewportActionCornersService` and its associated provider (`ViewportActionCornersProvider`) and hook (`useViewportActionCorners`) have been removed. Functionality for viewport corner items is now integrated into the `ToolbarService` and standard toolbar components. * **Viewport Corner Items as Toolbar Buttons:** Items previously managed by `ViewportActionCornersService` are now configured as regular toolbar buttons. They are assigned to specific toolbar sections (e.g., `viewportActionMenu.topLeft`) and rendered using `Toolbar` components within the viewport corners. * **`ToolbarService` API Updates:** * `ToolbarService.addButtons()` has been renamed to `ToolbarService.register()` to better reflect its purpose of registering button definitions rather than just adding them. * `ToolbarService.createButtonSection()` has been renamed to `ToolbarService.updateSection()` to better reflect that it is not about creating new sections but updating existing ones. * `ToolbarService` now has a `sections` property (e.g., `toolbarService.sections.viewportActionMenu.topLeft`) providing predefined section names. * **Enhanced `useToolbar` Hook:** * The `useToolbar` hook now returns additional state management functions for toolbar items: * `openItem`, `closeItem`, `isItemOpen` (for managing dropdown/popover states). * `lockItem`, `unlockItem`, `toggleLock`, `isItemLocked`. * `showItem`, `hideItem`, `toggleVisibility`, `isItemVisible`. * The `onInteraction` callback now receives `itemId` and `viewportId`. * **Toolbar Button Configuration:** * The `groupId` prop in button configurations (e.g., for `ohif.toolButtonList`, `ohif.toolBoxButtonGroup`) is generally replaced by directly using `buttonSection` to define the set of buttons. * Button `evaluate` functions can now leverage `evaluateProps.hideWhenDisabled` to automatically hide a button when it's disabled. * **New UI Components & Hooks for Viewport Corners:** * Specialized components like `ModalityLoadBadge`, `NavigationComponent`, `TrackingStatus`, `ViewportDataOverlayMenuWrapper`, `ViewportOrientationMenuWrapper`, `WindowLevelActionMenuWrapper` are now used as toolbar buttons, typically in viewport action menu sections. * `useViewportHover` hook can be used to determine if a viewport is hovered or active, controlling the visibility of corner toolbars. * **`IconPresentationProvider`:** A new `IconPresentationProvider` and `useIconPresentation` hook have been introduced to standardize icon sizing and styling within toolbars and related components. * **Legacy Toolbar Components Removed:** `ToolbarSplitButtonWithServicesLegacy` and `ToolbarButtonGroupWithServicesLegacy` have been removed. **Migration Steps:** 1. **Update `ToolbarService` Method Calls:** * Although the previous method also works but gives warning in the console when used. * Replace all instances of `toolbarService.addButtons(...)` with `toolbarService.register(...)`. * Replace all instances of `toolbarService.createButtonSection(...)` with `toolbarService.updateSection(...)`. ```diff // Before - toolbarService.addButtons(toolbarButtons); - toolbarService.createButtonSection('primary', ['Zoom', 'Pan']); // After + toolbarService.register(toolbarButtons); + toolbarService.updateSection('primary', ['Zoom', 'Pan']); ``` 2. **Migrate Viewport Action Corner Items:** * Remove any direct usage of the old `ViewportActionCornersService`, `useViewportActionCorners`, or `ViewportActionCornersProvider`. * Define your viewport corner items (like orientation menu, W/L menu, data overlay menu) as standard toolbar buttons using `toolbarService.register()`. * Assign these buttons to the new dedicated viewport action menu sections. You can access these section names via `toolbarService.sections.viewportActionMenu.`, e.g., `toolbarService.sections.viewportActionMenu.topLeft`. ```diff // Before: Customization in viewportActionMenuCustomizations.ts (now deleted) // or direct use of ViewportActionCornersService.addComponent - // Example: viewportActionCornersService.addComponent({ viewportId, id: 'orientationMenu', component: MyOrientationMenu, location: 'topLeft' }); // After: In your mode's onModeEnter or similar setup + const myViewportCornerButtons = [ + { + id: 'orientationMenu', + uiType: 'ohif.orientationMenu', // Or your custom component registered as a UI type + props: { /* ... props for your component ... */ } + }, + // ... other corner buttons + ]; + toolbarService.register(myViewportCornerButtons); + toolbarService.updateSection( + toolbarService.sections.viewportActionMenu.topLeft, + ['orientationMenu', /* other button IDs */] + ); ``` * The `OHIFViewportActionCorners.tsx` component now internally uses `Toolbar` components for each corner, which are populated by these sections. * For custom components that act as menus (e.g., popovers), use the `onOpen`, `onClose`, `isOpen` props passed down by the `Toolbar` component (which get these from `useToolbar`). ```diff // Before: Custom component might have managed its own open state - // const [isMenuOpen, setIsMenuOpen] = useState(false); - // const handleOpenChange = (open) => setIsMenuOpen(open); // After: Custom component receives isOpen, onOpen, onClose from Toolbar + function MyCustomMenuButton({ isOpen, onOpen, onClose, ...rest }) { + const handleOpenChange = (openState: boolean) => { + if (openState) { + onOpen?.(); + } else { + onClose?.(); + } + }; + + return ( + + {/* ... PopoverTrigger and PopoverContent ... */} + + ); + } ``` 3. **Adapt Toolbar Button and Component Configurations:** The configuration of toolbar buttons, especially how they relate to sections * **Button Section Association via `props.buttonSection`:** The toolbar service now offers two ways to define this association: * **A. Simple Approach: `buttonSection: true` (Implicitly Uses Button's Own ID)** If a button definition includes `props: { buttonSection: true }`, the `ToolbarService` automatically sets the effective `buttonSection` ID to be the same as the button's own `id`. ```javascript // Example: A ToolButtonList component's definition in toolbarButtons.ts // { // id: 'MeasurementTools', // ID of this ToolButtonList component // uiType: 'ohif.toolButtonList', // props: { // buttonSection: true // This ToolButtonList will render the section named 'MeasurementTools' // } // } ``` later you can use it like ```javascript toolbarService.updateSection('MeasurementTools', ['Length', 'Bidirectional', ...]); ``` * **B. Flexible Approach: `buttonSection: 'customSectionName'` (Explicit Section ID)** You can explicitly provide a string for `props.buttonSection` if the button should be associated with a section ID that is different from its own `id`, or if you prefer explicit naming. ```javascript // Example: A ToolButtonList component's definition // { // id: 'MySpecialToolList', // ID of this ToolButtonList component // uiType: 'ohif.toolButtonList', // props: { // buttonSection: 'toolsForAdvancedUsers', // This list renders 'toolsForAdvancedUsers' section // } // } ``` * **`evaluate` Function Enhancement:** * Button `evaluate` functions can now leverage `evaluateProps: { hideWhenDisabled: true }` in your button definition to automatically hide a button when it's disabled. * **Wrapper Component `onInteraction` (e.g., `ToolButtonListWrapper`):** * Update wrappers like `ToolBoxButtonGroupWrapper` and `ToolButtonListWrapper`: * The `groupId` prop is replaced by `id` (which is the ID of the wrapper button component itself). * The `onInteraction` callback in these wrappers now provides `id` (the wrapper's ID) instead of `groupId`. 4. **Adopt `IconPresentationProvider` (Optional but Recommended):** * For consistent icon styling across your application's toolbars, wrap a high-level component (like your main `Header` or layout component) with ``. * Custom tool button components can then use the `useIconPresentation` hook to get appropriate class names for icons or a pre-styled `IconContainer`. ```diff // In your main App.tsx or Header.tsx + import { IconPresentationProvider, ToolButton } from '@ohif/ui-next'; // ... + {/* Your Header content including Toolbars */} + // In a custom tool button using icons + import { useIconPresentation, Icons } from '@ohif/ui-next'; + function MyCustomToolButton({ iconName }) { + const { className: iconClassName } = useIconPresentation(); + return ; + } ``` 5. **Remove Legacy Component Usage:** * Replace any usage of `ToolbarSplitButtonWithServicesLegacy` and `ToolbarButtonGroupWithServicesLegacy` with the newer patterns, typically by configuring individual buttons and using `ToolButtonList` or `ButtonGroup` from `@ohif/ui-next` directly, driven by `useToolbar`. --- ### New useIconPresentation hook Source: https://docs.ohif.org/llm/migration-guide/3p10-to-3p11/ui.md #### New useIconPresentation hook This section details the introduction of the `IconPresentationProvider` and `useIconPresentation` hook, offering an optional way to manage icon size and container styling within the UI. #### Key Changes: * **New Context and Hook:** Introduction of `IconPresentationProvider` and `useIconPresentation` to provide a standardized way to control the size and potentially the container component/props for icons and related interactive elements (like `ToolButton`). #### Migration Steps: Using the `IconPresentationProvider` is **entirely optional**. If you do not wrap your components with this provider, components like `ToolButton` will continue to use their explicit `size` prop and default styling. However, if you wish to centrally manage the presentation of icons within a specific part of your application's component tree, follow these steps: 1. **Identify the component subtree:** Determine which section of your UI you want to apply consistent icon styling to. 2. **Wrap with `IconPresentationProvider`:** Wrap the root of that component subtree with the `IconPresentationProvider`. Pass the desired `size` prop. You can also optionally provide a custom `IconContainer` component and `containerProps` if you want to change the wrapper around the icon itself (e.g., switching from a `Button` to a `ToolButton` or applying specific styling). ```jsx import { IconPresentationProvider, ToolButton } from '@ohif/ui-next'; function MyComponentTree() { return ( // Icons and ToolButtons within this provider will inherit 'large' size {/* Any components inside that consume the context */} {/* ... other components ... */} ); } ``` 3. **Consume the context in components (if building custom components):** If you are building a custom component that renders an icon and want it to respect the provider's settings, use the `useIconPresentation` hook within that component. This hook provides the configured size, a calculated CSS class name (`className`), the specified `IconContainer` component, and its `containerProps`. ```jsx import React from 'react'; import { useIconPresentation, Icons } from '@ohif/ui-next'; function MyCustomIconButton({ iconName, ...rest }) { // This hook reads the nearest IconPresentationProvider context const { className, IconContainer, containerProps } = useIconPresentation(); // Use the provided IconContainer and its props return ( {/* Use the calculated className for the icon */} ); } ``` *Note: Built-in components like `ToolButton` in `@ohif/ui-next` have been updated internally to consume this context automatically if a provider is available.* --- ### viewport-action-menu Source: https://docs.ohif.org/llm/migration-guide/3p10-to-3p11/viewport-action-menu.md Okay, here's a migration guide based on the provided diff, focusing on the introduction of `TrackingStatus`, `ModalityLoadBadge`, and `NavigationComponent`. **Key Changes:** * **Deprecated `ViewportActionCornersService`**: The `ViewportActionCornersService` and its associated provider (`ViewportActionCornersProvider`) have been removed. UI elements previously managed by this service are now typically handled by dedicated components integrated via the `ToolbarService`. * **New Centralized UI Components**: * `ModalityLoadBadge`: A new component in `@ohif/extension-cornerstone` that displays the status (e.g., SEG/RT/SR loaded or requiring hydration) and a "LOAD" button for secondary display sets (SEG, RTSTRUCT, SR). This replaces the inline status and load logic within individual viewport components like `OHIFCornerstoneSEGViewport` and `OHIFCornerstoneRTViewport`. * `TrackingStatus`: A new component in `@ohif/extension-cornerstone` to indicate if measurements in a viewport are being tracked. This replaces inline tracking status indicators previously in `OHIFCornerstoneSRMeasurementViewport` and `TrackedCornerstoneViewport`. * `NavigationComponent`: A new component in `@ohif/extension-cornerstone` that provides navigation arrows (e.g., for segments in SEG/RT or measurements in SR/tracked series). This replaces the `ViewportActionArrows` previously instantiated directly within viewport components. * **Viewport Simplification**: Viewport components like `OHIFCornerstoneSEGViewport`, `OHIFCornerstoneRTViewport`, and `OHIFCornerstoneSRMeasurementViewport` have been simplified. They no longer manage their own status indicators, load buttons, or navigation arrows. They now primarily delegate rendering to `OHIFCornerstoneViewport`. * **Refactored Hydration Prompts**: Utility functions like `promptHydrateSEG` and `promptHydrateRT` now use a centralized `utils.promptHydrationDialog` from `@ohif/extension-cornerstone`. * **Centralized Hydration Command**: A new command `hydrateSecondaryDisplaySet` has been added to `@ohif/extension-cornerstone` to handle the hydration logic for SEG, RTSTRUCT, and SR display sets. * **New Hooks**: Several new hooks have been introduced in `@ohif/extension-cornerstone` (e.g., `useViewportDisplaySets`, `useMeasurementTracking`, `useViewportSegmentations`, `useViewportHover`) to provide data and state for these new UI components. **Migration Steps:** 1. **Remove `ViewportActionCornersService` Usage**: * If you were using `ViewportActionCornersService` to add custom components to viewport corners, you will need to refactor this. The recommended approach is to define these components as toolbar buttons and place them in designated viewport action menu sections (e.g., `viewportActionMenu.topLeft`) using the `ToolbarService`. * The internal status components (`_getStatusComponent`) and `ViewportActionArrows` within specific viewports (SEG, RT, SR) have been removed. Their functionality is now provided by `ModalityLoadBadge`, `TrackingStatus`, and `NavigationComponent`. 3. **Integrate New UI Components via `ToolbarService`**: * The `ModalityLoadBadge`, `TrackingStatus`, and `NavigationComponent` are now registered with the `ToolbarService` within the `@ohif/extension-cornerstone`'s `getToolbarModule`. * Modes (e.g., `longitudinal`) should define toolbar sections for viewport corners and add these components to those sections. *Example: Adding components to viewport corners in `longitudinal` mode* ```diff // modes/longitudinal/src/index.ts function modeFactory({ modeConfiguration }) { return { // ... onModeEnter: ({ servicesManager, extensionManager, commandsManager }: withAppTypes) => { // ... toolbarService.addButtons(toolbarButtons); toolbarService.createButtonSection('primary', [ // ... primary tools ]); + toolbarService.updateSection(toolbarService.sections.viewportActionMenu.topLeft, [ + 'orientationMenu', + 'dataOverlayMenu', + 'windowLevelMenu', + ]); + toolbarService.updateSection(toolbarService.sections.viewportActionMenu.topRight, [ + 'modalityLoadBadge', + 'trackingStatus', + 'navigationComponent', + ]); // ... }, ``` And ensure these buttons are defined in your mode's `toolbarButtons.ts`: ```diff // modes/longitudinal/src/toolbarButtons.ts + { + id: 'modalityLoadBadge', + uiType: 'ohif.modalityLoadBadge', + props: { + // ... props like icon, label, tooltip, evaluate + evaluate: { + name: 'evaluate.modalityLoadBadge', + hideWhenDisabled: true, + }, + }, + }, + { + id: 'navigationComponent', + uiType: 'ohif.navigationComponent', + props: { + // ... props + evaluate: { + name: 'evaluate.navigationComponent', + hideWhenDisabled: true, + }, + }, + }, + { + id: 'trackingStatus', + uiType: 'ohif.trackingStatus', + props: { + // ... props + evaluate: { + name: 'evaluate.trackingStatus', + hideWhenDisabled: true, + }, + }, + }, ``` 5. **Direct Import of `OHIFCornerstoneViewport`**: * Extensions that were previously getting the cornerstone viewport component dynamically via `extensionManager.getModuleEntry('@ohif/extension-cornerstone.viewportModule.cornerstone')` should now import `OHIFCornerstoneViewport` directly from `@ohif/extension-cornerstone`. ```diff // extensions/cornerstone-dicom-pmap/src/viewports/OHIFCornerstonePMAPViewport.tsx import PropTypes from 'prop-types'; import React, { useCallback, useEffect, useRef, useState } from 'react'; import { useViewportGrid } from '@ohif/ui-next'; +import { OHIFCornerstoneViewport } from '@ohif/extension-cornerstone'; function OHIFCornerstonePMAPViewport(props: withAppTypes) { // ... const getCornerstoneViewport = useCallback(() => { - const { component: Component } = extensionManager.getModuleEntry( - '@ohif/extension-cornerstone.viewportModule.cornerstone' - ); // ... return ( - + /> ); // ... ``` --- ## 3p8-to-3p9 ### General Source: https://docs.ohif.org/llm/migration-guide/3p8-to-3p9/0-general.md import Tabs from '@theme/Tabs'; import TabItem from '@theme/TabItem'; #### No SharedArrayBuffer anymore! We have streamlined the process of loading volumes without sacrificing speed by eliminating the need for shared array buffers. This change resolves issues across various frameworks, where previously, specific security headers were required. Now, you can remove any previously set headers, which lowers the barrier for adopting Cornerstone 3D in frameworks that didn't support those headers. Shared array buffers are no longer necessary, and all related headers can be removed. You can remove `Cross-Origin-Opener-Policy` and `Cross-Origin-Embedder-Policy` from your custom headers if you don't need them in other aspects of your app. #### React 18 Migration Guide As we upgrade to React 18, we're making some exciting changes to improve performance and developer experience. This guide will help you navigate the key updates and ensure your custom extensions and modes are compatible with the new version. What's Changing? ```md - React 17 - Using `defaultProps` - `babel-inline-svg` for SVG imports ``` ```md - React 18 - Default parameters for props - `svgr` for SVG imports ``` #### Update React version: In your custom extensions and modes, change the version of react and react-dom to ^18.3.1. #### Replace defaultProps with default parameters: ```jsx const MyComponent = ({ prop1, prop2 }) => { return
{prop1} {prop2}
} MyComponent.defaultProps = { prop1: 'default value', prop2: 'default value' } ```
```jsx const MyComponent = ({ prop1 = 'default value', prop2 = 'default value' }) => { return
{prop1} {prop2}
} ```
#### Update SVG imports: You might need to update your SVG imports to use the `ReactComponent` syntax, if you want to use the old Icon component. However, we have made a significant change to how we handle Icons, read the UI Migration Guide for more information. ```javascript import arrowDown from './../../assets/icons/arrow-down.svg'; ``` ```javascript import { ReactComponent as arrowDown } from './../../assets/icons/arrow-down.svg'; ``` --- #### Polyfill.io We have removed the Polyfill.io script from the Viewer. If you require polyfills, you can add them to your project manually. This change primarily affects Internet Explorer, which Microsoft has already [ended support for](https://learn.microsoft.com/en-us/lifecycle/faq/internet-explorer-microsoft-edge#is-internet-explorer-11-the-last-version-of-internet-explorer-). --- #### Webpack changes We previously were copying dicom-image-loader wasm files to the public folder via ```js // platform/app/.webpack/webpack.pwa.js { from: '../../../node_modules/@cornerstonejs/dicom-image-loader/dist/dynamic-import', to: DIST_DIR, }, ``` but now after our upgrade to Cornerstone 3D 2.0, we don't need to do this anymore. --- #### Scroll utility The `jumpToSlice` utility has been relocated from `@cornerstonejs/tools` utilities to `@cornerstonejs/core/utilities`. migration ```js import { jumpToSlice } from '@cornerstonejs/core/utilities'; ``` --- #### Crosshairs They now have new colors in their associated viewports in the MPR view. However, you can turn this feature off. To disable it, remove the configuration from the `initToolGroups` in your mode. ``` { configuration: { viewportIndicators: true, viewportIndicatorsConfig: { circleRadius: 5, xOffset: 0.95, yOffset: 0.05, }, } } ``` --- #### useAuthorizationCodeFlow `useAuthorizationCodeFlow` config is deprecated now internally we detect the authorizationCodeFlow if the response_type is equal to `code` you can remove the config from the appConfig --- #### StackScrollMouseWheel -> StackScroll Tool + Mouse bindings If you previously used: ```js { toolName: toolNames.StackScrollMouseWheel, bindings: [] } ``` in your `initToolGroups`, you should now use: ```js { toolName: toolNames.StackScroll, bindings: [{ mouseButton: Enums.MouseBindings.Wheel }], } ``` This change allows for more flexible mouse bindings and keyboard combinations. #### VolumeRotateMouseWheel -> VolumeRotate Tool + Mouse bindings Before: ```js { toolName: toolNames.VolumeRotateMouseWheel, configuration: { rotateIncrementDegrees: 5, }, }, ``` Now: ```js { toolName: toolNames.VolumeRotate, bindings: [{ mouseButton: Enums.MouseBindings.Wheel }], configuration: { rotateIncrementDegrees: 5, }, }, ``` --- #### CustomizationService The `CustomizationService` uses `contentF` instead of `content`. So make sure your customizations are updated accordingly. --- #### SidePanel auto switch if open In `basic viewer` mode, when the side panel is open and the segmentation panel is active, adding a measurement will automatically switch to the measurement panel. This switch won't happen if the side panel is closed. To enable or disable this feature, adjust your mode configuration accordingly. To prevent this behavior, remove the following code from your mode: ```js panelService.addActivatePanelTriggers('your.panel.id', [ { sourcePubSubService: segmentationService, sourceEvents: [segmentationService.EVENTS.SEGMENTATION_ADDED], }, ]) panelService.addActivatePanelTriggers('your.panel.id', [ { sourcePubSubService: measurementService, sourceEvents: [ measurementService.EVENTS.MEASUREMENT_ADDED, measurementService.EVENTS.RAW_MEASUREMENT_ADDED, ], }, ]) ``` --- #### DicomUpload The DICOM upload functionality in OHIF has been refactored to use the standard customization service pattern. Now you don't need to put `customizationService: { dicomUploadComponent: '@ohif/extension-cornerstone.customizationModule.cornerstoneDicomUploadComponent', },` in your config, we will automatically add that if you have `dicomUploadEnabled` --- #### Viewport and Modality Support for Toolbar Buttons Previously, toolbar buttons had limited support for disabling themselves based on the active viewport type (e.g., `volume3d`, `video`, `sr`) or the modality of the displayed data (e.g., `US`, `SM`). This led to inconsistencies and sometimes enabled tools in contexts where they weren't applicable. The new implementation introduces more robust and flexible evaluators to control the enabled/disabled state of toolbar buttons based on viewport types and modalities. **Key Changes** 1. **New Evaluators:** New evaluators have been added to the `getToolbarModule`: - `evaluate.viewport.supported`: Disables a button if the active viewport's type is listed in the `unsupportedViewportTypes` property. - `evaluate.modality.supported`: Disables a button based on the modalities of the displayed data. It checks for both `unsupportedModalities` (exclusion) and `supportedModalities` (inclusion). 2. **Removal of Legacy Evaluators:** - Evaluators such as `evaluate.not.sm`, `evaluate.action.not.video`, `evaluate.not3D`, and `evaluate.isUS` have been removed. Migrate your toolbar button definitions to use the new evaluators mentioned above. **Replace Legacy Evaluators:** - Replace `evaluate.not.sm` with: ```json { name: 'evaluate.viewport.supported', unsupportedViewportTypes: ['sm'], } ``` - Replace `evaluate.action.not.video` with: ```json { name: 'evaluate.viewport.supported', unsupportedViewportTypes: ['video'], } ``` - Replace `evaluate.not3D` with: ```json { name: 'evaluate.viewport.supported', unsupportedViewportTypes: ['volume3d'], } ``` - Replace `evaluate.isUS` with: ```json { name: 'evaluate.modality.supported', supportedModalities: ['US'], } ```
Example Migration Before: ```json evaluate: ['evaluate.cine', 'evaluate.not3D'], ``` After ```json evaluate: [ 'evaluate.cine', { name: 'evaluate.viewport.supported', unsupportedViewportTypes: ['volume3d'], }, ], ```
--- ### Renamings Source: https://docs.ohif.org/llm/migration-guide/3p8-to-3p9/2-Renamings.md import Tabs from '@theme/Tabs'; import TabItem from '@theme/TabItem'; #### Panel Measurements The panel in the default extension is renamed from `measure` to `panelMeasurement` to be more consistent with the rest of the extensions. **Action Needed** Update any references to the `measure` panel to `panelMeasurement` in your code. Find and replace @ohif/extension-default.panelModule.measure @ohif/extension-cornerstone.panelModule.panelMeasurement #### addIcon from ui The addIcon from the ui package has had a version added in the default extension as `utils.addIcon` which adds to both `ui` and `ui-next`. --- ### Data Sources Source: https://docs.ohif.org/llm/migration-guide/3p8-to-3p9/3-DataSources.md import Tabs from '@theme/Tabs'; import TabItem from '@theme/TabItem'; #### BulkDataURI Configuration We've updated the configuration for BulkDataURI to provide more flexibility and control. This guide will help you migrate from the old configuration to the new one. #### What's Changing? ```javascript useBulkDataURI: false, ``` ```javascript bulkDataURI: { enabled: true, // Additional configuration **options** }, ``` **Additional Notes:** - The new configuration allows for more granular control over BulkDataURI behavior. - You can now add custom URL prefixing logic using the startsWith and prefixWith properties. - This change enables easier correction of retrieval URLs, especially in scenarios where URLs pass through multiple systems. --- ### Measurements Source: https://docs.ohif.org/llm/migration-guide/3p8-to-3p9/4-Measurements.md #### Display Text Previously, `displayText` for measurements was often a simple string or an array of strings. This approach made it difficult to distinguish between primary measurement values (e.g., length, area) and secondary information (e.g., series number, instance number). It also limited styling options for differentiating these types of information. The new approach introduces a structured object for `displayText`, consisting of `primary` and `secondary` arrays. This separation allows for better organization and presentation of measurement information. The `primary` array is intended for the main measurement values (on the left), while the `secondary` array is for contextual information like series and instance numbers (on the right) #### Migration Steps If you have custom measurement tools or modify existing ones, you need to update the `getDisplayText` functions within the `measurementServiceMappings` to return a structured object in the new format. **Update Measurement Mappings:** If your extension defines custom measurement tools or modifies existing ones, update the `getDisplayText` functions within the `measurementServiceMappings` to return a structured object in the new format. ```js // Old Implementation (example for Length tool) function getDisplayText(mappedAnnotations, displaySet, customizationService) { // ... return `${roundedLength} ${unit} (S: ${SeriesNumber}${instanceText}${frameText})`; } // New Implementation function getDisplayText(mappedAnnotations, displaySet) { // ... return { primary: [`${roundedLength} ${unit}`], // Primary measurement value secondary: [`S: ${SeriesNumber}${instanceText}${frameText}`], // Secondary information }; } ``` --- #### selected property `selected` property on measurements is now renamed to `isSelected` to match the rest of `isLocked` , `isVisible` naming convention. Migration: you probably don't need to perform any migration --- --- ### ViewportActionCorner Source: https://docs.ohif.org/llm/migration-guide/3p8-to-3p9/4-ViewportActionCorner.md #### Key Changes and Rationale Previously, the `ViewportActionCornersService` used the `setComponent` or `setComponents` methods to add components to viewport corners. These methods, when used with multiple components, would essentially overwrite existing components at the same location, unless great care was taken with the `indexPriority` property. This made it difficult to reliably position multiple components within the same corner. The new approach introduces the methods `addComponent` and `addComponents`, which insert components into the viewport corners based on an optional `indexPriority` property and provide predictable ordering based on the relative `indexPriority` of the components already at the corner. If no `indexPriority` is given, components are added to the end (for the left side) or the beginning (for the right side) by default. #### Migration Steps **Update Component Addition Methods:** Replace calls to `setComponent` and `setComponents` with `addComponent` and `addComponents`, respectively. ```js // Old API viewportActionCornersService.setComponent({ viewportId, id: 'myComponent', component: , location: viewportActionCornersService.LOCATIONS.topRight }); ``` **New API** ```js viewportActionCornersService.addComponent({ viewportId, id: 'myComponent', component: , location: viewportActionCornersService.LOCATIONS.topRight, indexPriority: 1, // indexPriority is now optional and determines placement order within the corner }); ``` --- ### StateSyncService Source: https://docs.ohif.org/llm/migration-guide/3p8-to-3p9/5-StateSyncService.md #### Migrating from StateSyncService to Zustand Stores The `StateSyncService` has been deprecated in favor of more modern and efficient state management using Zustand stores. This migration guide outlines the reasons for the change and provides step-by-step instructions on how to migrate your extension or mode from using `StateSyncService` to Zustand. #### Why Migrate? The `StateSyncService` had limitations: - **Limited Reactivity:** Updates weren't always reactive, requiring manual re-renders. - **Lack of Granularity:** It stored large chunks of state, hindering performance. - **Complexity:** Managing and syncing state across components was cumbersome. Zustand offers several advantages: - **Lightweight and Fast:** Zustand is a minimal and performant state management library. - **Granular Control:** Create individual stores for specific data, improving reactivity and performance. - **Simplified API:** Easy-to-use hooks for subscribing and updating state. #### Migration Steps: 1. **Identify State to Migrate:** Determine which parts of your extension or mode rely on the `StateSyncService`. Typical examples include: - **Viewport Presentations:** LUT and position information for viewports. - **Layout State:** Custom grid layouts and one-up toggling. - **Synchronizers:** State for cross-viewport synchronization. - **UI State:** UI-specific settings. 2. **Replace StateSyncService Usage:** In your extension or mode: - **Import Zustand Stores:** Import the new stores you created. - **Replace** `getState()` and `store()`: Use the Zustand hooks (`useStore`, `set`, `get`) to access and update state in your components. - **Handle Presentation IDs:** Implement logic for generating and managing presentation IDs within your stores or relevant components. This can involve using unique keys based on viewport options, display sets, and unique indices. See the `presentationUtils.ts` file for example implementations. - **Rehydrate State:** On mode entry, rehydrate your Zustand stores with any relevant persisted state from localStorage or other storage mechanisms. - **Clear State on Mode Exit:** Ensure you clear your Zustand stores appropriately on mode exit to prevent memory leaks. #### `LutPresentationStore` **Before (StateSyncService):** ```js const stateSyncService = servicesManager.services.stateSyncService; const lutPresentationStore = stateSyncService.getState().lutPresentationStore; const lutPresentation = lutPresentationStore[presentationId]; // ...to update stateSyncService.store({ lutPresentationStore: { ...lutPresentationStore, [presentationId]: newLutPresentation, }, }); ``` **After (Zustand):** ```js import { useLutPresentationStore } from '../stores/useLutPresentationStore'; const { lutPresentationStore, setLutPresentation } = useLutPresentationStore(); const lutPresentation = lutPresentationStore[presentationId]; // ...to update setLutPresentation(presentationId, newLutPresentation); ``` The `getPresentationId` for `lutPresentationStore` was previously registered in `platform/core`. Now, the Zustand store provides this functionality. ```js // Fetch getPresentationId functions from respective Zustand stores const { getPresentationId: getLutPresentationId } = useLutPresentationStore.getState(); // Register presentation id providers viewportGridService.addPresentationIdProvider('lutPresentationId', getLutPresentationId); ``` --- #### `PositionPresentationStore` **Before (StateSyncService):** ```js const stateSyncService = servicesManager.services.stateSyncService; const positionPresentationStore = stateSyncService.getState().positionPresentationStore; const positionPresentation = positionPresentationStore[presentationId]; // ...to update stateSyncService.store({ positionPresentationStore: { ...positionPresentationStore, [presentationId]: newPositionPresentation, }, }); ``` **After (Zustand):** ```js import { usePositionPresentationStore } from '../stores/usePositionPresentationStore'; const { positionPresentationStore, setPositionPresentation } = usePositionPresentationStore(); const positionPresentation = positionPresentationStore[presentationId]; // ...to update setPositionPresentation(presentationId, newPositionPresentation); ``` Similar to lutPresentationId, the PositionPresentationId is also registered from outside ```js const { getPresentationId: getPositionPresentationId } = usePositionPresentationStore.getState(); // register presentation id providers viewportGridService.addPresentationIdProvider( 'positionPresentationId', getPositionPresentationId ); ``` --- #### `ViewportGridStore` **Before (StateSyncService):** ```js const stateSyncService = servicesManager.services.stateSyncService; const viewportGridStore = stateSyncService.getState().viewportGridStore; const gridState = viewportGridStore[storeId]; // ...to update stateSyncService.store({ viewportGridStore: { ...viewportGridStore, [storeId]: newGridState, }, }); ``` **After (Zustand):** ```js import { useViewportGridStore } from '../stores/useViewportGridStore'; const { viewportGridState, setViewportGridState } = useViewportGridStore.getState(); const gridState = viewportGridState[storeId]; // ...to update setViewportGridState(storeId, newGridState); ``` --- #### `DisplaySetSelectorStore` **Before (StateSyncService):** ```js const stateSyncService = servicesManager.services.stateSyncService; const displaySetSelectorMap = stateSyncService.getState().displaySetSelectorMap; const displaySetUID = displaySetSelectorMap[selectorKey]; // ...to update stateSyncService.store({ displaySetSelectorMap: { ...displaySetSelectorMap, [selectorKey]: newDisplaySetUID, }, }); ``` **After (Zustand):** ```js import { useDisplaySetSelectorStore } from '../stores/useDisplaySetSelectorStore'; const { displaySetSelectorMap, setDisplaySetSelector } = useDisplaySetSelectorStore(); const displaySetUID = displaySetSelectorMap[selectorKey]; // ...to update setDisplaySetSelector(selectorKey, newDisplaySetUID); ``` --- #### `HangingProtocolStageIndexStore` **Before (StateSyncService):** ```js const stateSyncService = servicesManager.services.stateSyncService; const hangingProtocolStageIndexMap = stateSyncService.getState().hangingProtocolStageIndexMap; const hpInfo = hangingProtocolStageIndexMap[cacheId]; // ...to update stateSyncService.store({ hangingProtocolStageIndexMap: { ...hangingProtocolStageIndexMap, [cacheId]: newHpInfo, }, }); ``` **After (Zustand):** ```js import { useHangingProtocolStageIndexStore } from '../stores/useHangingProtocolStageIndexStore'; const { hangingProtocolStageIndexMap, setHangingProtocolStageIndex } = useHangingProtocolStageIndexStore(); const hpInfo = hangingProtocolStageIndexMap[cacheId]; // ...to update setHangingProtocolStageIndex(cacheId, newHpInfo); ``` --- #### `ToggleHangingProtocolStore` **Before (StateSyncService):** ```js const stateSyncService = servicesManager.services.stateSyncService; const toggleHangingProtocol = stateSyncService.getState().toggleHangingProtocol; const previousHpInfo = toggleHangingProtocol[storedHanging]; // ...to update stateSyncService.store({ toggleHangingProtocol: { ...toggleHangingProtocol, [storedHanging]: newHpInfo, }, }); ``` **After (Zustand):** ```js import { useToggleHangingProtocolStore } from '../stores/useToggleHangingProtocolStore'; const { toggleHangingProtocol, setToggleHangingProtocol } = useToggleHangingProtocolStore(); const previousHpInfo = toggleHangingProtocol[storedHanging]; // ...to update setToggleHangingProtocol(storedHanging, newHpInfo); ``` --- #### `ToggleOneUpViewportGridStore` **Before (StateSyncService):** ```js const stateSyncService = servicesManager.services.stateSyncService; const toggleOneUpViewportGridStore = stateSyncService.getState().toggleOneUpViewportGridStore; const previousGridState = toggleOneUpViewportGridStore.layout; // Assuming layout was a property // ...to update stateSyncService.store({ toggleOneUpViewportGridStore: newGridState, }); ``` **After (Zustand):** ```js import { useToggleOneUpViewportGridStore } from '../stores/useToggleOneUpViewportGridStore'; const { toggleOneUpViewportGridStore, setToggleOneUpViewportGridStore } = useToggleOneUpViewportGridStore(); const previousGridState = toggleOneUpViewportGridStore; // No nested layout property // ...to update setToggleOneUpViewportGridStore(newGridState); ``` --- #### `UIStateStore` **Before (StateSyncService):** ```js const stateSyncService = servicesManager.services.stateSyncService; const uiState = stateSyncService.getState().uiStateStore[someUIKey]; // ...to update stateSyncService.store({ uiStateStore: { ...stateSyncService.getState().uiStateStore, [someUIKey]: newUIState, }, }); ``` **After (Zustand):** ```js import { useUIStateStore } from '../stores/useUIStateStore'; const { uiState, setUIState } = useUIStateStore(); const currentUIState = uiState[someUIKey]; // ...to update setUIState(someUIKey, newUIState); ``` --- #### `ViewportsByPositionStore` **Before (StateSyncService):** ```js const stateSyncService = servicesManager.services.stateSyncService; const viewportsByPosition = stateSyncService.getState().viewportsByPosition; const cachedViewport = viewportsByPosition[positionId]; // ...to update stateSyncService.store({ viewportsByPosition: { ...viewportsByPosition, [positionId]: newViewport, }, }); ``` **After (Zustand):** ```js import { useViewportsByPositionStore } from '../stores/useViewportsByPositionStore'; const { viewportsByPosition, setViewportsByPosition } = useViewportsByPositionStore(); const cachedViewport = viewportsByPosition[positionId]; // ...to update setViewportsByPosition(positionId, newViewport); ``` --- #### `SegmentationPresentationStore` **After (Zustand):** ```js import { useSegmentationPresentationStore } from '../stores/useSegmentationPresentationStore'; const { segmentationPresentationStore, setSegmentationPresentation } = useSegmentationPresentationStore(); // ...to update setSegmentationPresentation(presentationId, newSegmentationPresentation); // You likely have functions within the store like: // addSegmentationPresentation // setSegmentationVisibility // etc. ``` --- ### RTSTRUCT Source: https://docs.ohif.org/llm/migration-guide/3p8-to-3p9/6-RTSTRUCT.md #### RTStructure Set has transitioned from VTK actors to SVG. We have transitioned from VTK-based rendering to SVG-based rendering for RTStructure Set contours. This change should not require any modifications to your codebase. We anticipate improved stability and speed in our contour rendering. As a result of this update, viewports rendering RTStructure Sets will no longer convert to volume viewports. Instead, they will remain as stack viewports. Read more in Pull Requests: - https://github.com/OHIF/Viewers/pull/4074 - https://github.com/OHIF/Viewers/pull/4157 --- ### UI Source: https://docs.ohif.org/llm/migration-guide/3p8-to-3p9/7-UI.md #### New Components You can explore our new playground at `docs.ohif.org/ui` to see the latest components and their properties. We haven't provided a migration guide yet because the old components are still available. Feel free to update your codebase, including custom extensions and UI, to use the new Button, Dropdown, Icons, and other new components from `@ohif/ui-next`. The old methods (importing from `@ohif/ui`) will continue to work for now. However, the new components have a slightly different API, and we plan to deprecate the old components in a future release, as we see the new ones as the future of OHIF. #### `UINotificationService` We've switched our custom notification service to the Sonner component from https://sonner.emilkowal.ski/ #### 1. Toast Positions (Kebab-Case) Toast positions are now defined using kebab-case instead of camelCase. For instance, `topRight` becomes `top-right`, `bottomRight` becomes `bottom-right`, etc. Ensure your position strings are updated accordingly. **Old API:** ```js uiNotificationService.show({ title: 'My Title', message: 'My Message', duration: 3000, position: 'topRight', type: 'error', autoClose: true, }); ``` **New API:** ```js uiNotificationService.show({ title: 'My Title', message: 'My Message', duration: 3000, position: 'top-right', // Note the change to kebab-case type: 'error', autoClose: true, }); ``` #### 2. Promise Support The `show()` method now supports promises, enabling you to display loading notifications and automatically update them based on the promise's resolution or rejection. This significantly simplifies asynchronous operation feedback. **Example:** ```js const myPromise = someAsyncOperation(); const notificationId = uiNotificationService.show({ title: 'Loading Data', message: 'Fetching data from server...', type: 'info', promise: myPromise, promiseMessages: { loading: 'Fetching...', success: (data) => `Data loaded: ${data.length} items`, // Access promise result error: (error) => `Failed to load data: ${error.message}`, // Access error details }, }); // Optionally hide notification manually if needed // myPromise.finally(() => uiNotificationService.hide(notificationId)); ``` #### 3. `hide()` API Change The `hide()` method no longer takes an options object. It only accepts the notification ID as a string argument. **Old API:** ```js uiNotificationService.hide({ id: notificationId }); ``` **New API:** ```js uiNotificationService.hide(notificationId); ``` --- #### Viewport Pane Tailwindcss class Previously, when targeting the viewport pane to add custom CSS, you likely used `group-hover:visible` with the viewportPane having a `group` class. The naming was confusing as we added more groups, so we renamed it to `group/pane`. Now you can apply `group-hover/pane` for better clarity. --- #### Header Component Header Component has been refactored in the @ohif/ui-next package. **Before** ```js function Header({ children, menuOptions, isReturnEnabled, onClickReturnButton, isSticky, WhiteLabeling, showPatientInfo, servicesManager, Secondary, appConfig, ...props }: withAppTypes): ReactNode ``` **After** ```js function Header({ children, menuOptions, isReturnEnabled, onClickReturnButton, isSticky, WhiteLabeling, PatientInfo, Secondary, ...props }: HeaderProps): ReactNode ``` The `PatientInfo` component is now preferred, and the `showPatientInfo` prop has been removed. The previous method depended on `servicesManager`, which was cumbersome because the UI shouldn't need to interact with `servicesManager`. All the DropDown and Icons are now in the @ohif/ui-next package. --- #### ui, ui-next configs We currently have two component libraries that we plan to merge in the future, so we need to maintain both configurations. If your styles aren't applying correctly, ensure you update both `platform/ui-next/tailwind.config.js` and `platform/ui/tailwind.config.js`. #### addIcon from ui-next if you add custom icons, you may need to add them using a new `addIcon` utility which adds the icon to both `ui` and `ui-next`. --- ### Refactoring Source: https://docs.ohif.org/llm/migration-guide/3p8-to-3p9/8-Refactorings.md import Tabs from '@theme/Tabs'; import TabItem from '@theme/TabItem'; #### Panel Segmentation is now moved from `@ohif/extension-cornerstone-dicom-seg` to `@ohif/extension-cornerstone`. The cornerstone extension now provides the panelSegmentation feature, which was previously part of the cornerstone-dicom-seg extension. This change is logical as panelSegmentation handles more than just DICOM. It can process various formats, including custom formats from the backend and potentially NIFTI format in the future. Before in your modes you were using ```js '@ohif/extension-cornerstone-dicom-seg.panelModule.panelSegmentation', ``` Now you should use it via ```js '@ohif/extension-cornerstone.panelModule.panelSegmentation', ``` --- #### `callInputDialog` and `colorPickerDialog` and `showLabelAnnotationPopup` Due to the excessive number of `callInputDialog` instances, we centralized them. You can now import them from `@ohif/extension-default`. ```js import { showLabelAnnotationPopup, callInputDialog, colorPickerDialog } from '@ohif/extension-default'; ``` --- #### disableEditing The configuration has moved from appConfig to allow more precise control over component disabling. To disable editing for segmentation and measurements, add the following settings: **Before: ** ```js customizationService.addModeCustomizations([ { id: 'segmentation.panel', disableEditing: true, }, ]); ``` **Now ** ```js customizationService.addModeCustomizations([ // To disable editing in the SegmentationTable { id: 'panelSegmentation.disableEditing', disableEditing: true, }, // To disable editing in the MeasurementTable { id: 'panelMeasurement.disableEditing', disableEditing: true, }, ]) ``` --- #### Customization Ids The primary reason for this migration is to improve modularity and maintainability in configuration management, as we plan to focus more on the customization service in the near future. **Before** ```js customizationService.addModeCustomizations([ { id: 'segmentation.panel', segmentationPanelMode: 'expanded', addSegment: false, onSegmentationAdd: () => { commandsManager.run('createNewLabelmapFromPT'); }, }, ]); ``` **Now** ```js customizationService.addModeCustomizations([ { id: 'panelSegmentation.tableMode', mode: 'expanded', }, { id: 'panelSegmentation.onSegmentationAdd', onSegmentationAdd: () => { commandsManager.run('createNewLabelmapFromPT'); }, }, ]); ``` --- ### Other Changes Source: https://docs.ohif.org/llm/migration-guide/3p8-to-3p9/9-other.md import Tabs from '@theme/Tabs'; import TabItem from '@theme/TabItem'; #### External Libraries Some libraries are loaded via dynamic import. You can provide a global function `browserImport` the allows loading of dynamic imports without affecting the webpack build. This import looks like: ```html ``` and belongs in the root html file for your application. You then need to remove `dependencies` on the external import, and add a reference to the external import in your `pluginConfig.json` file. #### Example plugin config for `dicom-microscopy-viewer` The example below imports the `dicom-microscopy-viewer` for use as an external dependency. The example is part of the default `pluginConfig.json` file. ```json "public": [ { "directory": "./platform/public" }, { "packageName": "dicom-microscopy-viewer", "importPath": "/dicom-microscopy-viewer/dicomMicroscopyViewer.min.js", "globalName": "dicomMicroscopyViewer", "directory": "./node_modules/dicom-microscopy-viewer/dist/dynamic-import" } ] ``` This defines two directory modules, whose contents are copied unchanged to the output build directory. It then defines the `dicom-microscopy-viewer` using the `packageName` element as being a module which is imported dynamically. Then, the import path passed into the browserImportFunction above is specified, and then how to access the import itself, via the `window.dicomMicroscopyViewer` global name reference. #### Referencing External Imports The appConfig either defines or has a default peerImport function which can be used to load references to the modules defined in the pluginConfig file. See the example in `init.tsx` for the cornerstone extension for how this is passed into CS3D for loading the whole slide imaging library. --- --- --- #### Use of ViewReference for navigation When navigating to measurements and storing/remembering navigation positions, the `viewport.getViewReference` is used to get a position, and `viewport.isReferenceViewable` used to check if a reference can be applied, and finally `viewport.setViewReference` to navigate to a view. Note that this changes the behaviour of navigation between MPR and Stack viewports, and also enables navigation of video and microscopy viewports in CS3D. This can cause some unexpected behaviour depending on how the frame of reference values are configured to allow for navigation. The isReferenceViewable is used to determine when a view or measurement can be shown on a given view. For stack versus volume viewports, this can cause unexpected behaviour to be seen depending on how the view reference was fetched. #### `getViewReference` with `forFrameOfReference` When a view reference is fetched with the for frame of reference flag set to true, a reference will be returned which can be displayed on any viewport containing the same frame of reference and encompassing the given FOR and able to display the required orientation. Without this flag, a view reference is returned which will be displayed on a stack with the given image id, or a volume containing said image id or the specified volume. #### `isReferenceViewable` with navigation and/or orientation The is reference viewable will return false unless the given reference is directly viewable in the viewport as is. However, it can be passed various flags to determine whether the reference could be displayed if the viewport was modified in various ways, for example, by changing the position or orientation of the viewport. This allows checking for degrees of closeness so that the correct viewport can be chosen. Note that this may result in displaying a measurement from one viewport on a completely different viewport, for example, showing a Probe tool from the stack viewport on an MPR view. --- ### 3.8 -> 3.9 Source: https://docs.ohif.org/llm/migration-guide/3p8-to-3p9/index.md import DocCardList from '@theme/DocCardList'; import {useCurrentSidebarCategory} from '@docusaurus/theme-common'; #### Migration Guide Sections --- ## 3p8-to-3p9/1-segmentation ### New Architecture Source: https://docs.ohif.org/llm/migration-guide/3p8-to-3p9/1-segmentation/1-Architecture.md #### New Architecture * **Viewport-Centric Architecture** * Previous: Segmentations were tied to toolGroups * Now: Segmentations are tied directly to viewports * Impact: More granular control but requires significant code changes * **Representation Management** * Previous: Required managing segmentation representation UIDs * Now: Uses simpler segmentationId + type combination * Impact: Simplified but requires API updates If you are not familiar with the difference between a segmentation and a segmentation representation, below
Read More In Cornerstone3DTools, we have decoupled the concept of a Segmentation from a Segmentation Representation. This means that from one Segmentation we can create multiple Segmentation Representations. For instance, a Segmentation Representation of a 3D Labelmap, can be created from a Segmentation data, and a Segmentation Representation of a Contour can be created from the same Segmentation data. This way we have decouple the presentational aspect of a Segmentation from the underlying data. Similar relationship structure has been adapted in popular medical imaging softwares such as 3D Slicer with the addition of polymorph segmentation. - https://github.com/PerkLab/PolySeg - https://www.slicer.org/
#### Architecture Overview The new architecture in Cornerstone3D 2.0 makes a clear distinction between: * A segmentation (the data structure containing segments) * A segmentation representation (how that segmentation is visualized in a specific viewport) Let's now review what has changed --- ### SegmentationService API Source: https://docs.ohif.org/llm/migration-guide/3p8-to-3p9/1-segmentation/2-segmentationService-basic.md Below we will review the changes to the API of the `SegmentationService` #### SegmentationService API #### Events SEGMENTATION_UPDATED -> SEGMENTATION_MODIFIED Just a rename to match the cornerstone terminology #### VolumeId vs SegmentationId Previously, we used the SegmentationId as the VolumeId for volume-based segmentations, which led to confusion and issues. Now, we have two separate IDs: one for the segmentation and one for the volume. `segmentationService.getLabelmapVolume(segmentationId)` will return the volume associated with the segmentation. If your code uses `cache.getVolume(segmentationId)`, update it to use the new `getLabelmapVolume` method. #### getSegmentation(segmentationId) remains the same it will return the segmentation object = cornerstone segmentation object with the following properties: ```js /** * Global Segmentation Data which is used for the segmentation */ type Segmentation = { /** segmentation id */ segmentationId: string; /** segmentation label */ label: string; segments: { [segmentIndex: number]: Segment; }; /** * Representations of the segmentation. Each segmentation "can" be viewed * in various representations. For instance, if a DICOM SEG is loaded, the main * representation is the labelmap. However, for DICOM RT the main representation * is contours, and other representations can be derived from the contour (currently * only labelmap representation is supported) */ representationData: RepresentationsData; /** * Segmentation level stats, Note each segment can have its own stats * This is used for caching stats for the segmentation level */ cachedStats: { [key: string]: unknown }; }; export type Segment = { /** segment index */ segmentIndex: number; /** segment label */ label: string; /** is segment locked for editing */ locked: boolean; /** cached stats for the segment, e.g., pt suv mean, max etc. */ cachedStats: { [key: string]: unknown }; /** is segment active for editing, at the same time only one segment can be active for editing */ active: boolean; }; ```
Compared to Cornerstone3D 1.x Previously this function was returning this ```js export type Segmentation = { segmentationId: string; type: Enums.SegmentationRepresentations; label: string; activeSegmentIndex: number; segmentsLocked: Set; cachedStats: { [key: string]: number }; segmentLabels: { [key: string]: string }; representationData: SegmentationRepresentationData; }; ``` As you can see `segmentLabels`, `segmentsLocked`, `activeSegmentIndex`, are all gathered under the new `segments` object. We now have support for per segment cachedStats as well.
--- #### getSegmentations It provides all segmentations in the state. Previously, it accepted a `filterNonhydrated` flag, but since we've moved away from hydration and every loaded segmentation is now hydrated by default, it returns all segmentations. --- #### getActiveSegmentation After migrating to viewport-specific segmentations, different viewports can have distinct active segmentations for editing. The panel will always display the active segmentation when the active viewport changes. Before (3.8) ```js // Returns full segmentation object public getActiveSegmentation(): Segmentation { const segmentations = this.getSegmentations(); return segmentations.find(segmentation => segmentation.isActive); } ``` After (3.9) ```js public getActiveSegmentation(viewportId: string): Segmentation | null { return cstSegmentation.activeSegmentation.getActiveSegmentation(viewportId); } ```
Key Changes 1. **Viewport Specificity** - Before: Global active segmentation across all tool groups - After: Active segmentation per viewport 2. **Required Parameters** - Before: No parameters needed - After: Requires viewportId parameter
Migration Examples **Before:** ```js // Get active segmentation const activeSegmentation = segmentationService.getActiveSegmentation(); if (activeSegmentation) { console.log('Active segmentation:', activeSegmentation.segmentationId); console.log('Active segment:', activeSegmentation.activeSegmentIndex); } ``` **After:** ```js // Get active segmentation for specific viewport const activeSegmentation = segmentationService.getActiveSegmentation('viewport1'); ```
--- #### getToolGroupIdsWithSegmentation is now -> `getViewportIdsWithSegmentation` as you guessed #### setActiveSegmentationForToolGroup -> setActiveSegmentation **Before (OHIF 3.8)** ```js setActiveSegmentationForToolGroup( segmentationId: string, toolGroupId?: string, suppressEvents?: boolean ): void ``` **After (OHIF 3.9)** ```js setActiveSegmentation( viewportId: string, segmentationId: string ): void ```
Migration Examples 1. **Basic Usage Update** ```js // Before - OHIF 3.8 segmentationService.setActiveSegmentationForToolGroup( segmentationId, toolGroupId ); // After - OHIF 3.9 segmentationService.setActiveSegmentation( viewportId, segmentationId ); ```
--- #### addSegment The `addSegment` method in OHIF 3.9 has been updated to handle segmentation properties in a viewport-centric way, removing tool group dependencies and simplifying the configuration structure. **Before (OHIF 3.8)** ```js addSegment( segmentationId: string, config: { segmentIndex?: number; toolGroupId?: string; properties?: { label?: string; color?: ohifTypes.RGB; opacity?: number; visibility?: boolean; isLocked?: boolean; active?: boolean; }; } ): void ``` **After (OHIF 3.9)** ```js addSegment( segmentationId: string, config: { segmentIndex?: number; label?: string; isLocked?: boolean; active?: boolean; color?: csTypes.Color; visibility?: boolean; } ): void ```
Key Changes 1. **Configuration Structure** - Removed double nested `properties` object - Configuration options now at top level - Removed `toolGroupId` parameter - Removed `opacity` parameter (now part of color) 2. **Segment Index Generation** - Changed from length-based to max-value-based indexing - More reliable for non-sequential segment indices 3. **Color Handling** - Color now includes alpha channel (opacity) - Applied to all relevant viewports automatically
Migration Examples 1. **Basic Segment Creation** ```js // Before - OHIF 3.8 segmentationService.addSegment(segmentationId, { properties: { label: 'Segment 1' } }); // After - OHIF 3.9 segmentationService.addSegment(segmentationId, { label: 'Segment 1' }); ``` 2. **Creating Segment with Color** ```js // Before - OHIF 3.8 segmentationService.addSegment(segmentationId, { properties: { color: [255, 0, 0], opacity: 255 } }); // After - OHIF 3.9 segmentationService.addSegment(segmentationId, { color: [255, 0, 0, 255] // RGB + Alpha }); ``` 3. **Setting Visibility and Lock Status** ```js // Before - OHIF 3.8 segmentationService.addSegment(segmentationId, { toolGroupId: 'myToolGroup', properties: { visibility: true, isLocked: true } }); // After - OHIF 3.9 segmentationService.addSegment(segmentationId, { visibility: true, isLocked: true }); ``` 4. **Complete Configuration Example** ```js // Before - OHIF 3.8 segmentationService.addSegment(segmentationId, { segmentIndex: 1, toolGroupId: 'myToolGroup', properties: { label: 'Tumor', color: [255, 0, 0], opacity: 200, visibility: true, isLocked: false, active: true } }); // After - OHIF 3.9 segmentationService.addSegment(segmentationId, { segmentIndex: 1, label: 'Tumor', color: [255, 0, 0, 200], // RGB + Alpha visibility: true, isLocked: false, active: true }); ```
Important Changes 1. **Tool Group Removal** ```js // Before - OHIF 3.8 segmentationService.addSegment(segmentationId, { toolGroupId: 'myToolGroup' // ... other properties }); // After - OHIF 3.9 // No tool group needed - automatically applies to all relevant viewports segmentationService.addSegment(segmentationId, { // ... properties }); ``` 2. **Segment Index Generation** ```js // Before - OHIF 3.8 // Used array length segmentIndex = segmentation.segments.length === 0 ? 1 : segmentation.segments.length; // After - OHIF 3.9 // Uses highest existing index + 1 segmentIndex = Math.max(...Object.keys(csSegmentation.segments).map(Number)) + 1; ``` 3. **Color and Opacity** ```js // Before - OHIF 3.8 segmentationService.addSegment(segmentationId, { properties: { color: [255, 0, 0], opacity: 200 } }); // After - OHIF 3.9 segmentationService.addSegment(segmentationId, { color: [255, 0, 0, 200] // Combined color and opacity }); ```
--- --- #### getActiveSegment now requires viewportId, since we have moved away from global active segmentation to viewport specific one **API Changes** ```js // Before getActiveSegment(): Segment // After getActiveSegment(viewportId: string): Segment | null ``` --- ### Segmentation Representations Source: https://docs.ohif.org/llm/migration-guide/3p8-to-3p9/1-segmentation/3-segmentationserice-representation.md #### Segmentation Representation Management API ```js addSegmentationRepresentationToToolGroup removeSegmentationRepresentationFromToolGroup getSegmentationRepresentationsForToolGroup ``` In Cornerstone3D 2.0, segmentation representation management has shifted from a tool group-centric approach to a viewport-centric approach. This architectural change provides better control over segmentation rendering and simplifies the mental model for managing segmentations. #### Adding Segmentation Representations **Before (3.8)**: ```js // Tool group-based approach await segmentation.addSegmentationRepresentationToToolGroup( toolGroupId, segmentationId, hydrateSegmentation, csToolsEnums.SegmentationRepresentations.Labelmap ); ``` **After (3.9)**: ```js // Viewport-centric approach await segmentation.addSegmentationRepresentation( viewportId, { segmentationId: segmentationId, type: csToolsEnums.SegmentationRepresentations.Labelmap, } ); ``` #### Removing Segmentation Representations **Before** : ```js // Remove specific representations from a tool group segmentation.removeSegmentationRepresentationFromToolGroup( toolGroupId, [segmentationRepresentationUID] ); // Remove all representations from a tool group segmentation.removeSegmentationRepresentationFromToolGroup(toolGroupId); ``` **After** ```js // Remove specific representation from a viewport segmentation.removeSegmentationRepresentation( viewportId, { segmentationId: segmentationId, type: csToolsEnums.SegmentationRepresentations.Labelmap } ); // Remove all representations from a viewport segmentation.removeSegmentationRepresentations(viewportId); ``` #### Getting Segmentation Representations **Before**: ```js // Get representations for a tool group const representations = segmentation.getSegmentationRepresentationsForToolGroup(toolGroupId); ``` **After** : ```js // Get all representations for a viewport const representations = segmentation.getSegmentationRepresentations(viewportId); // Get specific type of representations const labelmapReps = segmentation.getSegmentationRepresentations(viewportId, { type: csToolsEnums.SegmentationRepresentations.Labelmap }); // Get representations for specific segmentation const segmentationReps = segmentation.getSegmentationRepresentations(viewportId, { segmentationId: segmentationId }); // Get specific representation const representation = segmentation.getSegmentationRepresentation(viewportId, { segmentationId: segmentationId, type: csToolsEnums.SegmentationRepresentations.Labelmap }); ``` #### Understanding the Specifier Pattern The Cornerstone3D 2.0 (OHIF 3.9) API introduces a "specifier" pattern that provides more flexible and precise control over segmentation representations. A specifier is an object that can include: ```js type Specifier = { segmentationId?: string; // The ID of the segmentation type?: SegmentationRepresentations; // The type of representation (Labelmap, Contour, etc.) } ``` The specifier pattern allows for: 1. **Precise Targeting**: You can target specific segmentations and representation types - Allows direct access to individual segmentations - Enables filtering by representation type 2. **Flexible Querying**: You can get all representations of a certain type or for a specific segmentation - Query by segmentation ID - Query by representation type - Combine queries for specific needs 3. **Granular Control**: You can manage representations at different levels of specificity - Viewport level control - Segmentation level control - Individual representation type control #### Examples of Specifier Usage ```js // Get all labelmap representations in a viewport const labelmaps = segmentation.getSegmentationRepresentations(viewportId, { type: csToolsEnums.SegmentationRepresentations.Labelmap }); // Get all representations of a specific segmentation (including contour, labelmap, surface) const segReps = segmentation.getSegmentationRepresentations(viewportId, { segmentationId: 'seg123' }); // Get a specific representation const specificRep = segmentation.getSegmentationRepresentation(viewportId, { segmentationId: 'seg123', type: csToolsEnums.SegmentationRepresentations.Labelmap }); ```
Benefits of the New Approach 1. **Direct Viewport Control**: - Each viewport can have its own unique representation configuration - No need to create separate tool groups for different viewport representations 2. **Simpler Mental Model**: - Representations are directly tied to where they're displayed - No intermediate tool group layer to manage 3. **More Flexible Rendering**: - Each viewport can render the same segmentation differently - Better support for multiple views of the same data 4. **Improved Type Safety**: - Specifier pattern provides better TypeScript support - More explicit API with clearer intentions
Migration Tips 1. **Replace Tool Group References**: - Search your codebase for `toolGroupId` references in segmentation code - Replace with appropriate `viewportId` references 2. **Update Event Handlers**: - Update any code listening for segmentation events - Events now include viewportId instead of toolGroupId 3. **Review Representation Management**: - Identify where you manage segmentation representations - Convert to using the new viewport-centric methods 4. **Consider Viewport Context**: - Think about segmentation representation in terms of viewport display - Use specifiers to target specific representations when needed
--- ### Segmentation Creation Source: https://docs.ohif.org/llm/migration-guide/3p8-to-3p9/1-segmentation/4-segmentationserice-creation.md #### createEmptySegmentationForViewport is now `createLabelmapForViewport` to align with other segmentation creation methods. Run it using `commandsManager.runCommand('createLabelmapForViewport', {viewportId})`. #### createSegmentationForDisplaySet is now -> `createLabelmapForDisplaySet` Since we are moving towards segmentations be contours as well, this is renamed to clearly state the purpose. Since OHIF 3.9 introduced Stack Segmentation support, we no longer generate a volume-based labelmap or convert the viewport to a volume viewport by default. Our default creation is now stack-based. API Changes - `createSegmentationForDisplaySet` has been renamed to `createLabelmapForDisplaySet`. - Pass a `displaySet` object instead of a `displaySetInstanceUID`. This change enhances type safety and flexibility, accommodating future updates to the `displaySetService`. **Before (OHIF 3.8)** ```js async createSegmentationForDisplaySet( displaySetInstanceUID: string, options?: { segmentationId: string; FrameOfReferenceUID: string; label: string; } ): Promise ``` **After (OHIF 3.9)** ```js // Method 1: Display Set Based async createLabelmapForDisplaySet( displaySet: DisplaySet, options?: { segmentationId?: string; label: string; segments?: { [segmentIndex: number]: Partial }; } ): Promise ```
Migration Examples ```js // Before - OHIF 3.8 const segmentationId = await segmentationService.createSegmentationForDisplaySet( displaySetInstanceUID, { label: 'My Segmentation' } ); ``` ```js // After - OHIF 3.9 // Option 1: If you have a display set UID const displaySet = displaySetService.getDisplaySetByUID(displaySetInstanceUID); const segmentationId = await segmentationService.createLabelmapForDisplaySet( displaySet, { label: 'My Segmentation' } ); ```
--- #### createSegmentationForRTDisplaySet **Before (OHIF 3.8)** ```js async createSegmentationForRTDisplaySet( rtDisplaySet, segmentationId?: string, suppressEvents = false ): Promise ``` **After (OHIF 3.9)** ```js async createSegmentationForRTDisplaySet( rtDisplaySet, options: { segmentationId?: string; type: SegmentationRepresentations; // not required, defaults to Contour } ): Promise ```
Migration Examples if you were not passing segmentationId, you don't need to change anything ```js // Before - OHIF 3.8 const segmentationId = await segmentationService.createSegmentationForRTDisplaySet( rtDisplaySet ); // After - OHIF 3.9 const segmentationId = await segmentationService.createSegmentationForRTDisplaySet( rtDisplaySet, ); ``` if you were passing segmentationId, you need to update the API to pass an options object and set the segmentationId in there. ```js // Before - OHIF 3.8 const segmentationId = await segmentationService.createSegmentationForRTDisplaySet( rtDisplaySet, 'custom-id', ); // After - OHIF 3.9 const segmentationId = await segmentationService.createSegmentationForRTDisplaySet( rtDisplaySet, { segmentationId: 'custom-id', type: csToolsEnums.SegmentationRepresentations.Contour } ); ```
--- #### createSegmentationForSEGDisplaySet Changes **Before (OHIF 3.8)** ```js async createSegmentationForSEGDisplaySet( segDisplaySet, segmentationId?: string, suppressEvents = false ): Promise ``` **After (OHIF 3.9)** ```js async createSegmentationForSEGDisplaySet( segDisplaySet, options: { segmentationId?: string; type: SegmentationRepresentations; // not required, defaults to Labelmap } ): Promise ```
Migration Examples 1. **Basic Usage Update** ``` // Before - OHIF 3.8 const segmentationId = await segmentationService.createSegmentationForSEGDisplaySet( segDisplaySet ); // After - OHIF 3.9 const segmentationId = await segmentationService.createSegmentationForSEGDisplaySet( segDisplaySet, { type: csToolsEnums.SegmentationRepresentations.Labelmap } ); ``` 2. **Custom Configuration** ``` // Before - OHIF 3.8 const segmentationId = await segmentationService.createSegmentationForSEGDisplaySet( segDisplaySet, 'custom-id', false ); // After - OHIF 3.9 const segmentationId = await segmentationService.createSegmentationForSEGDisplaySet( segDisplaySet, { segmentationId: 'custom-id', type: csToolsEnums.SegmentationRepresentations.Labelmap } ); ```
--- --- ### SegmentationService Modifications Source: https://docs.ohif.org/llm/migration-guide/3p8-to-3p9/1-segmentation/4-segmentationserice-modification.md --- #### Segmentation Representation Management API ```js addSegmentationRepresentationToToolGroup removeSegmentationRepresentationFromToolGroup getSegmentationRepresentationsForToolGroup ``` In Cornerstone3D 2.0, segmentation representation management has shifted from a tool group-centric approach to a viewport-centric approach. This architectural change provides better control over segmentation rendering and simplifies the mental model for managing segmentations. #### Adding Segmentation Representations **Before (3.8)**: ```js // Tool group-based approach await segmentation.addSegmentationRepresentationToToolGroup( toolGroupId, segmentationId, hydrateSegmentation, csToolsEnums.SegmentationRepresentations.Labelmap ); ``` **After (3.9)**: ```js // Viewport-centric approach await segmentation.addSegmentationRepresentation( viewportId, { segmentationId: segmentationId, type: csToolsEnums.SegmentationRepresentations.Labelmap, } ); ``` #### Removing Segmentation Representations **Before** : ```js // Remove specific representations from a tool group segmentation.removeSegmentationRepresentationFromToolGroup( toolGroupId, [segmentationRepresentationUID] ); // Remove all representations from a tool group segmentation.removeSegmentationRepresentationFromToolGroup(toolGroupId); ``` **After** ```js // Remove specific representation from a viewport segmentation.removeSegmentationRepresentation( viewportId, { segmentationId: segmentationId, type: csToolsEnums.SegmentationRepresentations.Labelmap } ); // Remove all representations from a viewport segmentation.removeSegmentationRepresentations(viewportId); ``` #### Getting Segmentation Representations **Before**: ```js // Get representations for a tool group const representations = segmentation.getSegmentationRepresentationsForToolGroup(toolGroupId); ``` **After** : ```js // Get all representations for a viewport const representations = segmentation.getSegmentationRepresentations(viewportId); // Get specific type of representations const labelmapReps = segmentation.getSegmentationRepresentations(viewportId, { type: csToolsEnums.SegmentationRepresentations.Labelmap }); // Get representations for specific segmentation const segmentationReps = segmentation.getSegmentationRepresentations(viewportId, { segmentationId: segmentationId }); // Get specific representation const representation = segmentation.getSegmentationRepresentation(viewportId, { segmentationId: segmentationId, type: csToolsEnums.SegmentationRepresentations.Labelmap }); ``` #### Understanding the Specifier Pattern The Cornerstone3D 2.0 (OHIF 3.9) API introduces a "specifier" pattern that provides more flexible and precise control over segmentation representations. A specifier is an object that can include: ```js type Specifier = { segmentationId?: string; // The ID of the segmentation type?: SegmentationRepresentations; // The type of representation (Labelmap, Contour, etc.) } ``` The specifier pattern allows for: 1. **Precise Targeting**: You can target specific segmentations and representation types - Allows direct access to individual segmentations - Enables filtering by representation type 2. **Flexible Querying**: You can get all representations of a certain type or for a specific segmentation - Query by segmentation ID - Query by representation type - Combine queries for specific needs 3. **Granular Control**: You can manage representations at different levels of specificity - Viewport level control - Segmentation level control - Individual representation type control #### Examples of Specifier Usage ```js // Get all labelmap representations in a viewport const labelmaps = segmentation.getSegmentationRepresentations(viewportId, { type: csToolsEnums.SegmentationRepresentations.Labelmap }); // Get all representations of a specific segmentation (including contour, labelmap, surface) const segReps = segmentation.getSegmentationRepresentations(viewportId, { segmentationId: 'seg123' }); // Get a specific representation const specificRep = segmentation.getSegmentationRepresentation(viewportId, { segmentationId: 'seg123', type: csToolsEnums.SegmentationRepresentations.Labelmap }); ```
Benefits of the New Approach 1. **Direct Viewport Control**: - Each viewport can have its own unique representation configuration - No need to create separate tool groups for different viewport representations 2. **Simpler Mental Model**: - Representations are directly tied to where they're displayed - No intermediate tool group layer to manage 3. **More Flexible Rendering**: - Each viewport can render the same segmentation differently - Better support for multiple views of the same data 4. **Improved Type Safety**: - Specifier pattern provides better TypeScript support - More explicit API with clearer intentions
Migration Tips 1. **Replace Tool Group References**: - Search your codebase for `toolGroupId` references in segmentation code - Replace with appropriate `viewportId` references 2. **Update Event Handlers**: - Update any code listening for segmentation events - Events now include viewportId instead of toolGroupId 3. **Review Representation Management**: - Identify where you manage segmentation representations - Convert to using the new viewport-centric methods 4. **Consider Viewport Context**: - Think about segmentation representation in terms of viewport display - Use specifiers to target specific representations when needed
--- --- ### SegmentationService Style Source: https://docs.ohif.org/llm/migration-guide/3p8-to-3p9/1-segmentation/5-segmentationserice-style.md #### Style #### setSegmentVisibility since visibility is viewport concern and representation is what is being toggled -> **Before (OHIF 3.8)** ```js setSegmentVisibility( segmentationId: string, segmentIndex: number, isVisible: boolean, toolGroupId?: string ): void ``` **After (OHIF 3.9)** ```js setSegmentVisibility( viewportId: string, segmentationId: string, segmentIndex: number, isVisible: boolean, type?: SegmentationRepresentations ): void ```
Migration Example ```js // Before segmentationService.setSegmentVisibility( 'segmentation1', 1, true, 'toolGroup1' ); // After segmentationService.setSegmentVisibility( 'viewport1', 'segmentation1', 1, true ); ``` **Getting Viewport IDs** When you need to update visibility across multiple viewports: ```js // Before const toolGroupIds = ['toolGroup1', 'toolGroup2']; toolGroupIds.forEach(toolGroupId => { segmentationService.setSegmentVisibility( 'segmentation1', 1, true, toolGroupId ); }); // After const viewportIds = segmentationService.getViewportIdsWithSegmentation('segmentation1'); viewportIds.forEach(viewportId => { segmentationService.setSegmentVisibility( viewportId, 'segmentation1', 1, true ); }); ```
#### get/set Configuration -> get/setStyle The segmentation configuration system has been completely redesigned: - Moved from global/toolGroup configuration to viewport-specific styles - Split rendering of inactive segmentations into separate API - More granular control over styles at different levels (global, segmentation, viewport, segment) **Before (OHIF 3.8)** ```js interface SegmentationConfig { brushSize: number; brushThresholdGate: number; fillAlpha: number; fillAlphaInactive: number; outlineWidthActive: number; renderFill: boolean; renderInactiveSegmentations: boolean; renderOutline: boolean; outlineOpacity: number; outlineOpacityInactive: number; } ``` **After (OHIF 3.9)** ```js // Style Types interface StyleSpecifier { viewportId?: string; segmentationId?: string; type: SegmentationRepresentations; segmentIndex?: number; } interface LabelmapStyle { renderOutline: boolean; outlineWidth: number; renderFill: boolean; fillAlpha: number; outlineAlpha: number; // .... } // Functions getStyle(specifier: StyleSpecifier): LabelmapStyle | ContourStyle | SurfaceStyle; setStyle(specifier: StyleSpecifier, style: LabelmapStyle | ContourStyle | SurfaceStyle): void; setRenderInactiveSegmentations(viewportId: string, renderInactive: boolean): void; getRenderInactiveSegmentations(viewportId: string): boolean; ``` **Before:** ```js // Get global configuration const config = segmentationService.getConfiguration(); console.log(config.fillAlpha, config.renderOutline); // Get tool group specific config const toolGroupConfig = segmentationService.getConfiguration('toolGroup1'); ``` **After:** ```js // Get global style for labelmap const labelmapStyle = segmentationService.getStyle({ type: SegmentationRepresentations.Labelmap }); // Get viewport-specific style const viewportStyle = segmentationService.getStyle({ viewportId: 'viewport1', type: SegmentationRepresentations.Labelmap }); // Get segmentation-specific style const segmentationStyle = segmentationService.getStyle({ segmentationId: 'seg1', type: SegmentationRepresentations.Labelmap }); // Get segment-specific style const segmentStyle = segmentationService.getStyle({ segmentationId: 'seg1', type: SegmentationRepresentations.Labelmap, segmentIndex: 1 }); ``` **Setting Configuration/Style** **Before:** ```js segmentationService.setConfiguration({ fillAlpha: 0.5, outlineWidthActive: 2, renderOutline: true, renderFill: true, renderInactiveSegmentations: true }); ``` **After:** ```js // Set global style segmentationService.setStyle( { type: SegmentationRepresentations.Labelmap }, { fillAlpha: 0.5, outlineWidth: 2, renderOutline: true, renderFill: true } ); // Set viewport-specific style segmentationService.setStyle( { viewportId: 'viewport1', type: SegmentationRepresentations.Labelmap }, { fillAlpha: 0.5, outlineWidth: 2 } ); // Handle inactive segmentations separately segmentationService.setRenderInactiveSegmentations('viewport1', true); ```
Migration Examples **Combining Multiple Style Settings** **Before:** ```js segmentationService.setConfiguration({ fillAlpha: 0.5, fillAlphaInactive: 0.2, outlineWidthActive: 2, outlineOpacity: 1, outlineOpacityInactive: 0.5, renderOutline: true, renderFill: true, renderInactiveSegmentations: true }); ``` **After:** ```js // Set base style segmentationService.setStyle( { type: SegmentationRepresentations.Labelmap }, { fillAlpha: 0.5, outlineWidth: 2, outlineAlpha: 1, renderOutline: true, renderFill: true } ); ```
**Set inactive rendering per viewport** ```js segmentationService.setRenderInactiveSegmentations('viewport1', true); // Set style for inactive segments if needed segmentationService.setStyle( { viewportId: 'viewport1', type: SegmentationRepresentations.Labelmap, segmentationId: 'seg1' }, { fillAlpha: 0.2, outlineAlpha: 0.5 } ); ``` --- #### setSegmentRGBAColor , setSegmentOpacity, setSegmentRGBA Previously, the SegmentationService had multiple redundant methods for setting colors and opacity (`setSegmentRGBA`, `setSegmentColor`, `setSegmentOpacity`). This led to confusion and potential state inconsistencies between the service and Cornerstone.js Tools. The old methods (`setSegmentRGBA`, `setSegmentRGBA`, and `setSegmentOpacity`) are now removed. 1. Replace `setSegmentRGBAColor`, `setSegmentRGBA`, and `setSegmentOpacity` calls: Replace all instances of the old methods with the new `setSegmentColor` method. Note that you now need to provide the `viewportId` as the first argument since segment color is managed per viewport and representation in cornerstone3D. **Before** ```js // Old API: segmentationService.setSegmentRGBAColor(segmentationId, segmentIndex, rgbaColor, toolGroupId); segmentationService.setSegmentRGBA(segmentationId, segmentIndex, rgbaColor, toolGroupId); segmentationService.setSegmentOpacity(segmentationId, segmentIndex, opacity, toolGroupId); ``` **After** ```js // New API: segmentationService.setSegmentColor(viewportId, segmentationId, segmentIndex, color); // color is an array of [red, green, blue, alpha] ``` The new `color` argument is an array representing the RGBA color, where the alpha component determines the opacity. Since the Cornerstone Tools library handles segment color per viewport and representation, we require the `viewportId` as an argument now. 2. **Retrieve Segment Color using** `getSegmentColor`: The new `getSegmentColor` provides a way to fetch the color of a segment within a specific viewport. ```js const color = segmentationService.getSegmentColor(viewportId, segmentationId, segmentIndex); //returns [r, g, b, a] ``` --- #### ToggleSegmentationVisibility In Cornerstone3D v2.x, `toggleSegmentationVisibility` has been replaced with `toggleSegmentationRepresentationVisibility`. This change reflects the fact that a representation is what is being toggled, not the segmentation. **Before (OHIF 3.8)** ```js // Toggle visibility for a segmentation globally segmentationService.toggleSegmentationVisibility(segmentationId); ``` **After (OHIF 3.9)** ```js // Toggle visibility for a segmentation representation in a specific viewport segmentationService.toggleSegmentationRepresentationVisibility(viewportId, { segmentationId: segmentationId, type: csToolsEnums.SegmentationRepresentations.Labelmap }); ``` **Migration Steps** 1. Update all calls to `toggleSegmentationVisibility` to use `toggleSegmentationRepresentationVisibility` 2. Add the required `viewportId` parameter 3. Add a `type` parameter specifying the representation type (e.g., Labelmap, Contour) 4. If you were toggling visibility across all viewports, you'll need to loop through the viewports:
Additional Notes - Each viewport can now have independent visibility settings for the same segmentation - The visibility state is specific to the representation type (Labelmap, Contour, etc.) - To check current visibility, use `getSegmentationRepresentationVisibility(viewportId, { segmentationId, type })`
--- --- ### Other Changes Source: https://docs.ohif.org/llm/migration-guide/3p8-to-3p9/1-segmentation/6-segmentationserice-other.md #### addOrUpdateSegmentation This was a public method but there is a good chance you were not using it **Before (OHIF 3.8)** ```js // Before addOrUpdateSegmentation( segmentation: Segmentation, suppressEvents = false, notYetUpdatedAtSource = false ): string ``` **After** ```js addOrUpdateSegmentation( segmentationInput: SegmentationPublicInput | Partial ) ``` #### Data Structure Changes The segmentation object that was used previously was a custom segmentation object that was used internally by the SegmentationService. But we have moved to the cornerstone public segmentation input type. **Before:** ```js const segmentation = { id: 'segmentation1', type: SegmentationRepresentations.Labelmap, isActive: true, activeSegmentIndex: 1, segments: [ { segmentIndex: 1, color: [255, 0, 0], isVisible: true, isLocked: false, opacity: 255 } ], label: 'Segmentation 1', cachedStats: {}, representationData: { LABELMAP: { volumeId: 'volume1', referencedVolumeId: 'reference1' } } }; ``` **After:** This matches the cornerstone public segmentation input type. ```js const segmentationInput = { segmentationId: 'segmentation1', representation: { type: SegmentationRepresentations.Labelmap, data: { imageIds: segmentationImageIds, referencedVolumeId: 'reference1' } }, config: { label: 'Segmentation 1', segments: { 1: { label: 'Segment 1', active: true, locked: false } } } }; ```
Migration Examples ```js // Before const newSegmentation = { id: 'seg1', type: SegmentationRepresentations.Labelmap, segments: [...], representationData: { LABELMAP: { volumeId: 'volume1', referencedVolumeId: 'reference1' } } }; segmentationService.addOrUpdateSegmentation(newSegmentation); // After segmentationService.addOrUpdateSegmentation({ segmentationId: 'seg1', representation: { type: SegmentationRepresentations.Labelmap, data: { imageIds: segmentationImageIds, referencedVolumeId: 'reference1' } }, config: { segments: { 1: { label: 'Segment 1', active: true } } } }); ``` **Updating Existing Segmentation** ```js // Before const updatedSegmentation = { ...existingSegmentation, segments: [...modifiedSegments], activeSegmentIndex: 2 }; segmentationService.addOrUpdateSegmentation(updatedSegmentation); // After segmentationService.addOrUpdateSegmentation({ segmentationId: 'seg1', config: { segments: { 2: { active: true }, } } }); ```
#### loadSegmentationsForViewport same as addOrUpdateSegmentation, you should pass in the new segmentation data structure. For instance **Before** ```js const segmentations = [ { id: '1', label: 'Segmentations', segments: labels.map((label, index) => ({ segmentIndex: index + 1, label })), isActive: true, activeSegmentIndex: 1, }, ]; commandsManager.runCommand('loadSegmentationsForViewport', { segmentations, }); ``` **After** ```js const labels = ['Segment 1', 'Segment 2', 'Segment 3']; const segmentations = [ { segmentationId: '1', representation: { type: Enums.SegmentationRepresentations.Labelmap, }, config: { label: 'Segmentations', segments: labels.reduce((acc, label, index) => { acc[index + 1] = { label, active: index === 0, // First segment is active locked: false, }; return acc; }, {}), }, }, ]; commandsManager.runCommand('loadSegmentationsForViewport', { segmentations, }); ``` --- #### highlightSegment **Before (OHIF 3.8)** ```js // Before (v1.x) highlightSegment( segmentationId: string, segmentIndex: number, toolGroupId?: string, alpha = 0.9, animationLength = 750, hideOthers = true, highlightFunctionType = 'ease-in-out' ) ``` **After (OHIF 3.9)** ```js highlightSegment( segmentationId: string, segmentIndex: number, viewportId?: string, // notice viewportId instead of toolGroupId alpha = 0.9, animationLength = 750, hideOthers = true, highlightFunctionType = 'ease-in-out' ) ```
Key Changes 1. Removed `toolGroupId` in favor of `viewportId` 2. If no viewportId is provided, highlights in all relevant viewports
Migration Examples **Basic Usage** ```js // Before segmentationService.highlightSegment( 'seg1', 1, 'toolGroup1', 0.9, 750, true, ); // After segmentationService.highlightSegment( 'seg1', 1, 'viewport1', 0.9, 750, true ); ``` **Highlighting in Multiple Views** ```js // Before const toolGroupIds = ['toolGroup1', 'toolGroup2']; toolGroupIds.forEach(toolGroupId => { segmentationService.highlightSegment( 'seg1', 1, toolGroupId ); }); // After - Method 1: Let service handle multiple viewports segmentationService.highlightSegment('seg1', 1); // After - Method 2: Explicitly specify viewports const viewportIds = ['viewport1', 'viewport2']; viewportIds.forEach(viewportId => { segmentationService.highlightSegment( 'seg1', 1, viewportId ); }); ```
--- #### jumpToSegmentCenter **Before (OHIF 3.8)** ```js jumpToSegmentCenter( segmentationId: string, segmentIndex: number, toolGroupId?: string, highlightAlpha = 0.9, highlightSegment = true, animationLength = 750, highlightHideOthers = false, highlightFunctionType = 'ease-in-out' ) ``` **After (OHIF 3.9)** ```js jumpToSegmentCenter( segmentationId: string, segmentIndex: number, viewportId? string, // notice viewportId instead of toolGroupId highlightAlpha = 0.9, highlightSegment = true, animationLength = 750, highlightHideOthers = false, highlightFunctionType = 'ease-in-out' ) ```
Key Changes 1. Removed `toolGroupId` parameter infavor of viewportId 2. Automatically handles relevant viewports if `viewportId` not provided ``` // Before segmentationService.jumpToSegmentCenter( 'seg1', 1, 'toolGroup1' ); // After segmentationService.jumpToSegmentCenter( 'seg1', 1, 'viewportId1' ); ```
--- ### Segmentation Source: https://docs.ohif.org/llm/migration-guide/3p8-to-3p9/1-segmentation/index.md import DocCardList from '@theme/DocCardList'; import {useCurrentSidebarCategory} from '@docusaurus/theme-common'; :::info This migration involves significant architectural changes to the segmentation system. While we typically aim for incremental updates, the shift from a tool group-centric to a viewport-centric architecture was necessary to support OHIF 3.9's advanced visualization capabilities, and more flexible segmentation handling. Don't worry - we'll guide you through each change step by step! ::: --- ## 3p9-to-3p10 ### Migration Guide from 3.9 to 3.10 beta Source: https://docs.ohif.org/llm/migration-guide/3p9-to-3p10/index.md #### Migration Guide #### General --- ## 3p9-to-3p10/1-General ### Commands Source: https://docs.ohif.org/llm/migration-guide/3p9-to-3p10/1-General/commands.md #### Commands #### Measurements * The `deleteMeasurement` command has been completely removed from the codebase It has been replaced by `removeMeasurement` command with enhanced functionality 1. Replace any usage of `deleteMeasurement` with `removeMeasurement` in your custom code ```diff - commandsManager.run('deleteMeasurement', { uid }); + commandsManager.run('removeMeasurement', { uid }); ``` #### Important Notes: * This change is part of a broader refactoring of the measurement system to provide more consistent and powerful APIs * The new command structure follows a more consistent pattern throughout the codebase * If you were using `measurementServiceSource.remove(uid)` directly, you should now use `measurementService.remove(uid)` instead * The changes affect both UI components and any extensions that integrate with the measurement system * Removal functionality now works with both individual UIDs and arrays of UIDs for batch operations #### `setSourceViewportForReferenceLinesTool` * `setSourceViewportForReferenceLinesTool` has been replaced by the more generic `setViewportForToolConfiguration` * The new API allows configuration of any tool, not just the ReferenceLinesTool * Tool name is now a required parameter, not hardcoded to ReferenceLinesTool #### Migration Steps: 1. Update command references from `setSourceViewportForReferenceLinesTool` to `setViewportForToolConfiguration` ```diff - { - commandName: 'setSourceViewportForReferenceLinesTool', - context: 'CORNERSTONE', - } + { + commandName: 'setViewportForToolConfiguration', + commandOptions: { + toolName: 'ReferenceLines' + }, + context: 'CORNERSTONE', + } ``` --- ### General Source: https://docs.ohif.org/llm/migration-guide/3p9-to-3p10/1-General/general-m.md #### Node.js Version Update We have updated the recommended Node.js version from `18.16.1` to `20.9.0`. Please ensure your development and build environments are using Node.js `20.9.0` or later. #### HTML Template Update We have modified the `template.html` file so if you are using a custom template, you will need to update it. Here are the key changes needed in the migration: 1. Added `window.PUBLIC_URL` declaration: ```javascript window.PUBLIC_URL = '<%= PUBLIC_URL %>'; ``` Was added before the `` comment block. #### Bundled Google Fonts Previously, OHIF relied on the Google Fonts API to load the required fonts. To improve privacy, performance, and offline availability, we now bundle the necessary font files as assets within the application. No explicit action is required for this change unless you were specifically overriding or manipulating the font loading process. You **might** need to update your `module` rule in your webpack ```javascript module.exports = { module: { rules: [ { test: /\.(woff|woff2|eot|ttf|otf)$/i, type: 'asset/resource', }, ], }, }; ``` #### OHIF Docs OHIF platform/docs is no longer part of the workspace. - Builds are faster for 99.99% of users since only maintainers need to run the docs development. If you need to run the docs website locally, you must install it first, as it is not installed by default. Before: ```bash yarn run dev ``` After: ```bash yarn install yarn run dev ``` #### Experimental Fast Development Build (`dev:fast`) We have introduced a new experimental command, `yarn run dev:fast`, which utilizes `rsbuild` and its Rust-based approach to significantly speed up development server start and hot module replacement times. Here's a comparison of the performance improvements: | Scenario | Load Time | Update Time | | -------- | ----------- | ----------- | | Before | ~12 seconds | ~5 seconds | | After | ~4 seconds | ~1 second | **Note:** This command is currently experimental. While functional, it may not yet support all features or configurations of the standard `yarn run dev` command. We are continuing to develop and test this feature. #### Webpack Configuration To use our new Segmentation AI models, you'll need `onnxruntime-web`. If you're using a custom webpack configuration, make sure to update it with the new `copyPlugin` to copy the `onnxruntime-web` `dist` folder to your output directory. ```javascript const CopyPlugin = require('copy-webpack-plugin'); module.exports = { plugins: [ new CopyPlugin({ patterns: [ { from: '../../../node_modules/onnxruntime-web/dist', to: `${DIST_DIR}/ort`, }, ], }), ], }; ``` Also, if you're running the viewer from a sub-route, you'll need to update the `dicom-microscopy-viewer` package in the dev server, so it knows where to load the assets from. ```javascript devServer: { proxy: { '/dicom-microscopy-viewer': { target: 'http://localhost:3000', pathRewrite: { '^/dicom-microscopy-viewer': `/${PUBLIC_URL}/dicom-microscopy-viewer`, }, }, }, }, ``` :::note Also, the `writePluginImportFile` function has been updated so that the dicom-microscopy-viewer package works correctly with the new webpack configuration. If you have a custom `writePluginImportFile` function, please update it to match. ::: --- ### Hotkeys Source: https://docs.ohif.org/llm/migration-guide/3p9-to-3p10/1-General/hotkeys.md #### Key Changes: * Hotkeys are no longer defined in mode factory via `hotkeys: [...hotkeys.defaults.hotkeyBindings]` * Hotkeys are now managed through the `customizationService` under the key `ohif.hotkeyBindings` * Default hotkeys are set automatically and can be customized using the customization service * User-defined hotkey preferences are now stored in a new format in localStorage * The `HotkeysManager` has undergone significant updates including better handling of defaults, key persistence, and cleanup #### Migration Steps: #### 1. Remove hotkeys array from mode factory definition **Before:** ```diff - function modeFactory({ modeConfiguration }) { - return { - id: 'basic', - // ... other configuration - hotkeys: [...hotkeys.defaults.hotkeyBindings], - }; - } ``` **After:** ```diff + function modeFactory({ modeConfiguration }) { + return { + id: 'basic', + // ... other configuration + // No hotkeys array necessary + }; + } ``` #### 2. Set custom hotkeys using the customization service There are several methods to modify hotkeys using the customization service: #### a. Completely replace all hotkeys using `$set`: ```diff + onModeEnter: function ({ servicesManager }) { + const { customizationService } = servicesManager.services; + customizationService.setCustomizations({ + 'ohif.hotkeyBindings': { + $set: [ + { + commandName: 'setToolActive', + commandOptions: { toolName: 'Zoom' }, + label: 'Zoom', + keys: ['z'], + isEditable: true, + }, + ], + }, + }); ``` #### b. Add new hotkeys using `$push`: ```diff + onModeEnter: function ({ servicesManager }) { + const { customizationService } = servicesManager.services; + customizationService.setCustomizations({ + 'ohif.hotkeyBindings': { + $push: [ + { + commandName: 'myCustomCommand', + label: 'My Custom Function', + keys: ['ctrl+m'], + isEditable: true, + }, + ], + }, + }); +} ``` #### 4. Update configuration file if you were setting window.config.hotkeys If you were previously defining hotkeys in your window.config.js file, it was not really taken into account. So you can safely remove it now. **Before:** ```diff - window.config = { - // ...other config - hotkeys: [ - { - commandName: 'incrementActiveViewport', - label: 'Next Viewport', - keys: ['right'], - }, - // ...more hotkeys - ], - }; ``` **After:** ```diff + window.config = { + // ...other config + }; ``` #### 5. Be aware that user preferences are now handled differently The new system automatically handles user-preferred hotkey mappings: - User hotkey preferences are stored in `localStorage` under the key `user-preferred-keys` - The format is a hash-based mapping rather than a full array of definitions - There's a migration utility that converts old preferences to the new format - You don't need to manually handle this, but be aware of it if you're accessing localStorage directly #### Benefits of the Change 1. **Consistent API**: Hotkeys now follow the same customization pattern as other OHIF features 2. **More flexible**: Easier to modify specific hotkeys without replacing the entire set 3. **Better user preferences**: User customizations are better preserved and migrated 4. **Runtime updates**: Hotkeys can be modified at runtime through the customization service 5. **Improved cleanup**: Better lifecycle management of hotkey bindings --- ### routerBaseName Source: https://docs.ohif.org/llm/migration-guide/3p9-to-3p10/1-General/routerBaseName.md #### Migration Guide: Router Configuration (`routerBasename` and `PUBLIC_URL`) **Key Changes:** * **`routerBasename` Default Value:** The recommended default value for `routerBasename` in the configuration file (`window.config`) has changed from `'/'` to `null`. * **New Default Behavior:** If `routerBasename` is set to `null` (or is not defined) in the configuration, the application's base path will now automatically default to the value determined by `PUBLIC_URL`. * **Clarified Roles:** * `routerBasename`: Explicitly defines the base path for the application's routes (e.g., `/viewer`). If `null`, it defaults to `PUBLIC_URL`. * `PUBLIC_URL`: Primarily defines the URL prefix from which static assets (like JavaScript files, CSS, images) are loaded. It defaults to `/` if not set. :::info see the comprehensive guide [here](/deployment/custom-url-access) ::: **Migration Steps:** 1. **Review `routerBasename` Configuration:** Locate the `routerBasename` setting within your application configuration file (typically found in `platform/app/public/config/*.js`). 2. **Update `routerBasename` Based on Hosting Scenario:** * **Scenario A: Hosting at the Root (`/`)** If your application is served from the root domain (e.g., `https://example.com/`), it's recommended to update `routerBasename` to `null`. This aligns the routing base with the default asset loading path (`PUBLIC_URL` which defaults to `/`). *Example Diff:* ```diff window.config = { - routerBasename: '/', + routerBasename: null, // ... other config options showStudyList: true, dataSources: [ /* ... */ ], ``` *Explanation:* Setting `routerBasename: null` leverages the new default behavior. The router will use `/` as its base because `PUBLIC_URL` defaults to `/`. * **Scenario B: Hosting at a Subpath (e.g., `/viewer/`)** If your application is served from a subpath (e.g., `https://example.com/viewer/`), you should ensure `routerBasename` is explicitly set to that path. *Example (No Change Needed if Already Correct):* ```diff window.config = { // No change needed if already set correctly for subpath hosting routerBasename: '/viewer', // ... other config options showStudyList: true, dataSources: [ /* ... */ ], ``` *Explanation:* Explicitly setting `routerBasename` ensures the application's internal routing works correctly under the `/viewer/` path. --- ## 3p9-to-3p10/2-CustomizationService ### Customization Service Source: https://docs.ohif.org/llm/migration-guide/3p9-to-3p10/2-CustomizationService/index.md #### CustomizationService **Key Changes:** 1. **Unified Customization Getter:** - The `getCustomization` method now uniformly retrieves customizations, prioritizing `global`, then `mode`, and finally `default` customizations. - The `defaultValue` parameter in `getCustomization` is no longer used for setting defaults. It simply returns if no customization is found. - The methods `getModeCustomization` and `getGlobalCustomization` are deprecated. 2. **Simplified Customization Registration:** - The `customizationType` property in customization definitions is renamed to `inheritsFrom`. - The `merge` property in customization definitions is removed. Instead, a customization is merged using the helper methods. The basic update commands are listed in the table below, and you can learn more about the helper methods [here](../../../platform/services/customization-service/customizationService.md). | Command | Description | Example | | :------- | :---------------------------------------- | :------------------------------------------------ | | `$set` | Replace a value entirely | Replace a list or object | | `$push` | Append items to an array | Add to the end of a list | | `$unshift` | Prepend items to an array | Add to the start of a list | | `$splice` | Insert, remove, or replace at specific index | Modify specific indices in a list | | `$merge` | Update specific fields in an object | Change a subset of fields | | `$apply` | Compute the new value dynamically | Apply a function to transform values | | `$filter` | Find and update specific items in arrays | Target nested structures based on matching criteria | 3. **New `$transform` command:** - If you were using the `transform` command, you should now use the `$transform` command. Just a simple rename to make it more consistent with the other commands. 5. **Renamed `CornerstoneOverlay` customizations:** - The `cornerstoneOverlay` customizations (`cornerstoneOverlayTopLeft`, `cornerstoneOverlayTopRight`, `cornerstoneOverlayBottomLeft`, `cornerstoneOverlayBottomRight`) have been renamed to `viewportOverlay.topLeft`, `viewportOverlay.topRight`, `viewportOverlay.bottomLeft`, and `viewportOverlay.bottomRight`. See dedicated page for customizing viewport overlays [here](../../../platform/services/customization-service/viewportOverlay.md). 6. **Renamed `customRoutes`:** - The `customRoutes` customization is renamed to `routes.customRoutes`. 7. **`contextMenu` customization:** - The `contextMenu` customization now uses the `inheritsFrom` property to inherit from other context menus, previously it was called `customizationType` 8. **New `immutability-helper` dependency:** The `immutability-helper` library is now used for merging customizations. If you encounter an error related to it, you'll need to install it - though OHIF should really handle the installation for you, so this is pretty much just a heads up. **Migration Steps:** 1. **Replace `getModeCustomization` and `getGlobalCustomization` with `getCustomization`:** - **Before:** ```javascript const tools = customizationService.getModeCustomization( 'cornerstone.overlayViewportTools' )?.tools; const globalValue = customizationService.getGlobalCustomization('someGlobalKey'); ``` - **After:** ```javascript const tools = customizationService.getCustomization('cornerstone.overlayViewportTools'); const globalValue = customizationService.getCustomization('someGlobalKey'); ``` :::note The returned value is the actual customization value, not an object that needs to be broken down. ::: 2. **Update Customization Definitions:** - We've moved away from using random items in the customization definition, and now we use the `id` property to identify the customization as a value. Previously, it was referred to as `value`, `values`, and so on, but now an `id` is used to reference the customization. This approach really simplifies things - when you need to grab the customization, you can just use the `id` to get it, and you don't have to bother with destructuring the value from the object. **Example: Customizing a Panel** **Before (v3.9):** ```javascript // the default value was hardcoded inside the panel itself - bad idea! // default was given in the panel itself // PanelSegmentation.tsx // Retrieve the onSegmentationAdd customization const { onSegmentationAdd } = customizationService.getCustomization( 'PanelSegmentation.onSegmentationAdd', { id: 'segmentation.onSegmentationAdd', onSegmentationAdd: handlers.onSegmentationAdd, } ); // Retrieve the disableEditing customization const { disableEditing } = customizationService.getCustomization( 'PanelSegmentation.disableEditing', { id: 'default.disableEditing', disableEditing: false, } ); // mode was customizing it via customizationService.addModeCustomizations([ { id: 'PanelSegmentation.tableMode', mode: 'expanded', }, { id: 'PanelSegmentation.showAddSegment', showAddSegment: false, }, ]); ``` **After (v3.10):** ```javascript // cornerstone extension getCustomizationModule // centralized customization location for all extensions - good! function getCustomizationModule() { return [ { name: 'default', value: { 'panelSegmentation.disableEditing': false, 'panelSegmentation.showAddSegment': true, }, }, ]; } // inside panelSegmentation.tsx const disableEditing = customizationService.getCustomization('panelSegmentation.disableEditing'); const showAddSegment = customizationService.getCustomization('panelSegmentation.showAddSegment'); // mode can customize it via $ operators for mode customizations customizationService.setCustomizations({ 'panelSegmentation.disableEditing': { $set: true }, 'panelSegmentation.showAddSegment': { $set: false }, }); //or via configuration for global customizations window.config = { // rest of config customizationService: [ { 'panelSegmentation.disableEditing': { $set: true, // Disables editing of segmentations in the panel }, }, ], // rest of config }; ``` **Example: Updating a Customization** Let's say you have a customization in v3.9 that adds a custom overlay item to the top-left corner: **Before (v3.9):** ```javascript // In your mode's onModeEnter customizationService.addModeCustomizations([ { id: 'cornerstoneOverlayTopLeft', items: [ { id: 'myCustomOverlay', customizationType: 'ohif.overlayItem', attribute: 'PatientName', label: 'Patient:', }, ], }, ]); ``` **After (v3.10):** ```javascript // In your mode's onModeEnter or elsewhere customizationService.setCustomizations({ 'viewportOverlay.topLeft': { $push: [ { id: 'myCustomOverlay', inheritsFrom: 'ohif.overlayItem', attribute: 'PatientName', label: 'Patient:', }, ], }, }); ``` ``` **Example: Customizing viewport action Menu** **Before (v3.9):** ```javascript // In your configuration for global customizations window.config = { // rest of config addWindowLevelActionMenu: true, }; ``` **After (v3.10):** ```javascript // you can now handle each action menu item (windowLevelActionMenu and segmentationOverlay) separately // cornerstone extension getCustomizationModule function getCustomizationModule() { return [ { name: 'default', value: { 'viewportActionMenu.windowLevelActionMenu': { enabled: true, location: viewportActionCornersService.LOCATIONS.topRight, }, 'viewportActionMenu.segmentationOverlay': { enabled: true, location: viewportActionCornersService.LOCATIONS.topRight, }, }, }, ]; } // Accessing customizations within your component (e.g., OHIFCornerstoneViewport.tsx) const windowLevelActionMenu = customizationService.getCustomization('viewportActionMenu.windowLevelActionMenu'); const segmentationOverlay = customizationService.getCustomization('viewportActionMenu.segmentationOverlay'); // Modifying customizations at runtime, for example, in your mode's onModeEnter customizationService.setCustomizations({ 'viewportActionMenu.windowLevelActionMenu': { $set: { enabled: false, location: viewportActionCornersService.LOCATIONS.bottomLeft, }, }, 'viewportActionMenu.segmentationOverlay': { $set: { enabled: true, location: viewportActionCornersService.LOCATIONS.topLeft, }, }, }); // Alternatively, setting global customizations via configuration window.config = { // rest of config customizationService: [ { 'viewportActionMenu.windowLevelActionMenu': { $set: { enabled: false, location: 1, }, }, 'viewportActionMenu.segmentationOverlay': { $set: { enabled: true, location: 1, }, }, }, ], // rest of config }; ``` **Note:** - The `customizationType` is replaced with `inheritsFrom`. #### Renaming To keep our customization system consistent, you should be aware of a few key renaming conventions. We now follow a straightforward naming convention for customizations: `scopeName.customizationItem`. | Customization Key (Old) | Customization Key (New) | Description | | :------------------------------------------ | :------------------------------------------- | :-------------------------------------------------------------------------- | | `PanelMeasurement.disableEditing` | `panelMeasurement.disableEditing` | Disables editing measurements in the Measurement Panel and after SR hydration. | | `PanelSegmentation.CustomDropdownMenuContent` | `panelSegmentation.customDropdownMenuContent` | Custom content for the dropdown menu in the Segmentation Panel. | | `PanelSegmentation.disableEditing` | `panelSegmentation.disableEditing` | Disables editing segmentations in the Segmentation Panel. | | `PanelSegmentation.showAddSegment` | `panelSegmentation.showAddSegment` | Controls visibility of the "Add Segment" button in the Segmentation Panel. | | `PanelSegmentation.onSegmentationAdd` | `panelSegmentation.onSegmentationAdd` | Custom function to execute when a new segmentation is added. | | `PanelSegmentation.tableMode` | `panelSegmentation.tableMode` | Controls the table mode (collapsed/expanded) in the Segmentation Panel. | | `PanelSegmentation.readableText` | `panelSegmentation.readableText` | Custom readable text labels for the Segmentation Panel. | | `PanelStudyBrowser.studyMode` | `studyBrowser.studyMode` | Controls the study mode (all/primary/recent) in the Study Browser Panel. | | `customRoutes` | `routes.customRoutes` | Defines custom routes for the application. | | `cornerstoneOverlayTopLeft` | `viewportOverlay.topLeft` | Custom overlay items for the top-left corner of the viewport. | | `cornerstoneOverlayTopRight` | `viewportOverlay.topRight` | Custom overlay items for the top-right corner of the viewport. | | `cornerstoneOverlayBottomLeft` | `viewportOverlay.bottomLeft` | Custom overlay items for the bottom-left corner of the viewport. | | `cornerstoneOverlayBottomRight` | `viewportOverlay.bottomRight` | Custom overlay items for the bottom-right corner of the viewport. | | (New) | `viewportActionMenu.windowLevelActionMenu` | Controls the display and the location of the window level action menu in the viewport. | | (New) | `viewportActionMenu.segmentationOverlay` | Controls the display and the location of segmentation overlays in the viewport. | --- ## 3p9-to-3p10/3-UI ### Introduction Source: https://docs.ohif.org/llm/migration-guide/3p9-to-3p10/3-UI/1-Introduction.md #### Introduction The OHIF Viewer has two main parts: the worklist and the image viewer. In version 3.10, we successfully migrated the image viewer to the `@ohif/ui-next` library. This is a complete rewrite of each component, offering extensibility, accessibility, and a modern look and feel. The worklist is still using the old `@ohif/ui` library, but it will be migrated to `@ohif/ui-next` in a future release. #### Migration Guide You'll generally need to update your custom panels to use the new `@ohif/ui-next` components. The task is to find the direct mapping of the components you're using in your custom panels. This guide will cover the migration for them. --- ### Tests Source: https://docs.ohif.org/llm/migration-guide/3p9-to-3p10/3-UI/10-Migration-3p10-Tests.md #### 1. ToolButton `data-active` Attribute - **Previous**: Checked for a `bg-primary-light` class to determine if a tool was active. - **Now**: Check for the HTML attribute `data-active="true"`. #### Example ```diff - cy.get('@wwwcButton').should('have.class', 'bg-primary-light'); + cy.get('@wwwcButton').should('have.attr', 'data-active', 'true'); ``` #### 2. Additional Data Attributes - Each tool button now includes: - `data-tool=""` - `data-active=""` This makes it easier to identify and assert on specific tools in the DOM. #### Example ```diff - + ``` #### 3. MPR Button Class Change If you were targeting the `ohif-disabled` class, you need to update your tests to target the `cursor-not-allowed` class. - **Previous**: `ohif-disabled` - **Now**: `cursor-not-allowed` #### Example ```diff - cy.get('[data-cy="MPR"]').should('have.class', 'ohif-disabled'); + cy.get('[data-cy="MPR"]').should('have.class', 'cursor-not-allowed'); ``` #### 4. Removal of Stack Scroll Alias - The `[data-cy="StackScroll"]` element is no longer reliably in the DOM at study load. - If needed, reintroduce or conditionally assert its presence when appropriate. ```diff - cy.get('[data-cy="StackScroll"]').as('stackScrollBtn'); + // Removed due to absence in DOM at study load ``` --- #### Summary 1. **Replace** all checks for `bg-primary-light` with `data-active="true"`. 2. **Use** `data-tool` and `data-active` attributes for more robust DOM selection and assertions. 3. **Update** MPR button checks to `cursor-not-allowed`. 4. **Remove** the `[data-cy="StackScroll"]` alias (or only use it when the element is present). --- ### Colors Source: https://docs.ohif.org/llm/migration-guide/3p9-to-3p10/3-UI/1a-Colors.md **Key Changes:** * **New Color System:** Migration from custom color names (e.g., `aqua-pale`, `common-bright`) to a semantic color palette using CSS variables (e.g., `--primary`, `--secondary`, `--muted-foreground`). Tailwind classes like `text-primary`, `bg-secondary`, `text-muted-foreground` should now be used. * **Deprecated Color Classes:** Custom color classes like `text-aqua-pale` and `text-common-bright` have been removed and need replacement. * **Simplified State Classes:** Explicit hover/active state classes like `bg-primary-main`, `hover:bg-primary-light`, `active:text-primary-light` seem to be replaced by simpler base classes (e.g., `bg-primary`) where Tailwind's state variants (`hover:`, `active:`) modify the base color, or these states are handled by component variants (e.g., in a Button component). * **Component Abstraction:** Some styling, especially for interactive elements like buttons, has been abstracted into components (e.g., `ViewportActionButton`, UI library buttons) which use predefined variants (`default`, `secondary`, `ghost`) instead of manual style combinations. :::note You can look at the set of colors in the [Color System](/colors-and-type) ::: **Migration Steps:** 1. **Identify Deprecated Color Classes:** Search your codebase for the old custom color classes. The most common ones identified in the diff are: * `text-aqua-pale` * `text-common-bright` * `text-primary-active` * `bg-primary-main` * `hover:bg-primary-light` * `hover:text-black` (when used with primary hover states) * Potentially others using similar custom names. 2. **Replace with New Semantic Colors:** Update the deprecated classes with their likely semantic equivalents from the new system. Use the table below as a guide. **Note:** The exact replacement might depend on the specific context and desired visual outcome. Inspect the element in the browser after changes to ensure it matches the intended design. | Old Class | Likely New Class(es) | Notes | | :------------------------ | :-------------------------------------------------------- | :-------------------------------------------------------------------- | | `text-aqua-pale` | `text-muted-foreground` | Used for less prominent text, now uses the muted foreground color. | | `text-common-bright` | `text-foreground` or `text-primary-foreground` | Likely the default bright text color. | | `text-primary-active` | `text-primary` or `text-highlight` | Simplified to the base primary color or potentially a highlight color. | | `bg-primary-main` | `bg-primary` | Simplified to the base primary background color. | | `text-white` (on dark bg) | `text-foreground` or `text-primary-foreground` | Use the standard foreground color for the theme. | | `bg-black` (for elements) | `bg-background`, `bg-popover`, `bg-card`, or `bg-muted` | Use semantic background colors depending on the element's role. | 3. **Update State Variants and Interactions:** Classes managing hover, active, or focus states have likely been simplified or moved into component variants. * **Remove Explicit Hover/Active Styles:** Search for combinations like `hover:bg-primary-light`, `hover:text-black`, `active:text-primary-light` and remove them if the element now uses a base class like `bg-primary` or component variants. Tailwind's built-in state modifiers (`hover:`, `active:`) might handle this automatically with the new base colors, or component variants encapsulate these states. * **Use Component Variants:** If the element is now a component from a UI library (like `Button` from `@ohif/ui-next`), use its variants (`variant="default"`, `variant="secondary"`, `variant="ghost"`) instead of manual style combinations. *Example Diff:* ```diff -
- Action Button -
+ ``` *Example Diff:* ```diff // Before (in _getStatusComponent.tsx) -
- {loadStr} -
// After (in OHIFCornerstoneRTViewport.tsx using the abstracted component) + + {loadStr} + ``` --- ### Icons Source: https://docs.ohif.org/llm/migration-guide/3p9-to-3p10/3-UI/2-Migration-3p10-Icons.md #### Migration Guide: Icon Component Updates #### General Overview This migration involves changes to how icons are used within the OHIF platform. The core change is the move to a new icon component library, `@ohif/ui-next`, which provides more flexibility and a more consistent naming convention for icons. **Key Changes:** 1. **New Icon Library:** The primary change is the shift from using `` from `@ohif/ui` to using the new `Icons` component from `@ohif/ui-next`. 2. **`AbcDef` Naming Convention:** The new library uses a `AbcDef` (PascalCase) naming convention for the icons. For instance, `status-alert` is now `StatusAlert`. 3. **Legacy Fallback:** To ease the transition, a legacy fallback has been provided using `Icons.ByName`. This allows you to continue using the old `name="status-alert"` format but is not the recommended way moving forward. 4. **Direct Icon Component Access:** The recommended approach is to use `Icons.StatusAlert` instead of `` this way will make code more clear and readable. #### Migration Strategies You have two ways to approach the migration: 1. **Recommended Approach (Gradual Adoption):** * Start by updating your codebase to use the `Icons.Method` for the new icon naming convention. * For example, replace `` with ``. * This ensures your code is aligned with the new standard and provides optimal compatibility in the future. * This method can be rolled out in phases. 2. **Legacy Fallback Approach (Temporary):** * If a full migration is not immediately feasible, you can use the legacy fallback temporarily: * Replace `` with ``. * This option allows you to complete the migration with minimal disruption to the old code * However, it is highly recommended to move towards the `Icons.Method` approach to take advantage of all the new library offers and have a cleaner code base. **Recommendation:** We strongly recommend using the *Recommended Approach* for a more maintainable and consistent codebase going forward. #### Specific Changes (Code Examples) Here are some specific examples based on the diff you provided, illustrating both the legacy fallback and recommended approach: **Example 1: Status Icons in `_getStatusComponent.tsx`** **Old Code (`@ohif/ui`):** ```jsx import { Icon, Tooltip } from '@ohif/ui'; // ... case true: StatusIcon = () => ; break; case false: StatusIcon = () => ( ); break; //... ``` **Legacy Fallback Approach (`Icons.ByName`):** ```jsx import { Tooltip } from '@ohif/ui'; import { Icons } from '@ohif/ui-next'; // ... case true: StatusIcon = () => ; break; case false: StatusIcon = () => ( ); break; //... ``` **Recommended Approach (`Icons.StatusAlert`, `Icons.StatusUntracked`):** ```jsx import { Tooltip } from '@ohif/ui'; import { Icons } from '@ohif/ui-next'; // ... case true: StatusIcon = () => ; break; case false: StatusIcon = () => ( ); break; //... ``` **Example 5: Icon usage in `WorkList.tsx`** **Old Code (`@ohif/ui`):** ```jsx ``` **Recommended Approach (`Icons.LaunchArrow`, `Icons.LaunchInfo`):** ```jsx isValidMode ? ( ) : ( ) ``` #### Creating New Custom Icons This section explains how to migrate your custom icons from the old SVG import method to the new React component-based system in `@ohif/ui-next`. The new approach improves consistency, allows for better tree-shaking, and provides type safety. The process involves converting your existing SVG files into React components and then registering them. #### 1. Convert SVG to a React Component First, take your raw SVG file and convert it into a `.tsx` React functional component. **Before: Raw SVG File** Previously, you might have had a file like `Baseline.svg`: ```xml // Baseline.svg < some svg content> ``` **After: React Icon Component** Now, create a `.tsx` file that exports a React component. Note the following changes: - SVG attributes like `text-anchor` and `stroke-width` are converted to camel case (i.e. `textAnchor`, `strokeWidth`). - The component accepts `IconProps` and spreads them onto the root `` element. ```typescript // Baseline.tsx import React from 'react'; import type { IconProps } from '../types'; export const Baseline = (props: IconProps) => ( < some svg content> ); export default Baseline; ``` #### 2. Register the New Icon After creating the component, you must register it with the `Icons` service from `@ohif/ui-next`. This is typically done in a centralized location where you initialize your UI components (for example, an extension's preRegistration is a good spot for this). You'll need a unique name for the icon, which can be managed with an enum for consistency. ```typescript // Example: in your setup/initialization code import { Icons, IconNameEnum } from '@ohif/ui-next'; import Baseline from './sources/Baseline'; // Import your new icon component // Add the icon to the registry Icons.addIcon(IconNameEnum.BASELINE, Baseline); ``` By following these steps, your custom icon will be available for use throughout the application just like any of the default icons. #### Detailed Renaming Table | Old Icon Name | New Icon Component Name | Example Usage (`Icons.`) | Notes | | :------------------------------ | :------------------------------------------ | :--------------------------------------------------------- | :------------------------------------------------------------------------------------------------------------------------------------------------------------------------------------------------ | | `status-alert` | `StatusAlert` | `Icons.StatusAlert` | | | `status-untracked` | `StatusUntracked` | `Icons.StatusUntracked` | | | `status-locked` | `StatusLocked` | `Icons.StatusLocked` | | | `icon-transferring` | `IconTransferring` | `Icons.IconTransferring` | | | `icon-alert-small` | `Alert` | `Icons.Alert` | | | `icon-alert-outline` | `AlertOutline` | `Icons.AlertOutline` | | | `icon-status-alert` | `Alert` | `Icons.Alert` | | | `action-new-dialog` | `ActionNewDialog` | `Icons.ActionNewDialog` | | | `VolumeRendering` | `VolumeRendering` | `Icons.VolumeRendering` | | | `chevron-left` | `ChevronClosed` | `Icons.ChevronClosed` | Use when arrow direction needs to point left | | `chevron-down` | `ChevronOpen` | `Icons.ChevronOpen` | Use when arrow direction needs to point down | | `launch-arrow` | `LaunchArrow` | `Icons.LaunchArrow` | | | `launch-info` | `LaunchInfo` | `Icons.LaunchInfo` | | | `group-layers` | `GroupLayers` | `Icons.GroupLayers` | | | `icon-upload` | `Upload` | `Icons.Upload` | | | `icon-search` | `Search` | `Icons.Search` | | | `icon-clear-field` | `Clear` | `Icons.Clear` | | | `icon-add` | `Add` | `Icons.Add` | | | `icon-close` | `Close` | `Icons.Close` | | | `icon-pause` | `Pause` | `Icons.Pause` | | | `icon-play` | `Play` | `Icons.Play` | | | `icon-multiple-patients` | `MultiplePatients` | `Icons.MultiplePatients` | | | `icon-settings` | `Settings` | `Icons.Settings` | | | `icon-more-menu` | `More` | `Icons.More` | | | `content-prev` | `ContentPrev` | `Icons.ContentPrev` | | | `content-next` | `ContentNext` | `Icons.ContentNext` | | | `checkbox-checked` | `CheckBoxChecked` | `Icons.CheckBoxChecked` | | | `checkbox-unchecked` | `CheckBoxUnchecked` | `Icons.CheckBoxUnchecked` | | | `checkbox-default` | `CheckBoxUnchecked` | `Icons.CheckBoxUnchecked` | | |`checkbox-active`| `CheckBoxChecked`| `Icons.CheckBoxChecked`| | | `sorting-active-up` | `SortingAscending` | `Icons.SortingAscending` | | | `sorting-active-down` | `SortingDescending` | `Icons.SortingDescending` | | | `sorting` | `Sorting` | `Icons.Sorting` | | |`link` | `Link` | `Icons.Link` | | |`unlink` | `Link` | `Icons.Link` | | |`info-action` | `Info` | `Icons.Info` | | |`database` | `Database`| `Icons.Database`| | |`tool-3d-rotate`| `Tool3DRotate`| `Icons.Tool3DRotate`| | |`tool-angle`| `ToolAngle`| `Icons.ToolAngle`| | |`tool-annotate`| `ToolAnnotate`| `Icons.ToolAnnotate`| | |`tool-bidirectional`| `ToolBidirectional`| `Icons.ToolBidirectional`| | |`tool-calibration`| `ToolCalibrate`| `Icons.ToolCalibrate`| | |`tool-capture`| `ToolCapture`| `Icons.ToolCapture`| | |`tool-cine`| `ToolCine`| `Icons.ToolCine`| | |`tool-circle`| `ToolCircle`| `Icons.ToolCircle`| | |`tool-cobb-angle`| `ToolCobbAngle`| `Icons.ToolCobbAngle`| | |`tool-create-threshold`| `ToolCreateThreshold` | `Icons.ToolCreateThreshold` | | |`tool-crosshair`| `ToolCrosshair`| `Icons.ToolCrosshair`| | |`dicom-tag-browser`| `ToolDicomTagBrowser` | `Icons.ToolDicomTagBrowser` | | |`tool-flip-horizontal`| `ToolFlipHorizontal` | `Icons.ToolFlipHorizontal` | | |`tool-freehand-polygon`| `ToolFreehandPolygon`| `Icons.ToolFreehandPolygon`| | |`tool-freehand-roi`| `ToolFreehandRoi` | `Icons.ToolFreehandRoi`| | |`tool-freehand`| `ToolFreehand`| `Icons.ToolFreehand`| | |`tool-fusion-color`| `ToolFusionColor`| `Icons.ToolFusionColor`| | |`tool-invert`| `ToolInvert`| `Icons.ToolInvert`| | |`tool-layout-default`| `ToolLayoutDefault`| `Icons.ToolLayoutDefault`| | |`tool-length`| `ToolLength`| `Icons.ToolLength`| | |`tool-magnetic-roi`| `ToolMagneticRoi` | `Icons.ToolMagneticRoi`| | |`tool-magnify`| `ToolMagnify`| `Icons.ToolMagnify`| | |`tool-measure-ellipse`| `ToolMeasureEllipse`| `Icons.ToolMeasureEllipse`| | |`tool-more-menu`| `ToolMoreMenu`| `Icons.ToolMoreMenu`| | |`tool-move`| `ToolMove`| `Icons.ToolMove`| | |`tool-polygon`| `ToolPolygon`| `Icons.ToolPolygon`| | |`tool-quick-magnify`| `ToolQuickMagnify` | `Icons.ToolQuickMagnify` | | |`tool-rectangle`| `ToolRectangle` | `Icons.ToolRectangle` | | |`tool-referenceLines`| `ToolReferenceLines`| `Icons.ToolReferenceLines`| | |`tool-reset`| `ToolReset`| `Icons.ToolReset`| | |`tool-rotate-right`| `ToolRotateRight`| `Icons.ToolRotateRight`| | |`tool-seg-brush`| `ToolSegBrush`| `Icons.ToolSegBrush`| | |`tool-seg-eraser`| `ToolSegEraser`| `Icons.ToolSegEraser`| | |`tool-seg-shape`| `ToolSegShape` | `Icons.ToolSegShape`| | |`tool-seg-threshold`| `ToolSegThreshold` | `Icons.ToolSegThreshold` | | |`tool-spline-roi`| `ToolSplineRoi`| `Icons.ToolSplineRoi`| | |`tool-stack-image-sync`| `ToolStackImageSync`| `Icons.ToolStackImageSync`| | |`tool-stack-scroll`| `ToolStackScroll` | `Icons.ToolStackScroll`| | |`tool-toggle-dicom-overlay`| `ToolToggleDicomOverlay`| `Icons.ToolToggleDicomOverlay`| | |`tool-ultrasound-bidirectional`| `ToolUltrasoundBidirectional`| `Icons.ToolUltrasoundBidirectional`| | |`tool-window-level`| `ToolWindowLevel`| `Icons.ToolWindowLevel`| | |`tool-window-region`| `ToolWindowRegion`| `Icons.ToolWindowRegion`| | |`tool-zoom` | `ToolZoom` | `Icons.ToolZoom`| | | `tool-layout` | `ToolLayout` | `Icons.ToolLayout` | | |`icon-tool-eraser`| `ToolEraser` | `Icons.ToolEraser`| | |`icon-tool-brush`| `ToolBrush`| `Icons.ToolBrush`| | |`icon-tool-threshold`| `ToolThreshold` | `Icons.ToolThreshold` | | |`icon-tool-shape`| `ToolShape`| `Icons.ToolShape` | | |`icon-color-lut`| `IconColorLUT` | `Icons.IconColorLUT` | | | `viewport-window-level`|`ViewportWindowLevel`|`Icons.ViewportWindowLevel`| | |`notifications-info`| `NotificationInfo`| `Icons.NotificationInfo`| | |`layout-advanced-3d-four-up` | `LayoutAdvanced3DFourUp` | `Icons.LayoutAdvanced3DFourUp` | | |`layout-advanced-3d-main` | `LayoutAdvanced3DMain` | `Icons.LayoutAdvanced3DMain` | | |`layout-advanced-3d-only` | `LayoutAdvanced3DOnly` | `Icons.LayoutAdvanced3DOnly`| | |`layout-advanced-3d-primary` | `LayoutAdvanced3DPrimary` | `Icons.LayoutAdvanced3DPrimary` | | |`layout-advanced-axial-primary` |`LayoutAdvancedAxialPrimary`| `Icons.LayoutAdvancedAxialPrimary` | | |`layout-advanced-mpr`| `LayoutAdvancedMPR` | `Icons.LayoutAdvancedMPR` | | |`layout-common-1x1` | `LayoutCommon1x1` | `Icons.LayoutCommon1x1` | | |`layout-common-1x2` | `LayoutCommon1x2`|`Icons.LayoutCommon1x2`| | |`layout-common-2x2` | `LayoutCommon2x2`|`Icons.LayoutCommon2x2` | | |`layout-common-2x3` | `LayoutCommon2x3`| `Icons.LayoutCommon2x3`| | |`illustration-investigational-use`|`InvestigationalUse`|`Icons.InvestigationalUse`| | --- ### Button Source: https://docs.ohif.org/llm/migration-guide/3p9-to-3p10/3-UI/2a-Migration-3p10-Button.md #### Key Changes: * **Component Library:** The primary `Button` component likely now resides in `@ohif/ui-next` instead of `@ohif/ui`. Imports need to be updated. * **`ButtonEnums` Deprecated:** The `ButtonEnums.type` (e.g., `ButtonEnums.type.primary`) used for button styling is deprecated. Styling is now primarily controlled by the `variant` prop using string literals (`'default'`, `'secondary'`, `'ghost'`, `'link'`). * **Styling Approach:** Manual Tailwind CSS classes for styling (colors, hover states, sizing) are largely replaced by the `variant` and `size` props on the new `Button` component. Semantic color names are used internally. * **`IconButton` Replacement:** The pattern of using a dedicated `IconButton` component is often replaced by using `
- {loadStr} -
+ {loadStr} ``` *Example (`VolumeRenderingPresetsContent.tsx` change):* ```diff - + + + Cancel + + ``` --- ### Input Source: https://docs.ohif.org/llm/migration-guide/3p9-to-3p10/3-UI/3-Migration-3p10-Input.md #### Migration Guide: Input Components to @ohif/ui-next This guide explains how to migrate from the existing `Input`, `InputNumber`, `InputRange`, `InputDoubleRange`, `InputFilterText`, `InputGroup`, `InputLabelWrapper`, and `InputText` components to their new equivalents or patterns using `@ohif/ui-next`, including the `Numeric` meta component for numeric inputs. #### Why Migrate? See the full list of components in the [Numeric Component Showcase](/components-list#numeric) The old components relied heavily on props, making them complex and difficult to maintain and apply custom styles. The new `Numeric` component provides a structured approach with a context-based API, reducing prop clutter and improving reusability. The `Numeric` component offers several advantages: - **Versatile Modes**: It supports basic number input (`Numeric.NumberInput`), stepper controls (`Numeric.NumberStepper`), single range sliders (`Numeric.SingleRange`), and double range sliders (`Numeric.DoubleRange`). - **Flexible Layout**: You have full control over the layout using standard CSS classes (`className`) on the container and its subcomponents like `Numeric.Label`, `Numeric.NumberInput`, etc., allowing for various arrangements (e.g., flex, grid). - **Enhanced Customization**: Easily customize the appearance and behavior, such as showing/hiding associated number inputs for sliders, displaying the current value within the label (`showValue`), and integrating icons. - **State Management**: Supports both controlled and uncontrolled component states. #### `Input type="number"` > `Numeric.NumberInput` #### Basic Usage **Old Usage:** ```tsx setValue(e.target.value)} type="number" /> ``` **New Usage:** ```tsx Enter a number ``` #### `Input` with Custom Classes #### **Old Usage (with containerClassName, labelClassName, and className)** In the old implementation, we manually applied `containerClassName`, `labelClassName`, and `className` to style the `Input` component: ```tsx setValue(e.target.value)} type="number" containerClassName="flex flex-col space-y-2" labelClassName="text-gray-500 text-sm" className="border rounded p-2" /> ``` **New Usage (Migrating to `Numeric.NumberInput`)** With `Numeric`, you should wrap everything inside `Numeric.Container`, and you can directly apply class names to its subcomponents: ```tsx Enter a number ``` #### `Input` / `InputText` (General) > `@ohif/ui-next Input + Label` **Key Changes:** * The base `Input` component from `@ohif/ui` is replaced by the `Input` component from `@ohif/ui-next`. * Styling props like `labelClassName`, `containerClassName` are removed. Use standard `className` on the `Input` component and its container elements. * Labels provided via the `label` prop are removed. Use the separate `Label` component from `@ohif/ui-next` alongside the `Input`. * Layout is handled by standard HTML/Tailwind (Flexbox, Grid). **Migration Steps:** 1. **Update Import:** Ensure you are importing `Input` and `Label` from `@ohif/ui-next`. 2. **Replace Label Prop:** If you used the `label` prop, add a separate `
} - labelClassName="text-[13px] text-white" - className="h-[26px] w-[117px]" - value={metadata.PatientWeight || ''} - onChange={handleWeightChange} - /> +
{/* Replaced containerClassName */} + + +
``` #### `InputNumber` > `Numeric.NumberStepper` **Key Changes:** * The `InputNumber` component is replaced by the `Numeric` component system using `mode="stepper"`. * Styling props like `sizeClassName`, `arrowsDirection`, and `labelPosition` are removed. Layout and styling are now controlled via standard `className` and parent container layouts (e.g., Flexbox). * Props like `value`, `onChange`, `minValue`, `maxValue`, and `step` are now typically set on the `Numeric.Container`. * Labels are handled by the separate `Numeric.Label` subcomponent. * Stepper controls are provided by the `Numeric.NumberStepper` subcomponent, which takes a `direction` prop (`horizontal` or `vertical`). **Migration Steps:** 1. **Replace Component:** Replace `` with ``. 2. **Transfer Props:** Move `value`, `onChange`, `minValue` (as `min`), `maxValue` (as `max`), and `step` props to the `Numeric.Container`. 3. **Add Subcomponents:** * Inside `Numeric.Container`, add ``. Set its `direction` prop (`horizontal` or `vertical`) based on the old `arrowsDirection`. Apply sizing classes directly using `className`. * Add a `` component for the label text. 4. **Handle Layout:** Wrap the `Numeric.Container` or arrange its children using standard layout techniques (like Flexbox) to achieve the desired positioning (equivalent to the old `labelPosition`). Apply styling classes as needed. *Example Diff:* ```diff - + {})} + min={1} + max={numDimensionGroups || 1} + step={1} + > +
+ + Frame +
+
``` #### `InputRange` > `Numeric.SingleRange` **Key Changes:** * `InputRange` is replaced by the `Numeric` component system using `mode="singleRange"`. * Props like `value`, `onChange`, `minValue` (`min`), `maxValue` (`max`), and `step` are set on the `Numeric.Container`. * The slider element itself is rendered using ``. * The `showLabel` prop is replaced by explicitly adding a `` subcomponent. The label text is passed as children to `Numeric.Label`. You can optionally show the current value(s) within the label using the `showValue` prop on `Numeric.Label`. * The `allowNumberEdit` prop is replaced by the `showNumberInput` prop on ``. * Layout props like `labelPosition` are removed; use standard CSS/Tailwind for layout. **Migration Steps:** 1. **Replace Component:** Replace `` with ``. 2. **Transfer Props:** Move `value`, `onChange`, `minValue` (as `min`), `maxValue` (as `max`), and `step` to the `Numeric.Container`. 3. **Add Subcomponents:** * Inside, add ``. * Use the `showNumberInput` prop on the range subcomponent if number editing was previously enabled (`allowNumberEdit={true}`). * If `showLabel` was true, add a `` component. Pass the label text as children. Use the `showValue` prop on the label if you want to display the numeric value alongside the text. 4. **Handle Layout:** Arrange the `Numeric.Label` and the Range subcomponent using standard layout techniques (Flexbox, Grid) as needed. Apply styling directly using `className`. *Example Diff (Conceptual):* ```diff - + +
{/* Example layout */} + Opacity + +
+
``` #### `InputDoubleRange` > `Numeric.DoubleRange` **Key Changes:** * `InputDoubleRange` is replaced by the `Numeric` component system using `mode="doubleRange"`. * Props like `values`, `onChange`, `minValue` (`min`), `maxValue` (`max`), and `step` are set on the `Numeric.Container`. * The slider element itself is rendered using ``. * The `showLabel` prop is replaced by explicitly adding a `` subcomponent. You can optionally show the current values within the label using the `showValue` prop on `Numeric.Label`. * Editing numbers is controlled by the `showNumberInputs` (plural) prop on ``. * Layout props like `labelPosition` are removed; use standard CSS/Tailwind for layout. **Migration Steps:** 1. **Replace Component:** Replace `` with ``. 2. **Transfer Props:** Move `values`, `onChange`, `minValue` (as `min`), `maxValue` (as `max`), and `step` to the `Numeric.Container`. 3. **Add Subcomponents:** * Inside, add ``. * Use the `showNumberInputs` prop on the range subcomponent if number editing is desired. * If `showLabel` was true, add a `` component. Pass the label text as children. Use the `showValue` prop on the label if you want to display the numeric values alongside the text. 4. **Handle Layout:** Arrange the `Numeric.Label` and the Range subcomponent using standard layout techniques (Flexbox, Grid) as needed. *Example Diff:* ```diff - + {})} + > + {/* Label could be added here if needed */} + {/* Range */} + + ``` #### InputFilterText > InputFilter **Key Changes:** * `InputFilterText` is replaced by the more composable `InputFilter` component from `@ohif/ui-next`. * `InputFilter` uses subcomponents (`InputFilter.SearchIcon`, `InputFilter.Input`, `InputFilter.ClearButton`) which are included by default but can be customized. * The `onDebounceChange` prop is replaced by a standard `onChange` prop on the main `InputFilter` component, which handles debouncing internally (configurable via `debounceTime`). * Props like `placeholder` and `value` are passed to the `InputFilter.Input` subcomponent (or directly to `InputFilter` for simplicity if using the default structure). **Migration Steps:** 1. **Replace Component:** Replace `` with ``. 2. **Transfer Props:** * Move `placeholder` to the `InputFilter` component or its `InputFilter.Input` subcomponent. * Handle `value` using controlled state if necessary, passing it to `InputFilter`. 3. **Update Handler:** Replace the `onDebounceChange` handler with the `onChange` prop on the `InputFilter` component. 4. **Styling:** Apply necessary classes for layout and positioning, especially padding on the input (e.g., `pl-9 pr-9`) to accommodate the default icon and clear button if using the defaults. *Example Diff:* ```diff - + + {/* Using default structure which includes Icon, Input, ClearButton */} + {/* Example customization: */} + {/* */} + {/* */} + {/* */} + ``` #### InputGroup / InputLabelWrapper > Composition **Key Changes:** * These wrapper components (`InputGroup`, `InputLabelWrapper`) are deprecated. * Functionality (grouping label and input, optional sorting indicators) is now achieved through composition using standard layout techniques (Flexbox/Grid) and the base `@ohif/ui-next` components (`Label`, `Input`, `Icons`). **Migration Steps:** 1. **Remove Wrapper:** Delete the `` or `` tags. 2. **Create Container:** Use a standard `div` as the container. 3. **Add Label and Input:** Place the ` +
{/* Example layout */} + + +
``` --- #### Summary of Changes | Old Component | New Component/Pattern Equivalent | Notes | |-----------------------|----------------------------------------------------|----------------------------------------------------------------------------| | `` | `` | Use `Numeric.Container` with `mode="number"` | | `` / `` | `@ohif/ui-next ` + `